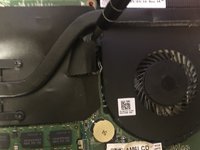
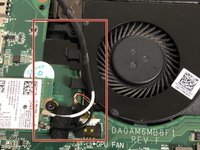
Aller au contenu principal

Dell Inspiron 15-7548 Fan Replacement

Ce dont vous avez besoin

  1. Dell Inspiron 15-7548 Fan Replacement, Back Panel: étape 1, image 1 de 2 Dell Inspiron 15-7548 Fan Replacement, Back Panel: étape 1, image 2 de 2
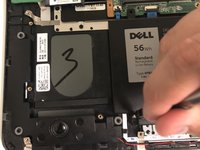
    • Remove the six 6 mm screws from the back panel with a Phillips #1 screwdriver.

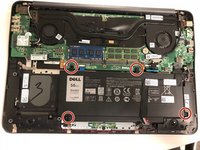
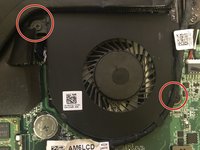
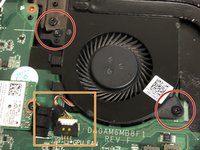
    • Loosen the four captive screws at the bottom using a Phillips #1 screwdriver.

    • The four screws on the bottom are captive screws and cannot be removed.

  2. Dell Inspiron 15-7548 Fan Replacement: étape 2, image 1 de 2 Dell Inspiron 15-7548 Fan Replacement: étape 2, image 2 de 2
    • Pry out the back panel using the flat head side of the spudger.

    • Do not insert the spudger more than half an inch when separating the bottom and right side of the back panel.

  3. Dell Inspiron 15-7548 Fan Replacement, Battery: étape 3, image 1 de 2 Dell Inspiron 15-7548 Fan Replacement, Battery: étape 3, image 2 de 2
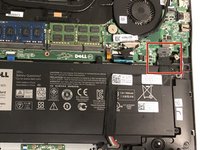
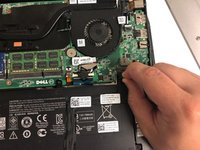
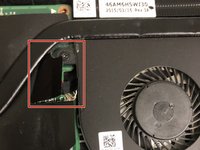
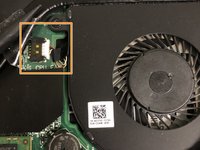
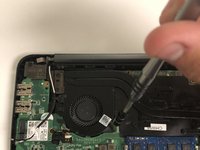
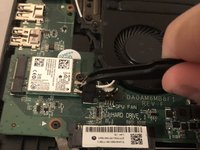
    • Disconnect the battery from the motherboard by pulling the black tab attached to the cable.

  4. Dell Inspiron 15-7548 Fan Replacement: étape 4, image 1 de 2 Dell Inspiron 15-7548 Fan Replacement: étape 4, image 2 de 2
    • Remove the four 2.5x6mm screws using a Phillips #1 screwdriver.

  5. Dell Inspiron 15-7548 Fan Replacement, Fan: étape 5, image 1 de 1
    • The two fans are located at the top of the computer.

    • The fan on the left is for the GPU (Graphics processing unit) and the right fan is for the CPU (Central processing unit).

  6. Dell Inspiron 15-7548 Fan Replacement: étape 6, image 1 de 3 Dell Inspiron 15-7548 Fan Replacement: étape 6, image 2 de 3 Dell Inspiron 15-7548 Fan Replacement: étape 6, image 3 de 3
    • To unplug the CPU fan lift the black plastic cutout next to the fan.

    • The connection can be removed by hand or with the plastic spudger.

  7. Dell Inspiron 15-7548 Fan Replacement: étape 7, image 1 de 2 Dell Inspiron 15-7548 Fan Replacement: étape 7, image 2 de 2
    • Remove the two 2x3mm screws from the fan using the Phillips #1 screwdriver.

    • The unit may now be removed from the board.

    • The black cord running alongside the fan is for the display. Push it aside if it stops you from removing the fan.

  8. Dell Inspiron 15-7548 Fan Replacement: étape 8, image 1 de 3 Dell Inspiron 15-7548 Fan Replacement: étape 8, image 2 de 3 Dell Inspiron 15-7548 Fan Replacement: étape 8, image 3 de 3
    • Remove the two 2x3mm screws from the fan using the Phillips #1 screwdriver.

    • Disconnect the unit from the motherboard.

    • It may be easier to disconnect with the spudger tool but it can also be done by hand.

  9. Dell Inspiron 15-7548 Fan Replacement: étape 9, image 1 de 2 Dell Inspiron 15-7548 Fan Replacement: étape 9, image 2 de 2
    • The black and white wires need to be unplugged and removed from the tabs on the fan.

    • Use a pair of tweezers to unplug the wires.

    • When reconnecting the wires connect the white to the top plug and the black to the bottom.

    • The unit may now be removed from the board.

Conclusion

To reassemble your device, follow these instructions in reverse order.

2 autres ont terminé cette réparation.

Christopher Fisher

Membre depuis le 09/26/18

394 Réputation

4 tutoriels rédigés

Équipe

0 commentaires

Ajouter un commentaire

Nombre de vues :

Dernières 24 heures : 1

7 derniers jours : 3

30 derniers jours : 15

Total : 2,544