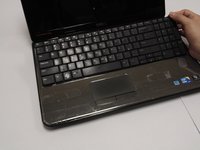
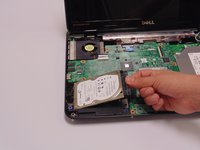
Aller au contenu principal

Dell Inspiron 15R Hard Drive Replacement

Ce dont vous avez besoin

  1. Dell Inspiron 15R Hard Drive Replacement, Battery: étape 1, image 1 de 1
    • Turn the device over and locate the battery.

  2. Dell Inspiron 15R Hard Drive Replacement: étape 2, image 1 de 2 Dell Inspiron 15R Hard Drive Replacement: étape 2, image 2 de 2
    • Place thumbs on each latch and push outwards.

  3. Dell Inspiron 15R Hard Drive Replacement: étape 3, image 1 de 1
    • Push and slide the battery away from you.

  4. Dell Inspiron 15R Hard Drive Replacement, Keyboard: étape 4, image 1 de 3 Dell Inspiron 15R Hard Drive Replacement, Keyboard: étape 4, image 2 de 3 Dell Inspiron 15R Hard Drive Replacement, Keyboard: étape 4, image 3 de 3
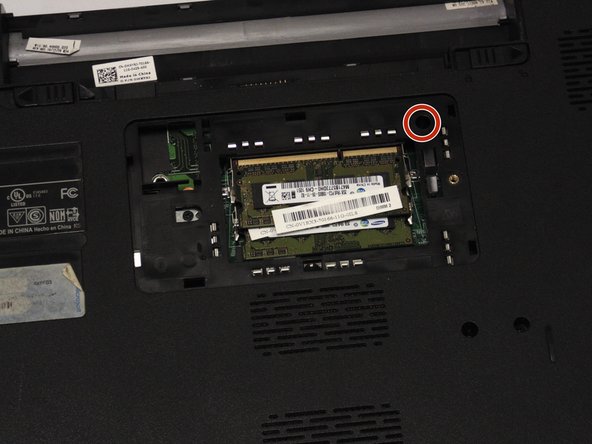
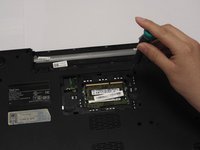
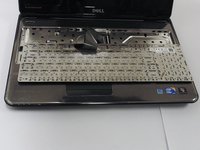
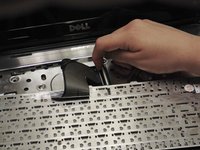
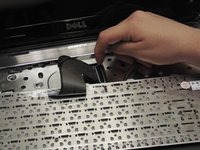
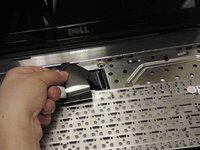
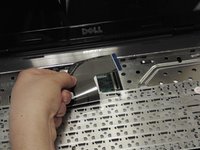
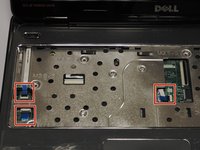
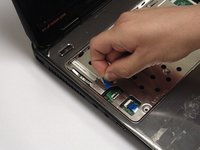
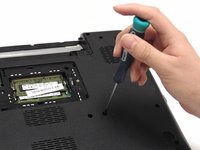
    • Locate the RAM compartment and the screw on the right hand side. Remove the cover.

  5. Dell Inspiron 15R Hard Drive Replacement: étape 5, image 1 de 2 Dell Inspiron 15R Hard Drive Replacement: étape 5, image 2 de 2
    • Locate and remove the 2.5 mm x 5 mm screw on the upper right hand side of the compartment.

  6. Dell Inspiron 15R Hard Drive Replacement: étape 6, image 1 de 1
    • Turn the device around and open it up.

  7. Dell Inspiron 15R Hard Drive Replacement: étape 7, image 1 de 2 Dell Inspiron 15R Hard Drive Replacement: étape 7, image 2 de 2
    • Using your index finger, push down on the F1 and F7 keys.

  8. Dell Inspiron 15R Hard Drive Replacement: étape 8, image 1 de 2 Dell Inspiron 15R Hard Drive Replacement: étape 8, image 2 de 2
    • Using your index finger, push down on the x icon and Home keys.

  9. Dell Inspiron 15R Hard Drive Replacement: étape 9, image 1 de 3 Dell Inspiron 15R Hard Drive Replacement: étape 9, image 2 de 3 Dell Inspiron 15R Hard Drive Replacement: étape 9, image 3 de 3
    • Locate the keyboard lining (between the black and silver).

    • Place your spudger between the keyboard lining behind the F1 and F7 keys and pull up.

  10. Dell Inspiron 15R Hard Drive Replacement: étape 10, image 1 de 2 Dell Inspiron 15R Hard Drive Replacement: étape 10, image 2 de 2
    • Place your spudger between the keyboard lining behind the x icon and Home keys and pull up.

  11. Dell Inspiron 15R Hard Drive Replacement: étape 11, image 1 de 2 Dell Inspiron 15R Hard Drive Replacement: étape 11, image 2 de 2
    • Carefully pull and turn the keyboard over.

  12. Dell Inspiron 15R Hard Drive Replacement: étape 12, image 1 de 2 Dell Inspiron 15R Hard Drive Replacement: étape 12, image 2 de 2
    • Lift the black lever.

  13. Dell Inspiron 15R Hard Drive Replacement: étape 13, image 1 de 2 Dell Inspiron 15R Hard Drive Replacement: étape 13, image 2 de 2
    • Remove the keyboard cable

  14. Dell Inspiron 15R Hard Drive Replacement, Hard Drive: étape 14, image 1 de 2 Dell Inspiron 15R Hard Drive Replacement, Hard Drive: étape 14, image 2 de 2
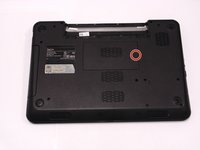
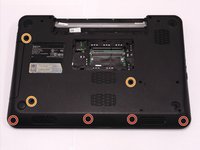
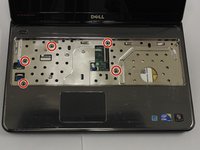
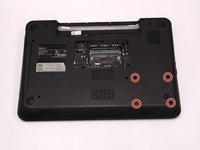
    • Turn laptop over and remove the bottom four screw covers outlined in red.

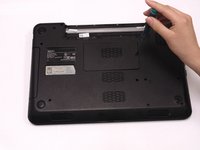
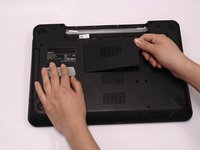
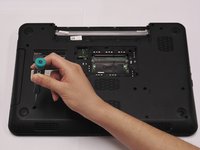
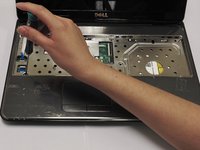
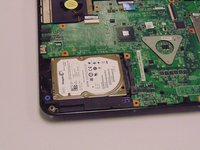
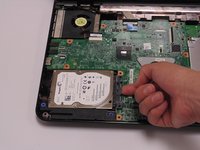
    • Then remove the three base screws.

  15. Dell Inspiron 15R Hard Drive Replacement: étape 15, image 1 de 2 Dell Inspiron 15R Hard Drive Replacement: étape 15, image 2 de 2
    • Turn laptop over and open it. Locate and remove the five palm rest screws.

  16. Dell Inspiron 15R Hard Drive Replacement: étape 16, image 1 de 3 Dell Inspiron 15R Hard Drive Replacement: étape 16, image 2 de 3 Dell Inspiron 15R Hard Drive Replacement: étape 16, image 3 de 3
    • Locate the palm rest cables. Lift the black levers and unplug the blue cables.

  17. Dell Inspiron 15R Hard Drive Replacement: étape 17, image 1 de 2 Dell Inspiron 15R Hard Drive Replacement: étape 17, image 2 de 2
    • Lift the palm rest until it snaps off.

  18. Dell Inspiron 15R Hard Drive Replacement: étape 18, image 1 de 2 Dell Inspiron 15R Hard Drive Replacement: étape 18, image 2 de 2
    • Close cover and turn laptop over. Locate and remove the four hard drive screws.

  19. Dell Inspiron 15R Hard Drive Replacement: étape 19, image 1 de 1
    • Turn laptop over and open it.

  20. Dell Inspiron 15R Hard Drive Replacement: étape 20, image 1 de 3 Dell Inspiron 15R Hard Drive Replacement: étape 20, image 2 de 3 Dell Inspiron 15R Hard Drive Replacement: étape 20, image 3 de 3
    • Lift and remove the hard drive.

  21. Dell Inspiron 15R Hard Drive Replacement: étape 21, image 1 de 1
    • Remove the hard drive connector.

Conclusion

To reassemble your device, follow these instructions in reverse order.

4 autres ont terminé cette réparation.

Trixie Gonzalez

Membre depuis le 02/14/15

843 Réputation

6 tutoriels rédigés

Équipe

San Diego State, Team 2-2, Sheppard Winter 2015 Membre de l'équipe San Diego State, Team 2-2, Sheppard Winter 2015

SDSU-SHEPPARD-W15S2G2

2 membres

6 tutoriels rédigés

Un commentaire

Shoot! My Dell Inspiron 15R is different. Mine has an almost full length cover (11.6”) by 3” wide on the bottom. The hard drive and memory sticks are under that cover. I’m just not sure what else to remove to replace the drive with an SSD.

Adrian Kocurek - Réponse

Ajouter un commentaire

Nombre de vues :

Dernières 24 heures : 1

7 derniers jours : 1

30 derniers jours : 12

Total : 7,297