Ce dont vous avez besoin
-
Outil utilisé dans cette étape :Anti-Static Wrist Strap$7.95
-
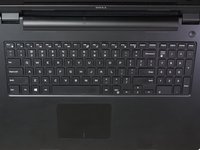
Turn off power to the laptop.
-
Unplug the charging cable from the laptop.
-
-
-
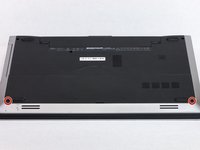
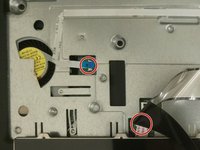
Remove the two 5.5mm screws that secure the base cover to the computer's base.
-
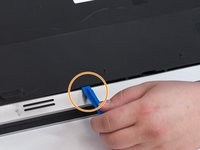
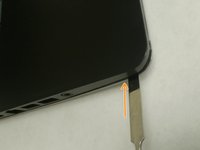
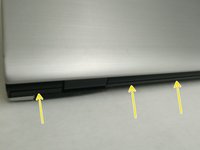
Using the plastic opening tool, carefully pry open the base cover starting from the center.
-
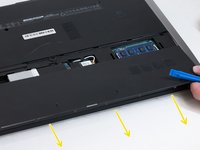
Lift the base cover upwards to remove and set it aside.
-
-
-
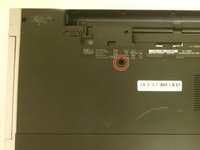
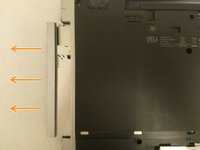
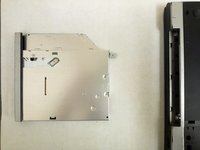
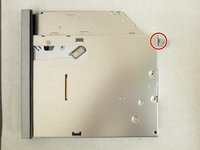
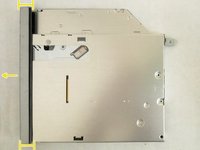
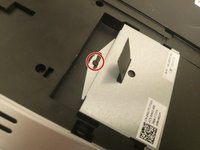
Remove the 5.5mm screw that secures the optical-drive assembly to the computer base
-
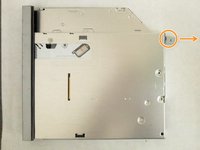
Using your fingertips, slide the optical-drive assembly out of the optical drive bay.
-
-
-
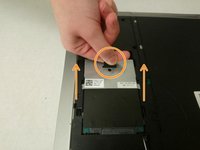
Remove the 2.5mm screw that secures the hard-drive assembly to the computer base.
-
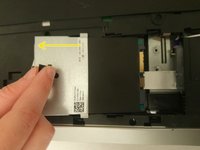
Using the pull tab, slide the hard-drive assembly to disconnect it from the system board.
-
Lift the hard-drive assembly off the computer base
-
-
-
-
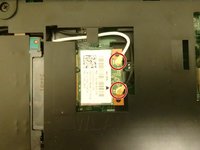
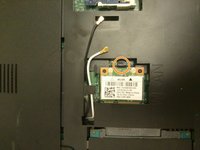
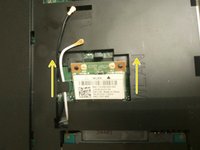
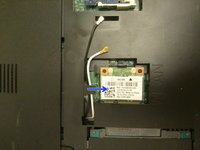
Disconnect the antenna cables from the wireless card.
-
Push the securing tab to release the wireless card.
-
Slide the wireless card out of the wireless-card slot.
-
-
-
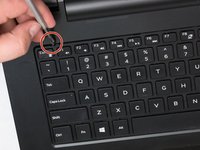
Turn the computer over and open the display as far as possible
-
Using a plastic opening tool, release the tabs that secure the keyboard to the palm-rest assembly.
-
-
-
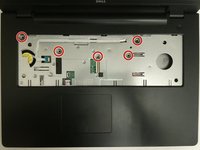
Remove the (5) 5.5mm screws that secure the palm rest to the system board.
-
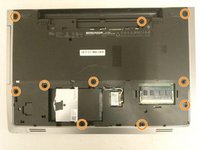
Close the display and turn the computer over.
-
Remove the (10) 5.5mm screws that secure the palm rest to the computer base.
-
-
-
Turn the computer over and open the display as far as possible.
-
Lift the connector latches and disconnect the power-button board cable and the touch-pad cable from the system board.
-
Using a plastic scribe, gently lift and release the tabs on the palm rest around the computer base including the backside.
-
Lift the palm rest away from the display assembly.
-
-
-
Remove the 2.5mm screw that secures the optical-drive connector board to the computer base.
-
Move wireless card wires covering the board away from the board.
-
Slide the optical-drive connector board away from the computer base.
-
Lift the optical-drive connector board away from the computer base.
-
-
-
Remove the 5.5mm screws that secure the battery-connector board to the computer base.
-
Carefully lift the battery-connector board to disconnect it from the system board.
-
-
-
Close the display and turn the computer over.
-
Remove the antenna cables from the routing guides on the computer base.
-
Slide the antenna cables through the slot on the computer base.
-
-
-
Turn the computer over and open the display as far as possible.
-
Peel off the tape that secures the display cable to the system-board assembly.
-
Lift the connector latch and disconnect the display cable from the system board.
-
Lift the connector latch and disconnect the I/O board cable from the system board.
-
-
-
Turn the system-board assembly over and place it on a flat and clean surface.
-
In sequential order (indicated on the heat sink), loosen the (3) captive 5.5mm screws that secure the heat-sink assembly to the system board.
-
Disconnect the fan cable from the system board.
-
Lift the heat-sink assembly off the system board.
-


To reassemble your device, follow these instructions in reverse order.
To reassemble your device, follow these instructions in reverse order.

Équipe

Washington State, Team S1-G2, Lobnitz Spring 2018 Membre de l'équipe Washington State, Team S1-G2, Lobnitz Spring 2018
WSU-LOBNITZ-S18S1G2
6 membres
12 tutoriels rédigés