Aller au contenu principal

Dell Inspiron 17-7737 Hard Disk Drive Replacement

Ce dont vous avez besoin

  1. Dell Inspiron 17-7737 Hard Disk Drive Replacement, Battery: étape 1, image 1 de 1
    • Close the display and turn the computer over.

    • Remove the 5 mm screw on the left-hand side of the battery cover using a Phillips #1 screwdriver.

    • Loosen the captive screw on the right-hand side using a Phillips #1 screwdriver.

  2. Dell Inspiron 17-7737 Hard Disk Drive Replacement: étape 2, image 1 de 3 Dell Inspiron 17-7737 Hard Disk Drive Replacement: étape 2, image 2 de 3 Dell Inspiron 17-7737 Hard Disk Drive Replacement: étape 2, image 3 de 3
    • Pry out the battery cover from the computer base using an opening tool.

  3. Dell Inspiron 17-7737 Hard Disk Drive Replacement: étape 3, image 1 de 1
    • Remove the three screws that secure the battery to the base using a Phillips #1 screwdriver.

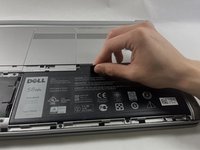
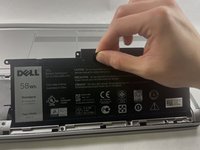
  4. Dell Inspiron 17-7737 Hard Disk Drive Replacement: étape 4, image 1 de 2 Dell Inspiron 17-7737 Hard Disk Drive Replacement: étape 4, image 2 de 2
    • Using the adhesive pull tab, pull and lift the battery out of the computer's base.

    • If using any tools to get ahold of the adhesive tab, try not to puncture your battery, as battery acids are extremely toxic to humans.

  5. Dell Inspiron 17-7737 Hard Disk Drive Replacement, Hard Disk Drive: étape 5, image 1 de 1
    • Remove the four 2.5 mm hard drive bay screws using a Phillips #1 screwdriver.

  6. Dell Inspiron 17-7737 Hard Disk Drive Replacement: étape 6, image 1 de 1
    • Using the pull tab, lift the hard drive assembly off of the body.

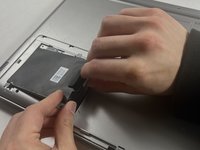
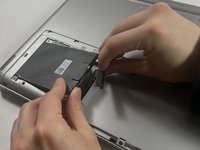
  7. Dell Inspiron 17-7737 Hard Disk Drive Replacement: étape 7, image 1 de 2 Dell Inspiron 17-7737 Hard Disk Drive Replacement: étape 7, image 2 de 2
    • Disconnect the hard drive cable and lift it out of the computer case.

  8. Dell Inspiron 17-7737 Hard Disk Drive Replacement: étape 8, image 1 de 1
    • Remove a total of four screws that secure the cage to the assembly.

    • There are two screws on either side of the cage.

  9. Dell Inspiron 17-7737 Hard Disk Drive Replacement: étape 9, image 1 de 1
    • Using the pull tab, lift the hard drive out of the cage.

Conclusion

To reassemble your device, follow these instructions in reverse order.

Une autre personne a terminé cette réparation.

Mark Batista

Membre depuis le 03/16/23

457 Réputation

3 tutoriels rédigés

Équipe

UMass Dartmouth, Team 7-7, Ryckebusch Spring 2023 Membre de l'équipe UMass Dartmouth, Team 7-7, Ryckebusch Spring 2023

UMASSD-RYCKEBUSCH-S23S7G7

3 membres

3 tutoriels rédigés

0 commentaires

Ajouter un commentaire

Nombre de vues :

Dernières 24 heures : 1

7 derniers jours : 5

30 derniers jours : 30

Total : 212