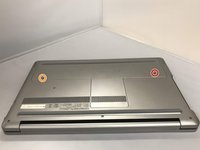
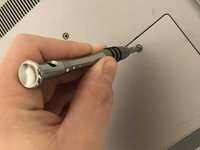
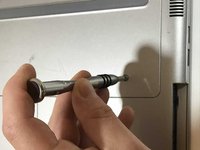
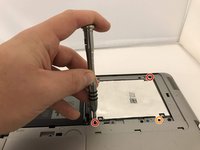
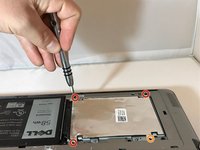
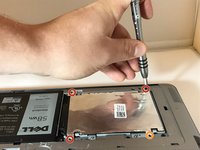
Aller au contenu principal

Dell Inspiron 17-7746 Hard Drive Replacement

Ce dont vous avez besoin

  1. Dell Inspiron 17-7746 Hard Drive Replacement, Hard Drive: étape 1, image 1 de 1
    • Disconnect the Laptop from the AC adapter and turn off the Laptop.

  2. Dell Inspiron 17-7746 Hard Drive Replacement: étape 2, image 1 de 1
    • Place laptop so the bottom faces up.

  3. Dell Inspiron 17-7746 Hard Drive Replacement: étape 3, image 1 de 3 Dell Inspiron 17-7746 Hard Drive Replacement: étape 3, image 2 de 3 Dell Inspiron 17-7746 Hard Drive Replacement: étape 3, image 3 de 3
    • Remove the silver 15mm PH1 screw that holds the plastic cover in place over the battery.

    • Remove the 8mm PH 1 screw that holds the plastic cover in place over the battery.

    • Place the screws accordingly because the length of the screws will matter when you reassemble.

  4. Dell Inspiron 17-7746 Hard Drive Replacement: étape 4, image 1 de 1
    • Using a metal jimmy, pry up to remove the first half of the cover.

  5. Dell Inspiron 17-7746 Hard Drive Replacement: étape 5, image 1 de 1
    • Apply pressure using your fingertips on the top of the cover, pushing to the front of the laptop. This will make the plate slide off exposing the hard drive.

  6. Dell Inspiron 17-7746 Hard Drive Replacement: étape 6, image 1 de 3 Dell Inspiron 17-7746 Hard Drive Replacement: étape 6, image 2 de 3 Dell Inspiron 17-7746 Hard Drive Replacement: étape 6, image 3 de 3
    • Remove the three black PH1 6mm screws that anchor the hard drive.

    • This screw hole will be empty because the 15mm silver screw that holds the plastic cover will anchor the hard drive down.

  7. Dell Inspiron 17-7746 Hard Drive Replacement: étape 7, image 1 de 1
    • Using the Jimmy, pry up the hard drive and lift out using your fingers.

  8. Dell Inspiron 17-7746 Hard Drive Replacement: étape 8, image 1 de 1
    • Gently wiggle and pull the connector to disconnect the Seta Cable attaching the hard drive to the laptop.

  9. Dell Inspiron 17-7746 Hard Drive Replacement: étape 9, image 1 de 3 Dell Inspiron 17-7746 Hard Drive Replacement: étape 9, image 2 de 3 Dell Inspiron 17-7746 Hard Drive Replacement: étape 9, image 3 de 3
    • Remove the harness around the hard drive by removing four black 4mm PH1 screws located on the side.

  10. Dell Inspiron 17-7746 Hard Drive Replacement: étape 10, image 1 de 1
    • Remove the hard drive from the harness.

Conclusion

To reassemble your device, follow these instructions in reverse order.

2 autres ont terminé cette réparation.

Joshua Plagerman

Membre depuis le 09/26/18

735 Réputation

4 tutoriels rédigés

0 commentaires

Ajouter un commentaire

Nombre de vues :

Dernières 24 heures : 0

7 derniers jours : 1

30 derniers jours : 7

Total : 1,244