Aller au contenu principal

Dell Inspiron 17" 7786 2-in-1 Heatsink Replacement

Ce dont vous avez besoin

  1. Dell Inspiron 17" 7786 2-in-1 Heatsink Replacement, Base Cover: étape 1, image 1 de 2 Dell Inspiron 17" 7786 2-in-1 Heatsink Replacement, Base Cover: étape 1, image 2 de 2
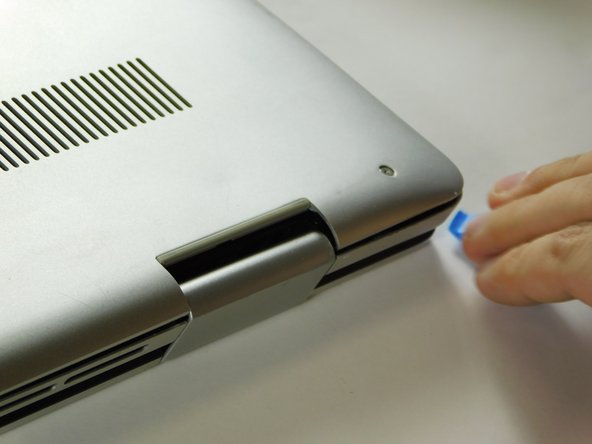
    • Remove the eight M2 5mm screws that secure the base cover using a Phillips #0 screwdriver.

  2. Dell Inspiron 17" 7786 2-in-1 Heatsink Replacement: étape 2, image 1 de 2 Dell Inspiron 17" 7786 2-in-1 Heatsink Replacement: étape 2, image 2 de 2
    • Loosen the three captive screws that secure the base closer to the hinges.

    • Do not attempt to remove the three captive screws! You need only to loosen them. They're supposed to stay on the base cover.

  3. Dell Inspiron 17" 7786 2-in-1 Heatsink Replacement: étape 3, image 1 de 3 Dell Inspiron 17" 7786 2-in-1 Heatsink Replacement: étape 3, image 2 de 3 Dell Inspiron 17" 7786 2-in-1 Heatsink Replacement: étape 3, image 3 de 3
    • Carefully pry the base cover using an iFixit opening tool in the crevice near the hinges. Guide the pick along the edges and slightly lift upwards as you go along.

    • Do not start from the speaker end of the edges when opening, or you may cause further damage to your device!

  4. Dell Inspiron 17" 7786 2-in-1 Heatsink Replacement: étape 4, image 1 de 3 Dell Inspiron 17" 7786 2-in-1 Heatsink Replacement: étape 4, image 2 de 3 Dell Inspiron 17" 7786 2-in-1 Heatsink Replacement: étape 4, image 3 de 3
    • Carefully remove the base cover from the laptop.

  5. Dell Inspiron 17" 7786 2-in-1 Heatsink Replacement, Fan: étape 5, image 1 de 2 Dell Inspiron 17" 7786 2-in-1 Heatsink Replacement, Fan: étape 5, image 2 de 2
    • Gently remove the I/O cable.

  6. Dell Inspiron 17" 7786 2-in-1 Heatsink Replacement: étape 6, image 1 de 2 Dell Inspiron 17" 7786 2-in-1 Heatsink Replacement: étape 6, image 2 de 2
    • Remove the fan cable from the motherboard.

  7. Dell Inspiron 17" 7786 2-in-1 Heatsink Replacement: étape 7, image 1 de 1
    • Remove two 3 mm screws that secure the fan using a Phillips #0 screwdriver.

  8. Dell Inspiron 17" 7786 2-in-1 Heatsink Replacement: étape 8, image 1 de 2 Dell Inspiron 17" 7786 2-in-1 Heatsink Replacement: étape 8, image 2 de 2
    • There is a little piece of tape/sticker on the fan that connects it to the heat sink. Gently remove this.

    • Lift the fan off the palm rest assembly.

  9. Dell Inspiron 17" 7786 2-in-1 Heatsink Replacement, Heatsink: étape 9, image 1 de 2 Dell Inspiron 17" 7786 2-in-1 Heatsink Replacement, Heatsink: étape 9, image 2 de 2
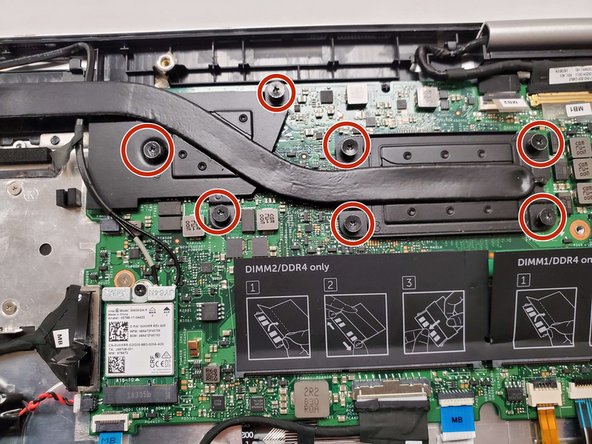
    • Loosen seven 3 mm captive screws securing the heatsink to the motherboard using a Phillips #0 screwdriver.

  10. Dell Inspiron 17" 7786 2-in-1 Heatsink Replacement: étape 10, image 1 de 3 Dell Inspiron 17" 7786 2-in-1 Heatsink Replacement: étape 10, image 2 de 3 Dell Inspiron 17" 7786 2-in-1 Heatsink Replacement: étape 10, image 3 de 3
    • Lift the heatsink off the motherboard.

Conclusion

To reassemble your device, follow these instructions in reverse order.

Delia Padilla

Membre depuis le 08/23/22

564 Réputation

5 tutoriels rédigés

Équipe

Gateway, Team 1-3, Class Fall 2022 Membre de l'équipe Gateway, Team 1-3, Class Fall 2022

GCC-CLASS-F22S1G3

4 membres

15 tutoriels rédigés

0 commentaires

Ajouter un commentaire

Nombre de vues :

Dernières 24 heures : 0

7 derniers jours : 0

30 derniers jours : 0

Total : 66