Aller au contenu principal

Dell Inspiron 17" 7786 2-in-1 TouchPad Replacement

Ce dont vous avez besoin

  1. Dell Inspiron 17" 7786 2-in-1 TouchPad Replacement, Base Cover: étape 1, image 1 de 2 Dell Inspiron 17" 7786 2-in-1 TouchPad Replacement, Base Cover: étape 1, image 2 de 2
    • Remove the eight M2 5mm screws that secure the base cover using a Phillips #0 screwdriver.

  2. Dell Inspiron 17" 7786 2-in-1 TouchPad Replacement: étape 2, image 1 de 2 Dell Inspiron 17" 7786 2-in-1 TouchPad Replacement: étape 2, image 2 de 2
    • Loosen the three captive screws that secure the base closer to the hinges.

    • Do not attempt to remove the three captive screws! You need only to loosen them. They're supposed to stay on the base cover.

  3. Dell Inspiron 17" 7786 2-in-1 TouchPad Replacement: étape 3, image 1 de 3 Dell Inspiron 17" 7786 2-in-1 TouchPad Replacement: étape 3, image 2 de 3 Dell Inspiron 17" 7786 2-in-1 TouchPad Replacement: étape 3, image 3 de 3
    • Carefully pry the base cover using an iFixit opening tool in the crevice near the hinges. Guide the pick along the edges and slightly lift upwards as you go along.

    • Do not start from the speaker end of the edges when opening, or you may cause further damage to your device!

  4. Dell Inspiron 17" 7786 2-in-1 TouchPad Replacement: étape 4, image 1 de 3 Dell Inspiron 17" 7786 2-in-1 TouchPad Replacement: étape 4, image 2 de 3 Dell Inspiron 17" 7786 2-in-1 TouchPad Replacement: étape 4, image 3 de 3
    • Carefully remove the base cover from the laptop.

  5. Dell Inspiron 17" 7786 2-in-1 TouchPad Replacement, Internal Battery: étape 5, image 1 de 3 Dell Inspiron 17" 7786 2-in-1 TouchPad Replacement, Internal Battery: étape 5, image 2 de 3 Dell Inspiron 17" 7786 2-in-1 TouchPad Replacement, Internal Battery: étape 5, image 3 de 3
    Outil utilisé dans cette étape :
    Tweezers
    $4.99
    J'achète
    • Detach the tab connecting the battery to the system board using your fingers or a pair of tweezers.

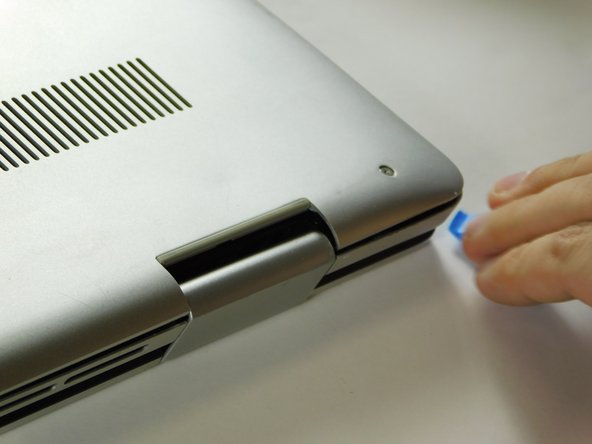
    • Peel off the adhesive tab holding the cable to the device.

  6. Dell Inspiron 17" 7786 2-in-1 TouchPad Replacement: étape 6, image 1 de 1
    • Flip the device over. Press and hold the power button for a few seconds to discharge any leftover electrical current.

    • You may leave the screen open if further repair is needed, or close it if you are only replacing the battery.

  7. Dell Inspiron 17" 7786 2-in-1 TouchPad Replacement: étape 7, image 1 de 3 Dell Inspiron 17" 7786 2-in-1 TouchPad Replacement: étape 7, image 2 de 3 Dell Inspiron 17" 7786 2-in-1 TouchPad Replacement: étape 7, image 3 de 3
    • Dell's official service manual does not mention of the 5th screw located near the middle edge of the battery closer to the touchpad.

    • Flip the device back over.

    • Remove five 3 mm screws that are securing the battery using a Phillips #0 screwdriver.

    • Lift the battery upwards to remove it completely.

  8. Dell Inspiron 17" 7786 2-in-1 TouchPad Replacement, TouchPad: étape 8, image 1 de 2 Dell Inspiron 17" 7786 2-in-1 TouchPad Replacement, TouchPad: étape 8, image 2 de 2
    • Lift the latch holding down the ribbon cable connected to the touch pad.

    • When inserting the cable back, ensure that it goes under the white indents.

    • Remove the three screws holding down the bracket on the bottom portion of the touch pad using a Phillips #0 screwdriver.

    • Remove the four screws holding down the bracket on the upper portion of the touch pad using a Phillips #0 screwdriver.

    • Remove the bracket on the bottom portion of the touchpad by carefully peeling it away, as it is held by adhesives, then set it aside.

  9. Dell Inspiron 17" 7786 2-in-1 TouchPad Replacement: étape 9, image 1 de 1
    • Pull the small adhesive tabs to lift the touch pad away from the assembly.

Conclusion

To reassemble your device, follow these instructions in reverse order.

Antonio Franco

Membre depuis le 08/25/22

1 025 Réputation

10 tutoriels rédigés

Équipe

Gateway, Team 1-3, Class Fall 2022 Membre de l'équipe Gateway, Team 1-3, Class Fall 2022

GCC-CLASS-F22S1G3

4 membres

15 tutoriels rédigés

0 commentaires

Ajouter un commentaire

Nombre de vues :

Dernières 24 heures : 1

7 derniers jours : 1

30 derniers jours : 10

Total : 169