Aller au contenu principal

Dell Inspiron 3148 Display Replacement

Ce dont vous avez besoin

  1. Dell Inspiron 3148 Display Replacement, Back Panel: étape 1, image 1 de 2 Dell Inspiron 3148 Display Replacement, Back Panel: étape 1, image 2 de 2
    • Ensure the device is powered off and unplugged. Close the device and orient it face up, with the hinges further away from you.

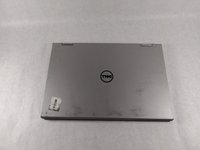
    • Flip the device over so the backside is facing you.

  2. Dell Inspiron 3148 Display Replacement: étape 2, image 1 de 1
    • Using the Phillips #1 screwdriver, remove all nine 7mm screws.

  3. Dell Inspiron 3148 Display Replacement: étape 3, image 1 de 2 Dell Inspiron 3148 Display Replacement: étape 3, image 2 de 2
    • Using the plastic opening tool, pull the back panel upward. Move the opening tool along the edge of the device and lift the panel off of your device.

    • Be aware, the back panel is kept in place by magnetic clips. They will offer some resistance, but continue to gently leverage upwards.

  4. Dell Inspiron 3148 Display Replacement, Battery: étape 4, image 1 de 1
    • Remove the three 4mm screws holding battery in place using the Phillips #0 screwdriver.

  5. Dell Inspiron 3148 Display Replacement: étape 5, image 1 de 1
    • Using the iFixit opening tools, lift the battery out of its housing.

  6. Dell Inspiron 3148 Display Replacement: étape 6, image 1 de 1
    • Once loosened, use your fingers to lift the battery up and out of its housing.

    • There is a small cable which sits in a rut in the top of the battery. Ensure that it is pushed out of the way before removing completely.

  7. Dell Inspiron 3148 Display Replacement: étape 7, image 1 de 1
    • Remove the battery completely.

  8. Dell Inspiron 3148 Display Replacement, Hard Drive: étape 8, image 1 de 3 Dell Inspiron 3148 Display Replacement, Hard Drive: étape 8, image 2 de 3 Dell Inspiron 3148 Display Replacement, Hard Drive: étape 8, image 3 de 3
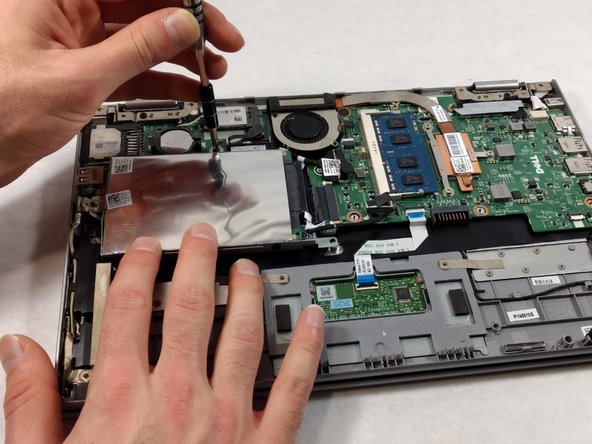
    • If there is a piece of tape connecting the hard drive and a small power cord, remove the tape.

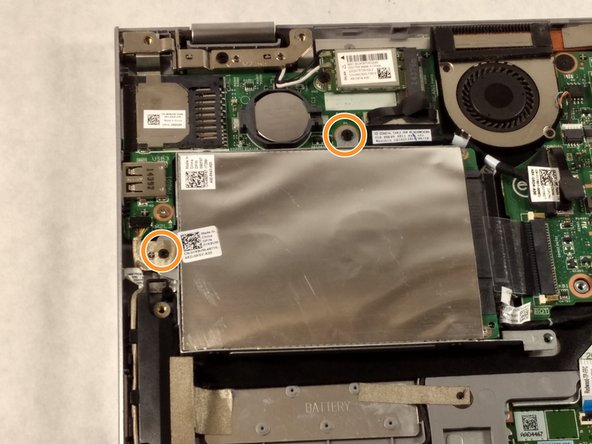
    • Using the Phillips #0 screwdriver, remove the two 4mm screws.

  9. Dell Inspiron 3148 Display Replacement: étape 9, image 1 de 3 Dell Inspiron 3148 Display Replacement: étape 9, image 2 de 3 Dell Inspiron 3148 Display Replacement: étape 9, image 3 de 3
    • Notice: there is a small data cable connecting the hard drive to the motherboard. Do not attempt to lift the hard drive all the way out before removing this cable.

    • Lift the hard drive slightly out of the device.

    • Grasp the head of the cable, not the cable itself.

    • Pull away from the hard drive, removing the data cable. The hard drive may now be fully removed.

  10. Dell Inspiron 3148 Display Replacement, Fan: étape 10, image 1 de 3 Dell Inspiron 3148 Display Replacement, Fan: étape 10, image 2 de 3 Dell Inspiron 3148 Display Replacement, Fan: étape 10, image 3 de 3
    • If there is tape on your fan, remove the tape.

    • Remove the two 2mm screws on the fan enclosure using the Phillips #00 screwdriver.

  11. Dell Inspiron 3148 Display Replacement: étape 11, image 1 de 2 Dell Inspiron 3148 Display Replacement: étape 11, image 2 de 2
    • Unscrew the three 4mm screws holding down the heat sink of the fan using the Phillips #00 screwdriver.

    • The three 4mm screws found in the heat sink will remain attached to the heat sink. This is okay as long as they are detached from the motherboard.

  12. Dell Inspiron 3148 Display Replacement: étape 12, image 1 de 1
    Outil utilisé dans cette étape :
    Tweezers
    $4.99
    • Use the tweezers to gently pull the power supply cable from its port.

  13. Dell Inspiron 3148 Display Replacement: étape 13, image 1 de 1
    • Grasp the fan and lift upward. Remove the fan from the device.

  14. Dell Inspiron 3148 Display Replacement, Display: étape 14, image 1 de 1
    • Remove the 3.4 mm screws from the cable bar using a Phillips #000 screwdriver.

    • Detach the cables located beneath the bar by lifting the tabs and pulling out the cables from their respective bases.

  15. Dell Inspiron 3148 Display Replacement: étape 15, image 1 de 1
    • Remove the three screws on the display hinge brackets with a Phillips #000 screwdriver

    • Remove the hinges and display from the rest of the device.

  16. Dell Inspiron 3148 Display Replacement: étape 16, image 1 de 1
    • Using the plastic opening tools and the metal spudger, remove the display screen from the outer panel along the edge.

    • To attach new display, insert into casing and press firmly along the edges.

Conclusion

To reassemble your device, follow these instructions in reverse order. Take care not to damage the new screen when installing.

2 autres ont terminé cette réparation.

0 commentaires

Ajouter un commentaire

Nombre de vues :

Dernières 24 heures : 0

7 derniers jours : 0

30 derniers jours : 0

Total : 162