Aller au contenu principal

Dell Inspiron 3520 RAM Replacement

Ce dont vous avez besoin

  1. Dell Inspiron 3520 RAM Replacement, Battery: étape 1, image 1 de 2 Dell Inspiron 3520 RAM Replacement, Battery: étape 1, image 2 de 2
    • Turn off notebook

    • Set the notebook upside down with the battery facing away from you.

    • Locate the unlock and release sliding tabs on the bottom right and left hand corners of the battery respectively.

  2. Dell Inspiron 3520 RAM Replacement: étape 2, image 1 de 3 Dell Inspiron 3520 RAM Replacement: étape 2, image 2 de 3 Dell Inspiron 3520 RAM Replacement: étape 2, image 3 de 3
    • Slide the right tab to the right to unlock the battery.

    • Slide and hold the the left tab to the left to release the battery from the unit.

    • Finally, remove the battery by sliding it away from the unit and yourself.

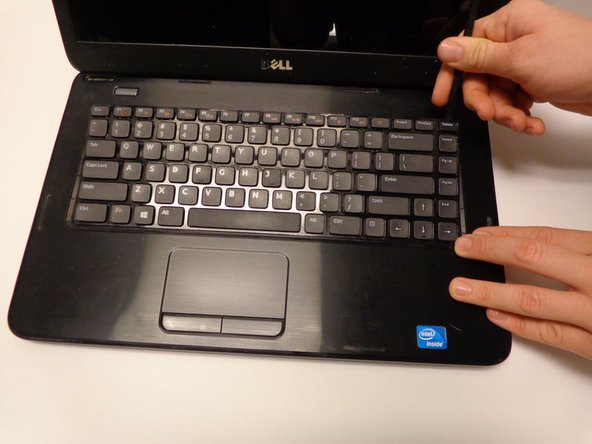
  3. Dell Inspiron 3520 RAM Replacement, Keyboard: étape 3, image 1 de 2 Dell Inspiron 3520 RAM Replacement, Keyboard: étape 3, image 2 de 2
    • Locate the four tabs along the top edge of the keyboard.

    • Using the spudger, push the tabs away from the keyboard and pull the keyboard up away from the laptop.

  4. Dell Inspiron 3520 RAM Replacement: étape 4, image 1 de 1
    • Slide the keyboard forward towards the screen to release the bottom tabs.

  5. Dell Inspiron 3520 RAM Replacement: étape 5, image 1 de 2 Dell Inspiron 3520 RAM Replacement: étape 5, image 2 de 2
    • Carefully lift the board up and locate the connecting cable.

    • Gently pull the end of the cable free from the port on the laptop.

  6. Dell Inspiron 3520 RAM Replacement, RAM: étape 6, image 1 de 1
    • Locate the RAM chip(s)

    • There are no RAM chips present in this photo.

  7. Dell Inspiron 3520 RAM Replacement: étape 7, image 1 de 2 Dell Inspiron 3520 RAM Replacement: étape 7, image 2 de 2
    • There are two connecting pins for the lower chip.

    • There are two connecting pins for the upper chip.

    • Pull the pins away from the sides of the chip(s) to release it.

    • The chip(s) should slide away from the dock easily.

Conclusion

To reassemble your device, follow these instructions in reverse order.

17 autres ont terminé cette réparation.

Ian

Membre depuis le 01/30/15

1 557 Réputation

5 tutoriels rédigés

Équipe

USF Tampa, Team 16-2, Watkins Winter 2015 Membre de l'équipe USF Tampa, Team 16-2, Watkins Winter 2015

USFT-WATKINS-W15S16G2

3 membres

5 tutoriels rédigés

0 commentaires

Ajouter un commentaire

Nombre de vues :

Dernières 24 heures : 3

7 derniers jours : 16

30 derniers jours : 55

Total : 31,952