Cette version peut contenir des modifications incorrectes. Passez au dernier aperçu vérifié.
Ce dont vous avez besoin
-
Cette étape n’est pas traduite. Aidez à la traduire
-
Push the switch next to the battery.
-
At the same time, lift the battery away from the laptop.
-
-
Cette étape n’est pas traduite. Aidez à la traduire
-
Place the laptop on flat surface.
-
Carefully open the laptop at far as it will go so that the back of screen is touching the flat surface.
-
Carefully take a spudger and separate part of the cover at the red circle.
-
-
Cette étape n’est pas traduite. Aidez à la traduire
-
Gently lift the keyboard away from the laptop without harming the cord that is located at the bottom of the keyboard.
-
-
-
Cette étape n’est pas traduite. Aidez à la traduire
-
Gently pull the blue tab up until it comes away from computer.
-
-
Cette étape n’est pas traduite. Aidez à la traduire
-
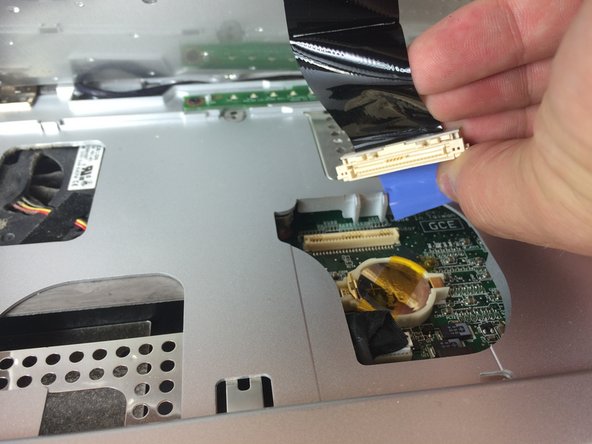
Gently pull the blue tab to separate the screen connection from the laptop.
-
Gently pull and disconnect the white and black cords from the power source.
-
-
Cette étape n’est pas traduite. Aidez à la traduire
-
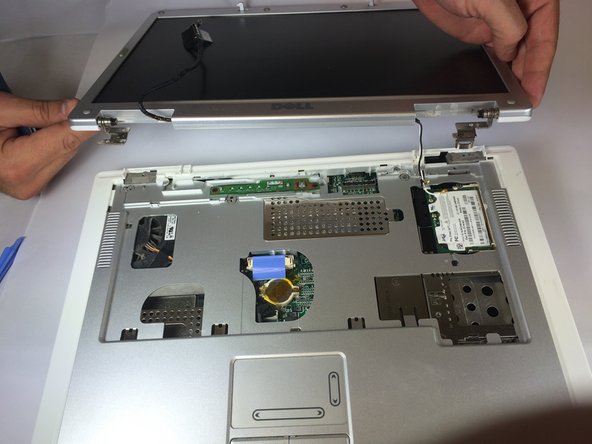
Remove four 4mm #00 Philips screws from the screen hinges.
-
Lift the screen away from the laptop.
-
-
Cette étape n’est pas traduite. Aidez à la traduire
-
Remove two 4 mm Philips #00 screws that connect top of laptop to base..
-
-
Cette étape n’est pas traduite. Aidez à la traduire
-
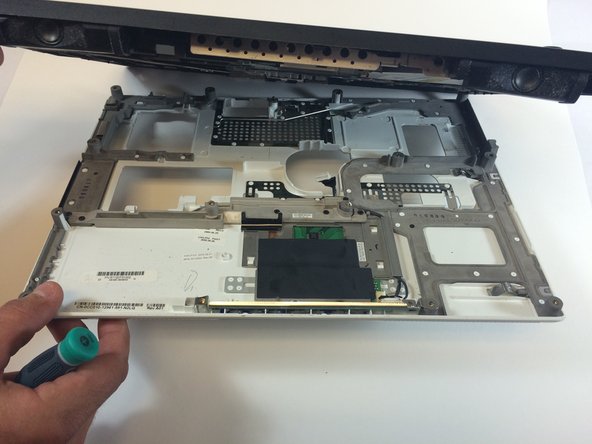
Flip laptop the over and remove thirteen 6mm Philips #00 screws.
-
-
Cette étape n’est pas traduite. Aidez à la traduire
-
Insert the plastic opening tool in between the back and front plates of the laptop
-


Annulation : je n'ai pas terminé ce tutoriel.
5 autres ont terminé cette réparation.

Équipe

USF Tampa, Team 11-1, Blackwell Fall 2014 Membre de l'équipe USF Tampa, Team 11-1, Blackwell Fall 2014
USFT-BLACKWELL-F14S11G1
5 membres
7 tutoriels rédigés