Cette version peut contenir des modifications incorrectes. Passez au dernier aperçu vérifié.
Ce dont vous avez besoin
-
Cette étape n’est pas traduite. Aidez à la traduire
-
Unplug the power cable.
-
Flip the 700m over and remove the battery.
-
Slide the battery release switch toward the center of the 700m, and then pull the battery free from the back.
-
-
Cette étape n’est pas traduite. Aidez à la traduire
-
Remove the two Phillips screws securing the RAM cover.
-
Remove the RAM cover and set it aside.
-
-
Cette étape n’est pas traduite. Aidez à la traduire
-
Two clips secure the RAM module in place, one on each side. Using your fingers, spread the clips away from the RAM module.
-
Lift the RAM module to an angle of about 30 degrees and slide it out.
-
-
-
Cette étape n’est pas traduite. Aidez à la traduire
-
Flip the 700m over and swing the screen all the way open until it lays flat.
-
Beginning from the left side, use the flat end of a spudger to gently pry up the plastic trim that runs along the top edge of the keyboard. Remove the trim.
-
-
Cette étape n’est pas traduite. Aidez à la traduire
-
Remove the two Phillips screws securing the keyboard.
-
-
Cette étape n’est pas traduite. Aidez à la traduire
-
Tilt the top of the keyboard up at an angle, and gently push the keyboard toward the back of the 700m, freeing the tabs along the bottom.
-
-
Cette étape n’est pas traduite. Aidez à la traduire
-
Tilt the bottom of the keyboard up at an angle.
-
Use the pointed end of a spudger to disconnect the keyboard ribbon cable by pushing open the clips on either side.
-
Remove the keyboard and set it aside.
-
-
Cette étape n’est pas traduite. Aidez à la traduire
-
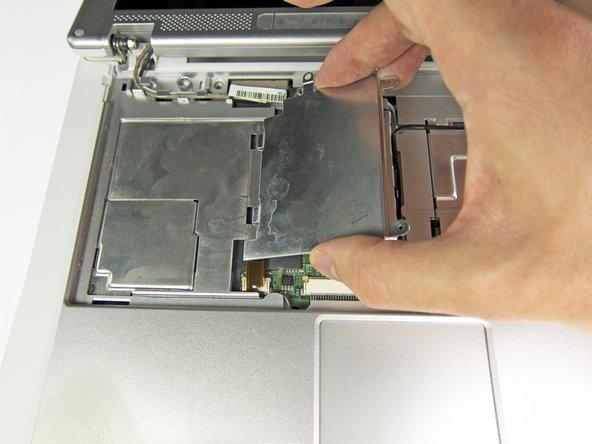
Remove the two Phillips screws securing the inner RAM cover.
-
Tilt the right side of the RAM cover up at an angle and pull it free.
-
-
Cette étape n’est pas traduite. Aidez à la traduire
-
Two clips secure the RAM module in place, one on each side. Using your fingers, spread the clips away from the RAM module.
-
Lift the RAM module to an angle of about 30 degrees and slide it out.
-


Annulation : je n'ai pas terminé ce tutoriel.
4 autres ont terminé cette réparation.

