Aller au contenu principal

Dell Inspiron E1405 LCD Screen Replacement

Ce dont vous avez besoin

  1. Dell Inspiron E1405 LCD Screen Replacement, Battery: étape 1, image 1 de 1
    • Save your work, power the laptop off, and ensure that the charging cable is unplugged before removing the battery.

    • Flip the laptop over.

    • Locate the battery release switch on the bottom of the laptop.

  2. Dell Inspiron E1405 LCD Screen Replacement: étape 2, image 1 de 3 Dell Inspiron E1405 LCD Screen Replacement: étape 2, image 2 de 3 Dell Inspiron E1405 LCD Screen Replacement: étape 2, image 3 de 3
    • Slide the battery release switch away from the lock symbol until you hear the battery click.

    • Slide the battery towards the back of the laptop until it comes free.

  3. Dell Inspiron E1405 LCD Screen Replacement, LCD Screen: étape 3, image 1 de 3 Dell Inspiron E1405 LCD Screen Replacement, LCD Screen: étape 3, image 2 de 3 Dell Inspiron E1405 LCD Screen Replacement, LCD Screen: étape 3, image 3 de 3
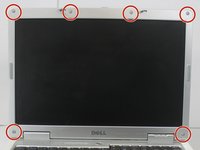
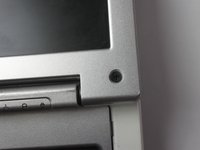
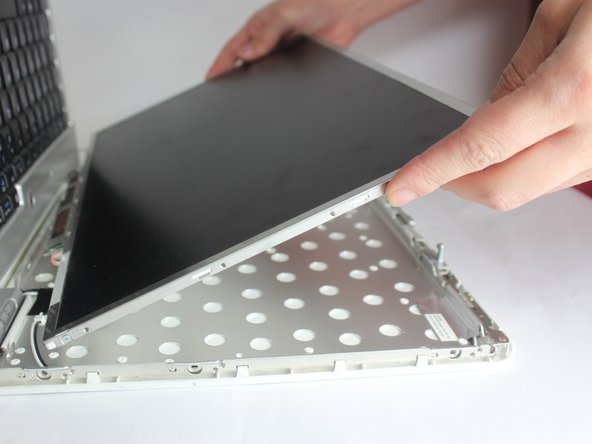
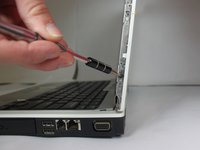
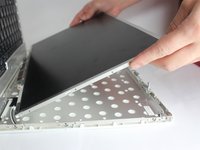
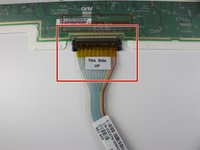
    • Use your fingers or a spudger to remove the six small rubber covers off the display assembly.

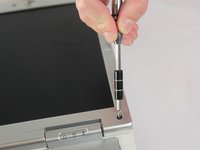
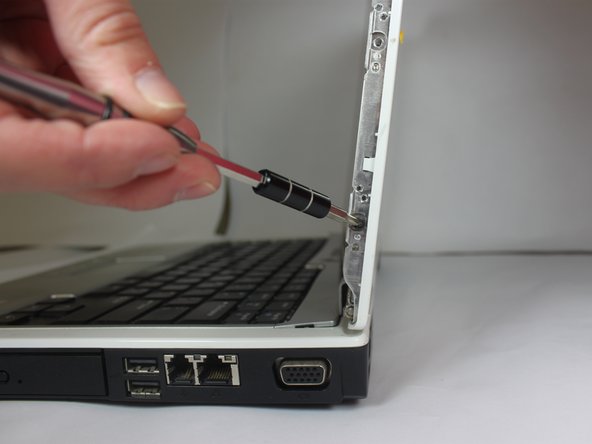
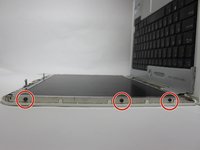
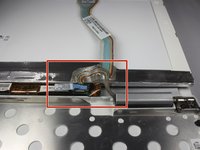
    • Remove the six 5.7 mm screws with a Phillips #00 screwdriver.

  4. Dell Inspiron E1405 LCD Screen Replacement: étape 4, image 1 de 1
    • Use your fingers to gently pry the front bezel off the display assembly. Start at a corner and work your way around.

    • Remove the front display bezel when it comes free.

  5. Dell Inspiron E1405 LCD Screen Replacement: étape 5, image 1 de 3 Dell Inspiron E1405 LCD Screen Replacement: étape 5, image 2 de 3 Dell Inspiron E1405 LCD Screen Replacement: étape 5, image 3 de 3
    • Remove the three 3.6 mm screws using a Phillips #00 screwdriver on both sides of the display.

    • Remove the LCD screen from the display assembly.

  6. Dell Inspiron E1405 LCD Screen Replacement: étape 6, image 1 de 2 Dell Inspiron E1405 LCD Screen Replacement: étape 6, image 2 de 2
    • Unplug the VGA cable by pushing the two metal sides towards the middle of the strip.

    • Gently pull the VGA cable away to release the strip.

  7. Dell Inspiron E1405 LCD Screen Replacement: étape 7, image 1 de 2 Dell Inspiron E1405 LCD Screen Replacement: étape 7, image 2 de 2
    • Remove the next connection by pressing the two metal sides towards the middle. Then gently pull up the ribbon.

Conclusion

To reassemble your device, follow these instructions in reverse order.

Une autre personne a terminé cette réparation.

Sarah Neal Secrest

Membre depuis le 03/20/17

597 Réputation

5 tutoriels rédigés

Équipe

Texas Tech, Team S8-G3, Bennett Spring 2017 Membre de l'équipe Texas Tech, Team S8-G3, Bennett Spring 2017

TTU-BENNETT-S17S8G3

3 membres

5 tutoriels rédigés

Un commentaire

I need complete body *Dell INSPIRON E1405 .

St Master Fun - Réponse

Ajouter un commentaire

Nombre de vues :

Dernières 24 heures : 0

7 derniers jours : 0

30 derniers jours : 2

Total : 436