Aller au contenu principal

Dell Latitude 3380 Fan Replacement

Ce dont vous avez besoin

  1. Dell Latitude 3380 Fan Replacement, Back Cover: étape 1, image 1 de 2 Dell Latitude 3380 Fan Replacement, Back Cover: étape 1, image 2 de 2
    • Turn the laptop over so that the back is facing up.

    • Remove the nine 3 mm screws with a Phillips #0 screwdriver.

  2. Dell Latitude 3380 Fan Replacement: étape 2, image 1 de 2 Dell Latitude 3380 Fan Replacement: étape 2, image 2 de 2
    • Use an opening tool to pry the back cover away from the laptop.

  3. Dell Latitude 3380 Fan Replacement, Fan: étape 3, image 1 de 1
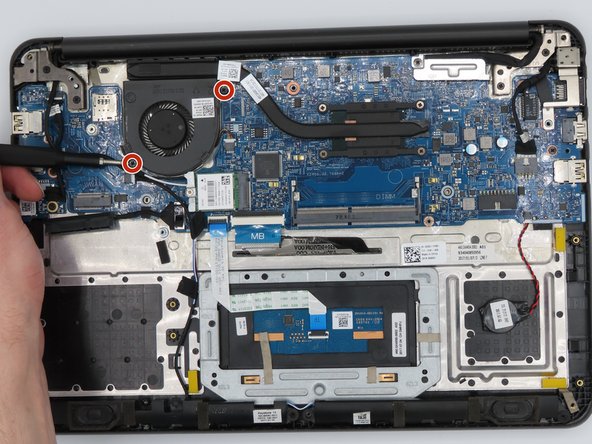
    • Remove the two 5 mm screws from the fan using a Phillips #0 screwdriver.

  4. Dell Latitude 3380 Fan Replacement: étape 4, image 1 de 1
    • Loosen the four captive screws on the heatsink using a Phillips #0 screwdriver.

  5. Dell Latitude 3380 Fan Replacement: étape 5, image 1 de 1
    • Remove the heatsink from the motherboard.

  6. Dell Latitude 3380 Fan Replacement: étape 6, image 1 de 2 Dell Latitude 3380 Fan Replacement: étape 6, image 2 de 2
    Outil utilisé dans cette étape :
    Tweezers
    $4.99
    J'achète
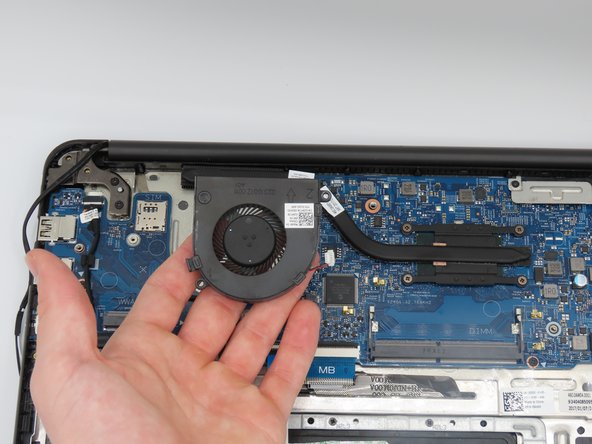
    • Using tweezers, loosen the power connector from the fan to the motherboard, fully disconnecting the fan.

Conclusion

To reassemble your device, follow these instructions in reverse order.

Dami Olowoye

Membre depuis le 02/21/23

229 Réputation

2 tutoriels rédigés

Équipe

0 commentaires

Ajouter un commentaire

Nombre de vues :

Dernières 24 heures : 1

7 derniers jours : 5

30 derniers jours : 11

Total : 81