Aller au contenu principal

Dell Latitude 7390 Bottom Panel Replacement

Ce dont vous avez besoin

  1. Dell Latitude 7390 Bottom Panel Replacement, Bottom Panel: étape 1, image 1 de 1
    • Orient your Dell Latitude 7390 laptop so that it is facing towards you as if you're going to open it.

  2. Dell Latitude 7390 Bottom Panel Replacement: étape 2, image 1 de 3 Dell Latitude 7390 Bottom Panel Replacement: étape 2, image 2 de 3 Dell Latitude 7390 Bottom Panel Replacement: étape 2, image 3 de 3
    • Flip your laptop over so that the bottom is facing up.

  3. Dell Latitude 7390 Bottom Panel Replacement: étape 3, image 1 de 1
    • Using your Phillips #1 screwdriver, remove the eight 6 mm screws around the border of the bottom panel.

  4. Dell Latitude 7390 Bottom Panel Replacement: étape 4, image 1 de 2 Dell Latitude 7390 Bottom Panel Replacement: étape 4, image 2 de 2
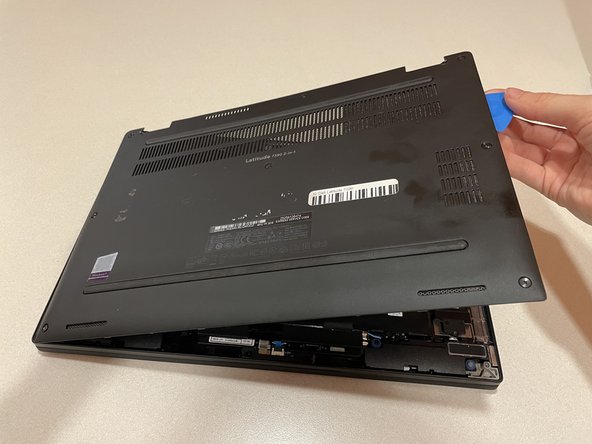
    • Using an opening tool or picks, work your way around the periphery and pry the back case off.

  5. Dell Latitude 7390 Bottom Panel Replacement: étape 5, image 1 de 1
    • Finally, lift the back panel off to uncover the inside of your Dell Latitude 7390.

Conclusion

To reassemble your device, follow these instructions in reverse order.

Julia Blahut

Membre depuis le 02/22/22

303 Réputation

2 tutoriels rédigés

Équipe

Clemson, Team 1-4, Hunter Spring 2022 Membre de l'équipe Clemson, Team 1-4, Hunter Spring 2022

CLEM-HUNTER-S22S1G4

5 membres

5 tutoriels rédigés

0 commentaires

Ajouter un commentaire

Nombre de vues :

Dernières 24 heures : 0

7 derniers jours : 6

30 derniers jours : 19

Total : 664