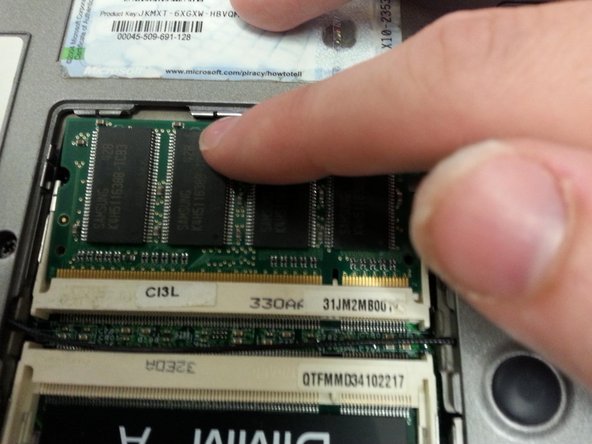
Aller au contenu principal

Dell Latitude D600 RAM (Main Memory) Replacement

Ce dont vous avez besoin

  1. Dell Latitude D600 RAM (Main Memory) Replacement, Battery: étape 1, image 1 de 1
    • Find the battery

  2. Dell Latitude D600 RAM (Main Memory) Replacement: étape 2, image 1 de 2 Dell Latitude D600 RAM (Main Memory) Replacement: étape 2, image 2 de 2
    • Pull the tab to release the battery

  3. Dell Latitude D600 RAM (Main Memory) Replacement: étape 3, image 1 de 1
    • Pull the battery out

  4. Dell Latitude D600 RAM (Main Memory) Replacement, RAM (Main Memory): étape 4, image 1 de 2 Dell Latitude D600 RAM (Main Memory) Replacement, RAM (Main Memory): étape 4, image 2 de 2
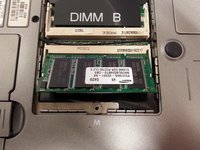
    • Find the panel underneath the microsoft product key sticker, the panel is labeled with an M

    • Unscrew the single screw above the M

  5. Dell Latitude D600 RAM (Main Memory) Replacement: étape 5, image 1 de 3 Dell Latitude D600 RAM (Main Memory) Replacement: étape 5, image 2 de 3 Dell Latitude D600 RAM (Main Memory) Replacement: étape 5, image 3 de 3
    • Pull off the panel to reveal the RAM

    • RAM is held in by two tabs, pull each tab to the side and the RAM will pop up

  6. Dell Latitude D600 RAM (Main Memory) Replacement: étape 6, image 1 de 1
    • Once the RAM is popped up, slowly pull it out of the slot

  7. Dell Latitude D600 RAM (Main Memory) Replacement: étape 7, image 1 de 3 Dell Latitude D600 RAM (Main Memory) Replacement: étape 7, image 2 de 3 Dell Latitude D600 RAM (Main Memory) Replacement: étape 7, image 3 de 3
    • To add or replace RAM, place the memory into the slot at an angle

    • Make sure you line it up correctly

    • If it is in correctly it should stay up at an angle by itself

    • Then push down in the middle until it clicks into place

  8. Dell Latitude D600 RAM (Main Memory) Replacement: étape 8, image 1 de 1
    • The RAM should be secured by the tabs where the two semi circles are on the RAM

    • If it is not secure, just gently pull it out and try again, use the images to help you out

Conclusion

To reassemble your device, follow these instructions in reverse order.

6 autres ont terminé cette réparation.

Joseph

Membre depuis le 07/16/14

1 497 Réputation

5 tutoriels rédigés

Un commentaire

Almost perfect: easy; clear;

Herman - Réponse

Ajouter un commentaire

Nombre de vues :

Dernières 24 heures : 0

7 derniers jours : 2

30 derniers jours : 11

Total : 2,828