Introduction
Installing a new keyboard in your Dell Studio laptop is easier than you might think, it just involves some basic screw removal and knowledge. This guide can also be used to simply fix an existing keyboard that may be malfunctioning.
Ce dont vous avez besoin
-
-
Gather materials and tools
-
Flip laptop over
-
Remove battery and power cord before doing anything
-
-
-
Open the laptop
-
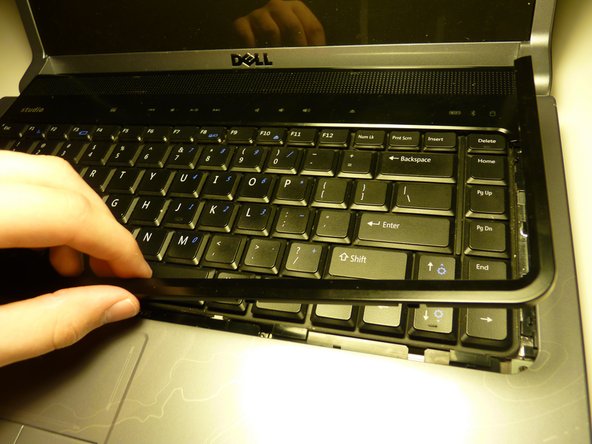
Take the flathead screwdriver, and put it under the bezel that goes around the keyboard
-
If you're simply fixing the existing keyboard, be careful not to pry a key off. They are close to impossible to get back on
-
Pry the bezel out of the frame. It might take some effort, but this is the correct method
-
Once one part has snapped out of the frame, continue to carefully remove the rest of the bezel
-
-
-
-
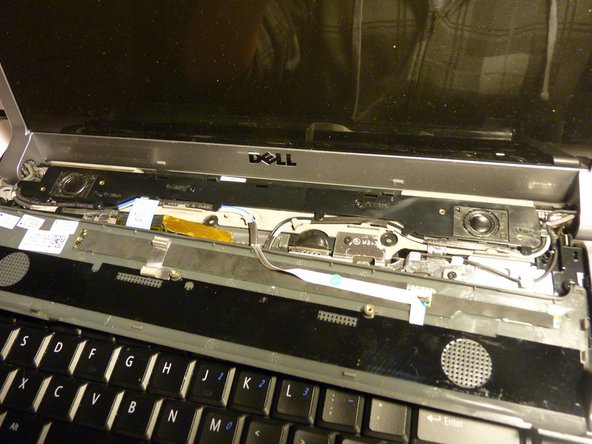
Once the bezel is removed, put the screwdriver under the media control bar
-
Continue to apply pressure, prying it out of place; it should snap out easy
-
Do not rip it out without precaution. It's attached with a delicate ribbon cable, and if damaged, you'll be replacing more than the keyboard
-
Once snapped out of it's place, flip it over gently onto the keyboard
-
-
-
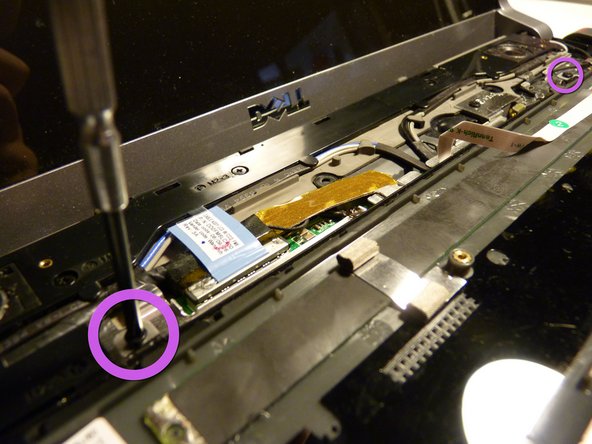
Now that the screws are out, lift the top of the keyboard
-
You will notice some resistance due to clips on the sides. Lift the side of the keyboard gently, taking the board out of the clip without breaking it
-
Once both sides are out of the clips, slide the keyboard forward a bit
-
Flip the keyboard over, minding the ribbon cable, over onto the palmrest
-
-
-
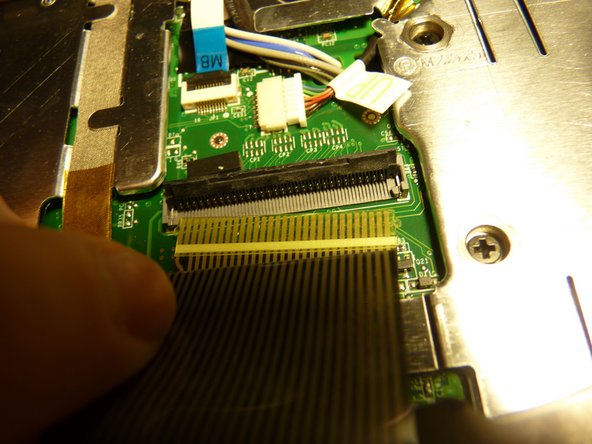
Now that they physical keyboard is removed, we can focus on the ribbon cable
-
Caution, this step can make or break the connection point, so be gentle
-
Gently flip the black hatch part of the connection point upwards
-
Remove the ribbon cable from the connection point
-
When re-installing the cable, be sure that it is inserted all the way, and that the hatch is closed. If not, it may malfunction, or not work at all, and you will have to do this all over again
-


To reassemble your device, follow these instructions in reverse order.
To reassemble your device, follow these instructions in reverse order.
Annulation : je n'ai pas terminé ce tutoriel.
9 autres ont terminé cette réparation.
