Aller au contenu principal

Dell XPS 18 Support Feet Replacement

Ce dont vous avez besoin

  1. Dell XPS 18 Support Feet Replacement, Back Cover: étape 1, image 1 de 1
    • Turn the device on its screen.

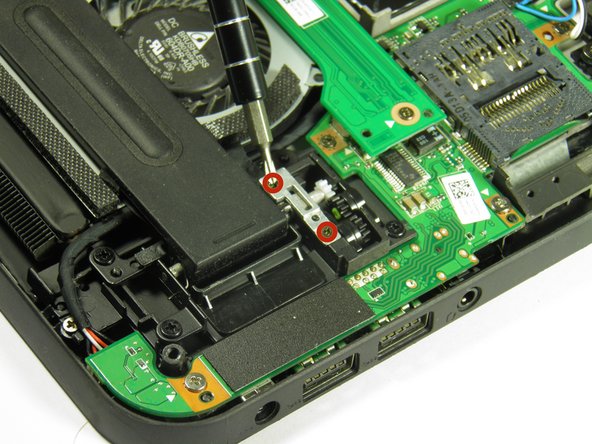
    • Remove the ten 4mm screws using a T8 Torx screwdriver.

  2. Dell XPS 18 Support Feet Replacement: étape 2, image 1 de 1
    • Gently flip out support feet located near the bottom of device.

  3. Dell XPS 18 Support Feet Replacement: étape 3, image 1 de 1
    • Gently lift the back cover off the device. The back cover should come off easily.

  4. Dell XPS 18 Support Feet Replacement, Support Feet: étape 4, image 1 de 1
    • Fold down the support foot.

  5. Dell XPS 18 Support Feet Replacement: étape 5, image 1 de 1
    • Remove the two silver 3mm screws with a Phillips 00 screwdriver.

  6. Dell XPS 18 Support Feet Replacement: étape 6, image 1 de 1
    • Remove the silver metal piece holding the support feet down.

  7. Dell XPS 18 Support Feet Replacement: étape 7, image 1 de 1
    • Remove the support foot.

    • Follow these same steps for the remaining support foot.

Conclusion

To reassemble your device, follow these instructions in reverse order.

Austin Weir

Membre depuis le 01/31/15

1 287 Réputation

8 tutoriels rédigés

Équipe

Cal Poly, Team 6-29, Amido Winter 2015 Membre de l'équipe Cal Poly, Team 6-29, Amido Winter 2015

CPSU-AMIDO-W15S6G29

4 membres

16 tutoriels rédigés

0 commentaires

Ajouter un commentaire

Nombre de vues :

Dernières 24 heures : 1

7 derniers jours : 1

30 derniers jours : 4

Total : 1,993