Aller au contenu principal
Pour réparer ensemble - Je crée un compte

Desktop PC GPU Replacement

Ce dont vous avez besoin

  1. Desktop PC GPU Replacement, Create an Anti-Static Work Area: étape 1, image 1 de 1
    • Minimize exposure to items that can charge up and produce static electricity.

    • Use an anti-static wrist band.

    Demander à FixBot
  2. Desktop PC GPU Replacement, Turn Off Computer: étape 2, image 1 de 1
    • Power off PC via Windows.

    • Switch off Power Supply

    Demander à FixBot
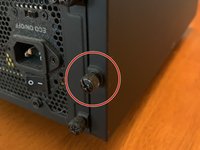
  3. Desktop PC GPU Replacement, Unscrew Case Side Panel: étape 3, image 1 de 2 Desktop PC GPU Replacement, Unscrew Case Side Panel: étape 3, image 2 de 2
    • Put screws where you wont lose them

    Demander à FixBot
  4. Desktop PC GPU Replacement, Unplug Power Connector to GPU: étape 4, image 1 de 1
    • Be gentle to not pull with to much force when removing power cables.

    Demander à FixBot
  5. Desktop PC GPU Replacement, Flip GPU Lock on Motherboard: étape 5, image 1 de 1
    • Try not to touch other components.

    Demander à FixBot
    • Gently pull the card out of the slot.

    Demander à FixBot
  6. Desktop PC GPU Replacement, Insert New GPU: étape 7, image 1 de 1
    • Verify that the notch in the connector matches the motherboard before sliding in.

    • Carefully slide in GPU until you hear a click on the motherboard.

    Demander à FixBot
  7. Desktop PC GPU Replacement, Connect Power Cables: étape 8, image 1 de 1
    • Insert wisdom here.

    Demander à FixBot
  8. Desktop PC GPU Replacement, Re-Attach Side Panel: étape 9, image 1 de 1
    • Use same screws from step 2.

    Demander à FixBot
    • Flip power supply switch back to on.

    • Plug in PC and turn on.

    • If PC does not post go back through the steps to see if you missed something.

    Demander à FixBot
    • Go to manufacturer's website or use the CD that came with the card to download the latest drivers for the GPU to ensure better stability of GPU.

    Demander à FixBot
    • Enjoy your new GPU.

    Demander à FixBot
Conclusion

To reassemble your device, follow these instructions in reverse order.

3 autres ont terminé cette réparation.

Joseph Thompson

Membre depuis le 06/20/19

295 Réputation

1 tutoriel rédigé

0 commentaires de tutoriel

Ajouter un commentaire

Nombre de vues :

Dernières 24 heures : 4

7 derniers jours : 22

30 derniers jours : 84

Total : 1,976