Disassembling Appliance small portable car vacuum cleaner

Dernière mise à jour le 24 sept. 2025
Vues: 3,3 k
Afficher les statistiques :
- Dernières 24 heures :
- 19
- Sept derniers jours :
- 69
- Trente derniers jours :
- 287
- Total :
- 3 251
Commentaires: 1
1 commentaire de tutoriel.
Aller aux commentaires de tutorielTerminé: 0 1
Personne n'a marqué ce tutoriel comme « terminé ». Serez-vous le premier ?
1 personne a marqué ce tutoriel comme « terminé ». Et c'est vous — super boulot !
Favoris: 0 1
Personne n'a mis ce tutoriel en favori (ni ne s'y est abonné). Serez-vous le premier ?
1 personne a mis ce tutoriel en favori (et s'y est abonnée) – et c'est vous !
Tutoriel réalisé par la communauté
Un membre tout à fait remarquable de notre communauté a réalisé ce tutoriel. Il n'a pas été créé par l'équipe iFixit.
Introduction
Allez à l'étape 1 ↓How to Fix a Noisy Portable Re-chargeable Car Vacuum Cleaner by Tightening the Impeller Housing
📋 Introduction
If your portable re-chargeable vacuum cleaner is making a loud mechanical noise, the culprit might be a loose impeller housing. This guide shows how I fixed mine by drilling a small access hole in the base of the impeller to be able to tighten two screws that secure the housing to the motor —no parts replaced, and the noise was gone!
🧰 Tools Required
- Small drill with precision bit
- Small Phillips screwdriver
- Safety goggles (recommended)
🛑 Safety Warning
Before starting, wear safety goggles when drilling.
🧭 Step-by-Step Instructions
🪛 Step 1: Diagnose the Noise
- Power on the vacuum briefly to identify the source of the noise.
- If it sounds mechanical and comes from the motor area, proceed to inspection.
🔍 Step 2: Access the Impeller Housing
- Remove the vacuum casing to expose the motor and impeller.
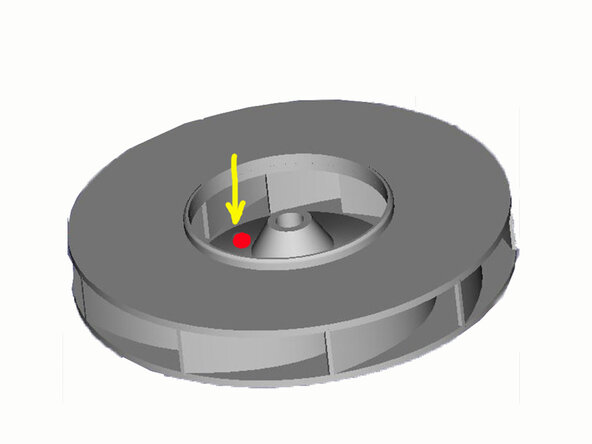
- The impeller casing consists of a rubber cover that easily comes off and a plastic cover around the impeller that easily opens up.
- Check if the impeller housing is loose or wobbling.
🛠️ Step 3: Drill an Access Hole
- Identify the location of the screws securing the impeller housing to the motor.
- Carefully drill a small hole into the impeller base, just large enough for a screwdriver to pass through.
💡 Tip: Use a low-speed drill and steady pressure to avoid damaging the impeller.
🔩 Step 4: Tighten the Screws
- Insert a small screwdriver through the hole.
- Tighten both screws until the housing is secure.
🔄 Step 5: Reassemble and Test
- Reassemble the vacuum cleaner.
- Power it on—listen for any remaining noise.
✅ Results
- Noise eliminated
- No parts replaced
- Total cost: €0
- Satisfaction: High!
💬 Final Thoughts
This fix saved me from buying a new vacuum and taught me a lot about its internal mechanics. If your vacuum has a similar issue, give this method a try!
 Demander à FixBot
To reassemble your device, follow these instructions in reverse order.