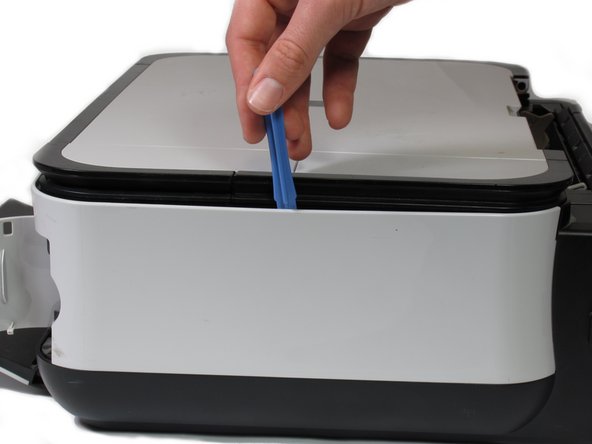
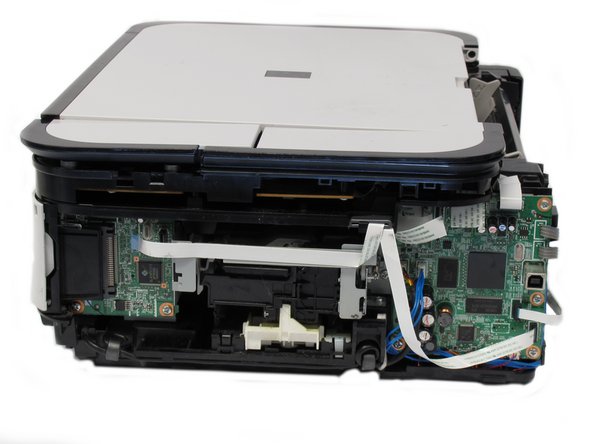
Aller au contenu principal

Disassembling Canon Pixma MP480 Rear and Side Panel

Ce dont vous avez besoin

  1. Disassembling Canon Pixma MP480 Rear and Side Panel, Rear and Side Panel: étape 1, image 1 de 2 Disassembling Canon Pixma MP480 Rear and Side Panel, Rear and Side Panel: étape 1, image 2 de 2
    • Remove the two 7.9 mm screws using a Phillips #1 screwdriver.

  2. Disassembling Canon Pixma MP480 Rear and Side Panel: étape 2, image 1 de 1
    • Lift up the back cover to remove it.

    • You may need to lift firmly as it requires quite a bit of force.

  3. Disassembling Canon Pixma MP480 Rear and Side Panel: étape 3, image 1 de 1
    • Open the front tray.

  4. Disassembling Canon Pixma MP480 Rear and Side Panel: étape 4, image 1 de 2 Disassembling Canon Pixma MP480 Rear and Side Panel: étape 4, image 2 de 2
    • Open the scanner compartment.

    • Make sure the blue lever locks into place to keep the compartment open.

  5. Disassembling Canon Pixma MP480 Rear and Side Panel: étape 5, image 1 de 2 Disassembling Canon Pixma MP480 Rear and Side Panel: étape 5, image 2 de 2
    • Remove the blue lever from its slot by pushing it back and twisting clockwise.

    • Close the scanner compartment and cover.

  6. Disassembling Canon Pixma MP480 Rear and Side Panel: étape 6, image 1 de 2 Disassembling Canon Pixma MP480 Rear and Side Panel: étape 6, image 2 de 2
    • Pry open the side cover with the plastic opening tool.

  7. Disassembling Canon Pixma MP480 Rear and Side Panel: étape 7, image 1 de 2 Disassembling Canon Pixma MP480 Rear and Side Panel: étape 7, image 2 de 2
    • Flip the printer over so that you are facing the bottom of the printer.

    • Use the plastic opening tool to remove the corner of the side panel from the plastic pin.

  8. Disassembling Canon Pixma MP480 Rear and Side Panel: étape 8, image 1 de 2 Disassembling Canon Pixma MP480 Rear and Side Panel: étape 8, image 2 de 2
    • Use the plastic opening tool to loosen the side panel from the bottom of the printer.

Conclusion

To reassemble your device, follow these instructions in reverse order.

6 autres ont terminé cette réparation.

Kevin Cole

Membre depuis le 01/17/13

116 Réputation

1 tutoriel rédigé

Équipe

Cal Poly, Team 19-41, Regan Winter 2013 Membre de l'équipe Cal Poly, Team 19-41, Regan Winter 2013

CPSU-REGAN-W13S19G41

4 membres

6 tutoriels rédigés

2 commentaires

Where is the rest of disassembly?

bill roberts - Réponse

Ajouter un commentaire

Nombre de vues :

Dernières 24 heures : 0

7 derniers jours : 9

30 derniers jours : 22

Total : 21,140