Aller au contenu principal

Disassembling Compaq Mini 110 Microphone

Ce dont vous avez besoin

  1. Disassembling Compaq Mini 110 Microphone, Battery: étape 1, image 1 de 2 Disassembling Compaq Mini 110 Microphone, Battery: étape 1, image 2 de 2
    • Locate the battery and the battery tabs on the bottom of the Compaq Mini.

  2. Disassembling Compaq Mini 110 Microphone: étape 2, image 1 de 3 Disassembling Compaq Mini 110 Microphone: étape 2, image 2 de 3 Disassembling Compaq Mini 110 Microphone: étape 2, image 3 de 3
    • Push both tabs inward simultaneously and slide the battery out.

  3. Disassembling Compaq Mini 110 Microphone, RAM: étape 3, image 1 de 2 Disassembling Compaq Mini 110 Microphone, RAM: étape 3, image 2 de 2
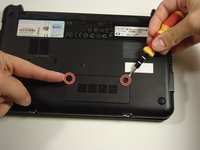
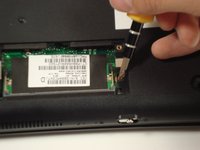
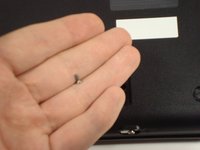
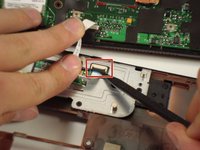
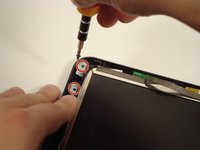
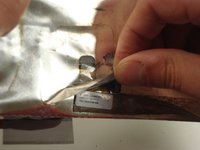
    • Use a Philips #0 screwdriver to unscrew the two screws covering the memory compartment on the bottom of the laptop and remove the cover.

  4. Disassembling Compaq Mini 110 Microphone: étape 4, image 1 de 1
    • Push out the side tabs simultaneously and pull out the old RAM module.

    • When inserting a new RAM stick, be sure to evenly insert the gold pins in the same orientation that the old module was removed. While sliding the module in, press the side tabs in place.

  5. Disassembling Compaq Mini 110 Microphone, Keyboard: étape 5, image 1 de 2 Disassembling Compaq Mini 110 Microphone, Keyboard: étape 5, image 2 de 2
    • Remove the rubber pads located on the corners of your Compaq Mini.

    • There may be junk underneath it. This is residue left from the glue that held on the rubber pad. Just scrape it away to find the screw.

  6. Disassembling Compaq Mini 110 Microphone: étape 6, image 1 de 2 Disassembling Compaq Mini 110 Microphone: étape 6, image 2 de 2
    • Unscrew all the corner screws. There are four total, one under each rubber pad.

  7. Disassembling Compaq Mini 110 Microphone: étape 7, image 1 de 2 Disassembling Compaq Mini 110 Microphone: étape 7, image 2 de 2
    • Unscrew the screw for the bottom case located in the RAM compartment.

  8. Disassembling Compaq Mini 110 Microphone: étape 8, image 1 de 2 Disassembling Compaq Mini 110 Microphone: étape 8, image 2 de 2
    • Remove the three screws in the silver tabs at the back of the keyboard.

    • These are located at the back of the base under the screen.

    • Lift the keyboard away from the laptop.

  9. Disassembling Compaq Mini 110 Microphone, Hard Drive: étape 9, image 1 de 1
    • Remove the three screws holding the panel in place.

  10. Disassembling Compaq Mini 110 Microphone: étape 10, image 1 de 2 Disassembling Compaq Mini 110 Microphone: étape 10, image 2 de 2
    • Pull up on the tab to remove the hard drive.

  11. Disassembling Compaq Mini 110 Microphone, Top Cover: étape 11, image 1 de 1
    • Remove the eight screws that are from the plastic top cover.

  12. Disassembling Compaq Mini 110 Microphone: étape 12, image 1 de 3 Disassembling Compaq Mini 110 Microphone: étape 12, image 2 de 3 Disassembling Compaq Mini 110 Microphone: étape 12, image 3 de 3
    • Pry up the top plastic cover using a spudger.

    • These two tabs under the screen need to be pushed in with a spudger.

  13. Disassembling Compaq Mini 110 Microphone: étape 13, image 1 de 2 Disassembling Compaq Mini 110 Microphone: étape 13, image 2 de 2
    • Remove the cable by carefully pulling it up.

    • Be careful when lifting up the cover because the track pad is still attached.

  14. Disassembling Compaq Mini 110 Microphone, Display Assembly: étape 14, image 1 de 3 Disassembling Compaq Mini 110 Microphone, Display Assembly: étape 14, image 2 de 3 Disassembling Compaq Mini 110 Microphone, Display Assembly: étape 14, image 3 de 3
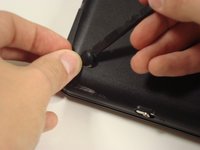
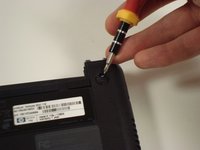
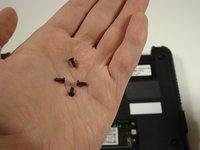
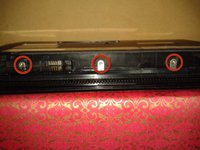
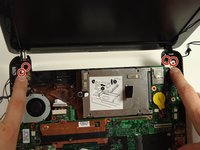
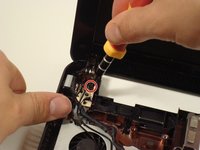
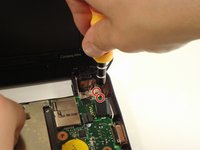
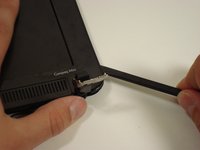
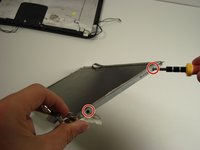
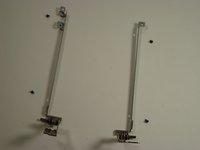
    • Remove the four screws that keep the bottom of the hinges attached to the base.

  15. Disassembling Compaq Mini 110 Microphone: étape 15, image 1 de 3 Disassembling Compaq Mini 110 Microphone: étape 15, image 2 de 3 Disassembling Compaq Mini 110 Microphone: étape 15, image 3 de 3
    • Pry off the top plastic cover of the display assembly.

    • The spudger may go all the way through to the screen-side of the cover. This is not a problem and won't damage anything.

    • There is adhesive tape holding the cover on.

  16. Disassembling Compaq Mini 110 Microphone, Screen: étape 16, image 1 de 3 Disassembling Compaq Mini 110 Microphone, Screen: étape 16, image 2 de 3 Disassembling Compaq Mini 110 Microphone, Screen: étape 16, image 3 de 3
    • Remove the 4 screws keeping the screen on the plastic assembly.

  17. Disassembling Compaq Mini 110 Microphone: étape 17, image 1 de 3 Disassembling Compaq Mini 110 Microphone: étape 17, image 2 de 3 Disassembling Compaq Mini 110 Microphone: étape 17, image 3 de 3
    • Take the screen off the metal connectors by unscrewing each side. Each side has 2 screws.

    • The last picture shows the metal connectors that attach it to the display assembly.

  18. Disassembling Compaq Mini 110 Microphone: étape 18, image 1 de 3 Disassembling Compaq Mini 110 Microphone: étape 18, image 2 de 3 Disassembling Compaq Mini 110 Microphone: étape 18, image 3 de 3
    • Detach the cable from the screen. It is connected under the foil flap.

    • The large wire on the back of the screen is for both the webcam and the microphone, as well as the screen.

  19. Disassembling Compaq Mini 110 Microphone, Microphone: étape 19, image 1 de 1
    • Just pull the little thing out. It's not attached on it's own.

Conclusion

To reassemble your device, follow these instructions in reverse order.

alea

Membre depuis le 10/06/10

1 405 Réputation

14 tutoriels rédigés

Équipe

Cal Poly, Team 22-2, Maness Fall 2010 Membre de l'équipe Cal Poly, Team 22-2, Maness Fall 2010

CPSU-MANESS-F10S22G2

6 membres

20 tutoriels rédigés

0 commentaires

Ajouter un commentaire

Nombre de vues :

Dernières 24 heures : 1

7 derniers jours : 1

30 derniers jours : 3

Total : 2,220