Aller au contenu principal

Disassembling Flip Video Outer Shell

Ce dont vous avez besoin

  1. Disassembling Flip Video Outer Shell, Outer Shell: étape 1, image 1 de 2 Disassembling Flip Video Outer Shell, Outer Shell: étape 1, image 2 de 2
    • Turn off the device and take the batteries out.

    • Remove metal sticker under the LCD screen with a spudger.

    • This may require a large force to pry off the glued sticker.

  2. Disassembling Flip Video Outer Shell: étape 2, image 1 de 1
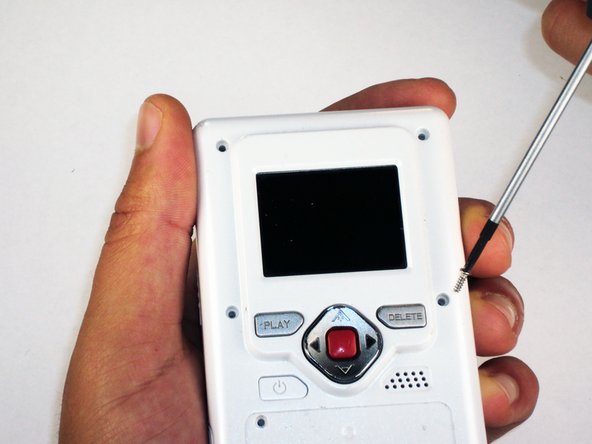
    • Remove the 4 gray screw caps with the spudger. These cover the screw heads and protect from dirt or grime.

  3. Disassembling Flip Video Outer Shell: étape 3, image 1 de 2 Disassembling Flip Video Outer Shell: étape 3, image 2 de 2
    • Remove the 5 10mm screws with the #00 Phillips screwdriver. These connect the back of the outer shell to the front of the outer shell.

  4. Disassembling Flip Video Outer Shell: étape 4, image 1 de 1
    • Open battery door. This can be done by gently depressing and sliding the battery down downward.

  5. Disassembling Flip Video Outer Shell: étape 5, image 1 de 1
    • Use the spudger to separate outer shells.

    • The spudger must be inserted between the shell halves to pry the edges apart.

    • Slowly work around the outside to separate the halves.

Conclusion

To reassemble your device, follow these instructions in reverse order.

Une autre personne a terminé cette réparation.

Elizabeth

Membre depuis le 04/15/10

100 Réputation

6 tutoriels rédigés

Équipe

Cal Poly, Team 26-21, Regan Spring 2010 Membre de l'équipe Cal Poly, Team 26-21, Regan Spring 2010

CPSU-REGAN-S10S26G21

4 membres

12 tutoriels rédigés

0 commentaires

Ajouter un commentaire

Nombre de vues :

Dernières 24 heures : 0

7 derniers jours : 0

30 derniers jours : 1

Total : 2,021