Aller au contenu principal

Disassembling Razer Basilisk X Hyperspeed Top Case

Ce dont vous avez besoin

    • First heat up the underside of the device, so the glue of the stickers softens up.

  1. Disassembling Razer Basilisk X Hyperspeed Top Case, Remove Stickers: étape 2, image 1 de 3 Disassembling Razer Basilisk X Hyperspeed Top Case, Remove Stickers: étape 2, image 2 de 3 Disassembling Razer Basilisk X Hyperspeed Top Case, Remove Stickers: étape 2, image 3 de 3
    • Remove the bottom sticker underneath the switch and the big one in the middle. You can drip isopropyl alcohol along the edges of the stickers to make them even easier to remove.

  2. Disassembling Razer Basilisk X Hyperspeed Top Case, Unscrew: étape 3, image 1 de 1
    • Remove all 4 screws.

  3. Disassembling Razer Basilisk X Hyperspeed Top Case, Remove the Top: étape 4, image 1 de 2 Disassembling Razer Basilisk X Hyperspeed Top Case, Remove the Top: étape 4, image 2 de 2
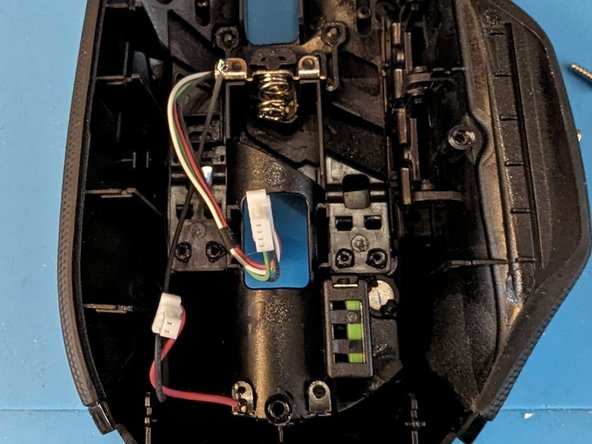
    • Start by gently prying open the case from the bottom. Once the top case becomes loose, you will notice two white wire connectors. Carefully disconnect these to proceed.

  4. Disassembling Razer Basilisk X Hyperspeed Top Case, Admire your work: étape 5, image 1 de 1
    • And your done.

Conclusion

To reassemble your device, follow these instructions in reverse order.

Oliver

Membre depuis le 04/14/23

97 Réputation

1 tutoriel rédigé

Équipe

Global Fixers Membre de l'équipe Global Fixers

Community

33 membres

574 tutoriels rédigés

0 commentaires

Ajouter un commentaire

Nombre de vues :

Dernières 24 heures : 8

7 derniers jours : 26

30 derniers jours : 101

Total : 102