Aller au contenu principal

Disassembling Sony CPF-IP001 Main Speaker Housing Disassembly

Ce dont vous avez besoin

  1. Disassembling Sony CPF-IP001 Main Speaker Housing Disassembly, Main Speaker Housing Disassembly: étape 1, image 1 de 1
    • Remove two 6mm Phillips #0 screws.

    • Remove two 7.5 mm Phillips #0 screws.

    • Remove seven 4 mm Phillips #0 screws.

  2. Disassembling Sony CPF-IP001 Main Speaker Housing Disassembly: étape 2, image 1 de 3 Disassembling Sony CPF-IP001 Main Speaker Housing Disassembly: étape 2, image 2 de 3 Disassembling Sony CPF-IP001 Main Speaker Housing Disassembly: étape 2, image 3 de 3
    • Remove six 4 mm Phillips #0 screws from the metal backing.

    • Remove six 5 mm Phillips #0 screws from the metal backing.

    • Using the plastic opening tool, remove the metal plate from the main speaker by gently pulling on it.

  3. Disassembling Sony CPF-IP001 Main Speaker Housing Disassembly: étape 3, image 1 de 2 Disassembling Sony CPF-IP001 Main Speaker Housing Disassembly: étape 3, image 2 de 2
    • Remove the plastic dock cover by using two fingers to push the attached metal piece forward and slide it out of the holes.

  4. Disassembling Sony CPF-IP001 Main Speaker Housing Disassembly: étape 4, image 1 de 3 Disassembling Sony CPF-IP001 Main Speaker Housing Disassembly: étape 4, image 2 de 3 Disassembling Sony CPF-IP001 Main Speaker Housing Disassembly: étape 4, image 3 de 3
    Outil utilisé dans cette étape :
    Tweezers
    $4.99
    J'achète
    • Using the plastic opening tool, detach the wires connected to the metal plate

    • When disconnecting the wires, be careful not to pull on the wires themselves. Use the plastic opening tool and the connector to disconnect it.

    • Use the plastic opening tool to remove wires connected to the circuit board on the far right.

    • Use the tweezers to remove wires connected to the circuit board in between the two black wires.

    • Use the tweezers to press the release tab on the front and back of the plastic white wire head.

    • Once the tab is pressed on both sides, lift up to slide wire head out of socket.

  5. Disassembling Sony CPF-IP001 Main Speaker Housing Disassembly: étape 5, image 1 de 1
    • Remove two 5 mm Phillips #0 screws.

  6. Disassembling Sony CPF-IP001 Main Speaker Housing Disassembly: étape 6, image 1 de 3 Disassembling Sony CPF-IP001 Main Speaker Housing Disassembly: étape 6, image 2 de 3 Disassembling Sony CPF-IP001 Main Speaker Housing Disassembly: étape 6, image 3 de 3
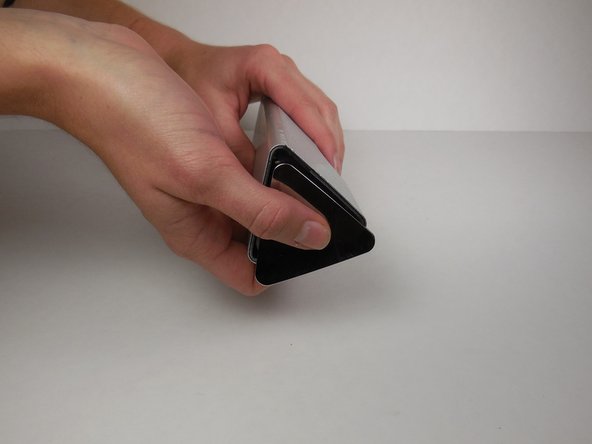
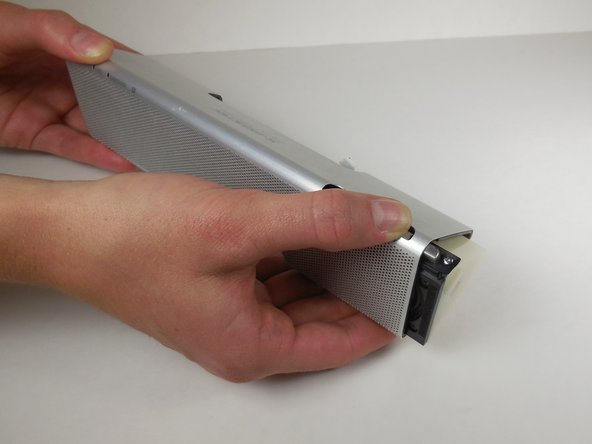
    • Using the metal spudger, loosen the metal cap at the end of the speaker.

    • Slide down the loosened cap to remove it from the end of the speaker.

    • Simultaneously push down on the buttons and slide the speaker out from the casing.

Conclusion

To reassemble your device, follow these instructions in reverse order.

Marlena Perez

Membre depuis le 04/14/15

442 Réputation

3 tutoriels rédigés

Équipe

Cal Poly, Team 6-14, Maness Spring 2015 Membre de l'équipe Cal Poly, Team 6-14, Maness Spring 2015

CPSU-MANESS-S15S6G14

4 membres

8 tutoriels rédigés

0 commentaires

Ajouter un commentaire

Nombre de vues :

Dernières 24 heures : 2

7 derniers jours : 2

30 derniers jours : 5

Total : 790