Aller au contenu principal

Disassembling Western Digital Elements SE HD case and mainboard

Ce dont vous avez besoin

  1. Disassembling Western Digital Elements SE HD case and mainboard, Opening the case: étape 1, image 1 de 1
    Outil utilisé dans cette étape :
    Plastic Cards
    $2.99
    J'achète
    • The case can be opened easily with a plastic case opening tool. Strong finger nails and an old credit card / plastic card may work too.

  2. Disassembling Western Digital Elements SE HD case and mainboard, Remove marked screws (T5): étape 2, image 1 de 1
    • The 5 marked screws can be removed with a Torx T5.

  3. Disassembling Western Digital Elements SE HD case and mainboard, Lift up the board: étape 3, image 1 de 2 Disassembling Western Digital Elements SE HD case and mainboard, Lift up the board: étape 3, image 2 de 2
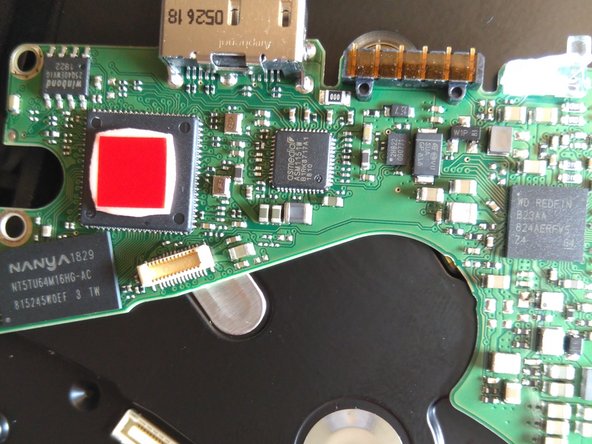
    • Lift the board gently - there is only one small connector connecting the board to the hard disk case (around the yellow market space).

    • On the second image, you can see the board turned over.

    • Further disassembly would damage the disk. I hoped to find a SATA connector within, but maybe someone knows an alternative board with the same connector.

  4. Disassembling Western Digital Elements SE HD case and mainboard, Hard disk labels and case labels: étape 4, image 1 de 2 Disassembling Western Digital Elements SE HD case and mainboard, Hard disk labels and case labels: étape 4, image 2 de 2
    • The label on the WD Elements SE case and the labels on the harddisk can be seen here. I censored serial numbers, the WWID and the barcodes.

Conclusion

To reassemble your device, follow these instructions in reverse order.

Bastli

Membre depuis le 12/30/23

229 Réputation

2 tutoriels rédigés

0 commentaires

Ajouter un commentaire

Nombre de vues :

Dernières 24 heures : 2

7 derniers jours : 16

30 derniers jours : 64

Total : 396