Aller au contenu principal

Disassembling the Garmin eTrex Vista-H Outer Case

Ce dont vous avez besoin

  1. Disassembling the Garmin eTrex Vista-H Outer Case, Removing Battery: étape 1, image 1 de 1
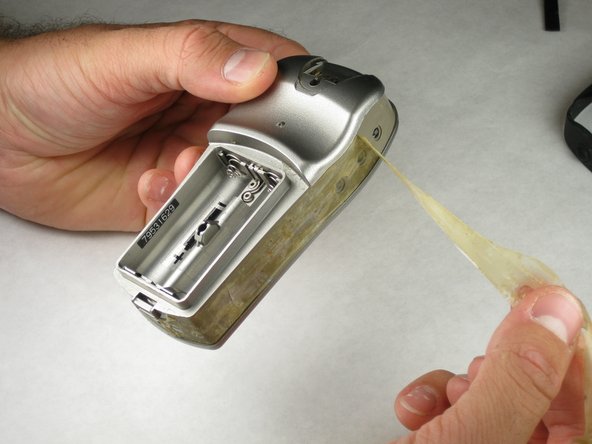
    • Flip the device to the backside, and locate the metal tab at the center of the back cover.

  2. Disassembling the Garmin eTrex Vista-H Outer Case: étape 2, image 1 de 1
    • Lift the metal tab up, and rotate it counterclockwise. This will unlock the back case cover.

  3. Disassembling the Garmin eTrex Vista-H Outer Case: étape 3, image 1 de 2 Disassembling the Garmin eTrex Vista-H Outer Case: étape 3, image 2 de 2
    • Lift the battery plate off to either insert or remove 2 AA batteries.

  4. Disassembling the Garmin eTrex Vista-H Outer Case, Disassembling the Garmin eTrex Vista-H Outer Case: étape 4, image 1 de 2 Disassembling the Garmin eTrex Vista-H Outer Case, Disassembling the Garmin eTrex Vista-H Outer Case: étape 4, image 2 de 2
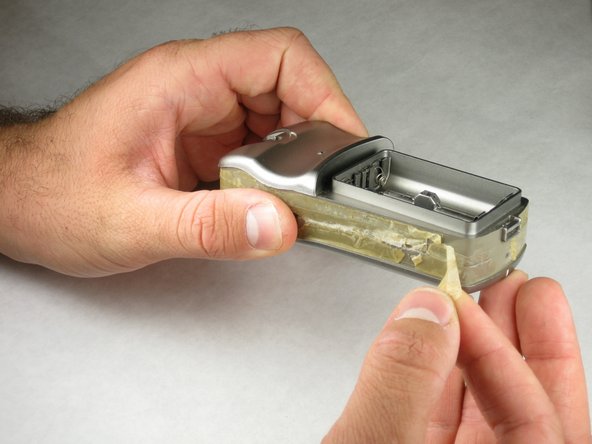
    • With the wedge side of a spudger (or a small, flat head screwdriver), remove the black rubber case support from the device body.

  5. Disassembling the Garmin eTrex Vista-H Outer Case: étape 5, image 1 de 3 Disassembling the Garmin eTrex Vista-H Outer Case: étape 5, image 2 de 3 Disassembling the Garmin eTrex Vista-H Outer Case: étape 5, image 3 de 3
    • With the pick side of a spudger (or tweezers), peel the sticky tape from the device.

  6. Disassembling the Garmin eTrex Vista-H Outer Case: étape 6, image 1 de 1
    • Split the front and rear panels by inserting a small pointed tool (such as a pen point or a screwdriver tip SL1.5) in the 5 plastic tabs along the sides of the device.

    • Do not remove the back panels quickly. If too much force is applied, there is a wire connection that will break.

    • CAUTION! Be careful not to force the tabs inward. This will result in broken tabs.

  7. Disassembling the Garmin eTrex Vista-H Outer Case: étape 7, image 1 de 2 Disassembling the Garmin eTrex Vista-H Outer Case: étape 7, image 2 de 2
    • With tweezers (or your fingernails), carefully disconnect the wires between the PC input and the motherboard.

Conclusion

To reassemble your device, follow these instructions in reverse order.

7 autres ont terminé cette réparation.

Ryan Green

Membre depuis le 10/17/10

93 Réputation

1 tutoriel rédigé

Équipe

Cal Poly, Team 21-30, Regan Fall 2010 Membre de l'équipe Cal Poly, Team 21-30, Regan Fall 2010

CPSU-REGAN-F10S21G30

3 membres

5 tutoriels rédigés

0 commentaires

Ajouter un commentaire

Nombre de vues :

Dernières 24 heures : 0

7 derniers jours : 1

30 derniers jours : 3

Total : 4,982