Introduction
My Thomas had already been modified when I received it, the battery had been replaced and the wagon and charger were missing. The train was none functional so needed to open it up to see why.
Note
The battery may still contain charge so be careful not to short out the connectors
Ce dont vous avez besoin
-
-
You will need quite a lot of space to work on the engine as it effectively has to be stripped right down to get to the key components
-
Before commencing, remove the battery from the system. This will make the train lighter and avoid any electrical issues. See Replacing the battery guide.
-
-
-
Turn the train upside down
-
Remove the screws down the centre and across the front to release the wheel cover
-
Remove the loudspeaker by unscrewing the 3 screws that attach it to this cover.
-
-
-
The front two pairs of wheels are screwed on with self tapping screws. Remove the four screws that hold on each of the wheels and keep safe
-
Reassembly
-
When screwing the wheels back on note that there are counterbores in the plastic clips that fit onto the raised parts on the case
-
-
-
The electric motor is held in place by two different things.
-
Firstly two screws and a yellow plastic bracket.
-
Also on the right is a clip that hold the motor and gearbox in place. You can release this by inserting a pallet knife or a screwdriver between the motor and case
-
Note that you won't be able to completely remove the engine at this point as it is still connected by wires
-
-
-
-
Over the wheel arches are 2 more plastic panels, they are held in place by screws. Note that the outer screws are a smaller size.
-
-
-
The next 5 screws hold the body to the chassis. The top also is clipped in place at the back
-
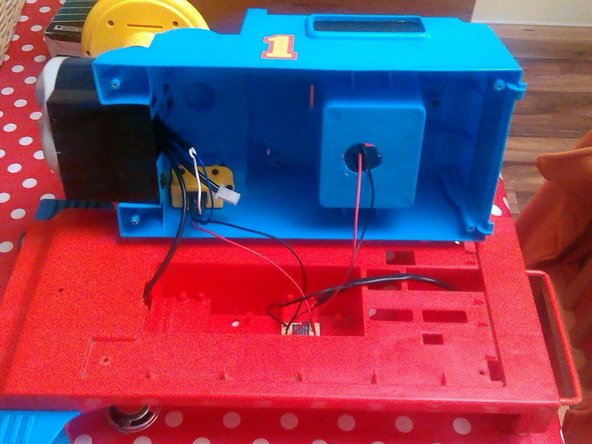
You can access most of the components at this point including disconnecting the motor and the power switch
-
Reassembly
-
Take care not to trap wires, you should be able to route the cables around the case
-
-
-
The power is connected via spade connectors.
-
By removing the three screws you can access the switch which is an off the shelf double pole double throw switch but only one throw is used.
-
This had broken in my train but I simply reversed it to use the other throw which did work correctly. This might be an option if you can't find a replacement part.
-
-
-
To access the controls you need to remove the chimney, this step may require a shorter or stubby screwdriver
-
Once the screws are removed the chimney slides up with respect to the body
-
Reassembly
-
Take care to ensure that all of the wires pass through the large hole and are not trapped
-
-
-
A single screw inside the chimney holds this in place, again you may need a short screwdriver to access this
-
-
-
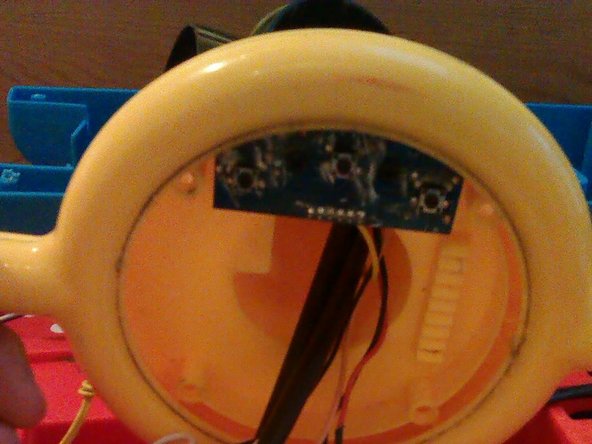
The console is held in place by the 4 inner screws, note you don't need to remove the outer screws or screws in the handlebars
-
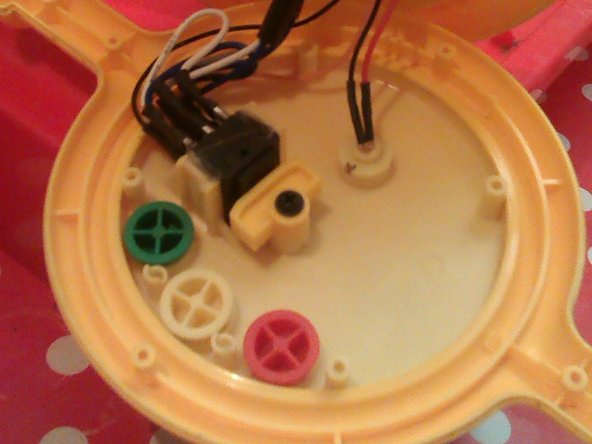
Note how the block attached to the lever is positioned against the switch. In my train this was 180degrees reversed and hence the lever did not do anything.
-
The three buttons need to be correctly orientated, they have little bars to fit into slots
-
Note the newer model may look slightly different to this
-




To reassemble your device, follow these instructions in reverse order.
To reassemble your device, follow these instructions in reverse order.


