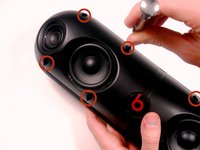
Aller au contenu principal

Dr. Dre Pill XL Case Replacement

Ce dont vous avez besoin

  1. Dr. Dre Pill XL  Case Replacement, Case: étape 1, image 1 de 2 Dr. Dre Pill XL  Case Replacement, Case: étape 1, image 2 de 2
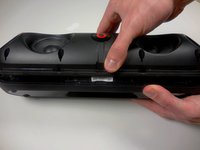
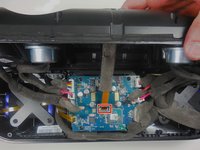
    • Using a plastic opening tool, pry the casing from the rest of the device.

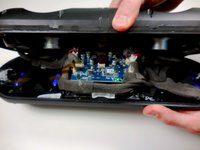
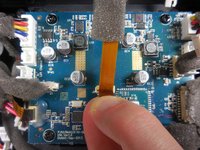
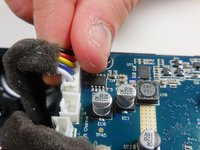
    • Pry all the way around the edge and then pull apart.

    • It should be relatively easy, to pull apart. Don't be afraid to apply a necessary force.

  2. Dr. Dre Pill XL  Case Replacement: étape 2, image 1 de 1
    • Using your thumb, remove the 8 rubber plugs in order to get to the screws.

    • Simply rub them towards the speakers and they will slide out enough to grip the edge and pull them out.

    • In the picture provided, we labeled four of them on one side of the Beats Pill XL. The other four are symmetrical to these four on the other side of the device.

  3. Dr. Dre Pill XL  Case Replacement: étape 3, image 1 de 2 Dr. Dre Pill XL  Case Replacement: étape 3, image 2 de 2
    • Using a Phillips #2 screwdriver, remove the 8 (10mm maxi-loc Phillips #2) screws that hold the casing together.

  4. Dr. Dre Pill XL  Case Replacement: étape 4, image 1 de 2 Dr. Dre Pill XL  Case Replacement: étape 4, image 2 de 2
    • Pull apart the front casing from the back casing, slowly. Try to avoid any tension on any of the connected cables.

    • Separate at a slow constant force to avoid damage to the ribbon cables.

  5. Dr. Dre Pill XL  Case Replacement: étape 5, image 1 de 2 Dr. Dre Pill XL  Case Replacement: étape 5, image 2 de 2
    • Gently pull on the plastic tab at the base of the ribbon cable to remove it from the motherboard.

    • Never pull the cables by the cord, as this could cause damage to the cables and/or motherboard. Always disconnect the cables from the base by the motherboard.

  6. Dr. Dre Pill XL  Case Replacement: étape 6, image 1 de 2 Dr. Dre Pill XL  Case Replacement: étape 6, image 2 de 2
    • Using your thumb and index finger, pull upwards on the base of the the power cable to remove it from the motherboard.

    • Even though there are two batteries, there is only one cable connecting the two to the motherboard.

Conclusion

To reassemble your device, follow these instructions in reverse order.

4 autres ont terminé cette réparation.

Nolan

Membre depuis le 03/11/15

855 Réputation

2 tutoriels rédigés

Équipe

Colorado Springs, Team 9-2, Panko Spring 2015 Membre de l'équipe Colorado Springs, Team 9-2, Panko Spring 2015

UCCS-PANKO-S15S9G2

3 membres

7 tutoriels rédigés

0 commentaires

Ajouter un commentaire

Nombre de vues :

Dernières 24 heures : 0

7 derniers jours : 3

30 derniers jours : 9

Total : 5,974