Introduction
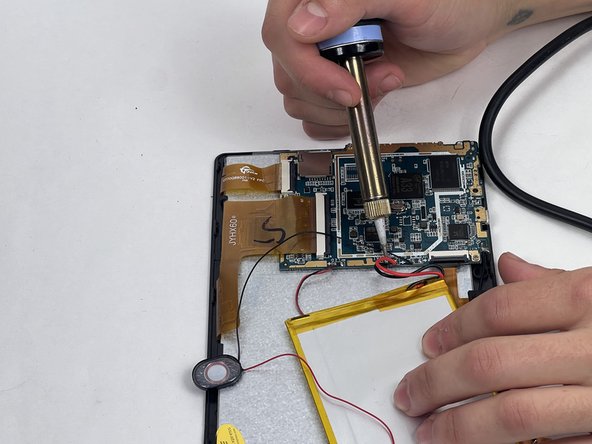
If the battery in your Dragon Touch Y88X Plus tablet is having power issues, use this guide to replace it. This repair requires a soldering iron to remove the connectors of the battery. You may also want to use adhesive tape to further secure the battery after replacement. If you need any additional help with the process of soldering, you can refer to the How To Solder and Desolder Connections guide.
Ce dont vous avez besoin
-
-
Remove the back case using a plastic opening tool or spudger.
-
Start at the corners and work your way around the perimeter of the tablet.
-
-


To reassemble your device, follow these instructions in reverse order.
To reassemble your device, follow these instructions in reverse order.
Annulation : je n'ai pas terminé ce tutoriel.
2 autres ont terminé cette réparation.

Équipe

UMass Dartmouth, Team 1-4, Petersen Fall 2023 Membre de l'équipe UMass Dartmouth, Team 1-4, Petersen Fall 2023
UMASSD-PETERSEN-F23S1G4
4 membres
4 tutoriels rédigés