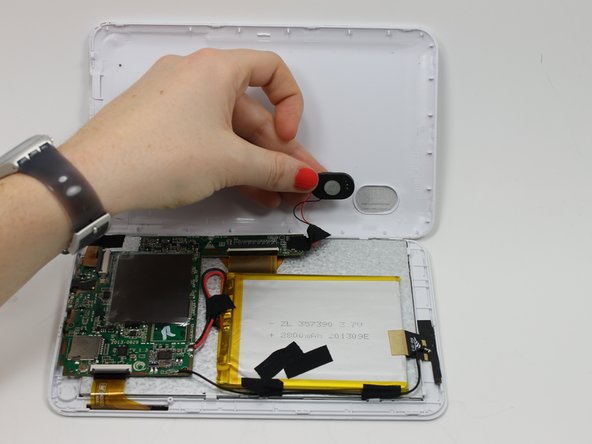
Aller au contenu principal

Dreamax DMX-ST7A Speaker Replacement

Ce dont vous avez besoin

  1. Dreamax DMX-ST7A Speaker Replacement, Back Cover: étape 1, image 1 de 1
    • Position the tablet so the ports and screws are facing you.

  2. Dreamax DMX-ST7A Speaker Replacement: étape 2, image 1 de 1
    • Remove the two 2.5mm screws using the Phillips #00 precision screwdriver.

  3. Dreamax DMX-ST7A Speaker Replacement: étape 3, image 1 de 2 Dreamax DMX-ST7A Speaker Replacement: étape 3, image 2 de 2
    • Use the plastic opening tool to assist in removing the back cover.

  4. Dreamax DMX-ST7A Speaker Replacement: étape 4, image 1 de 1
    • Upon removing the back cover position the tablet as seen in the picture.

  5. Dreamax DMX-ST7A Speaker Replacement, Speaker: étape 5, image 1 de 2 Dreamax DMX-ST7A Speaker Replacement, Speaker: étape 5, image 2 de 2
    • Remove the speaker from the back cover.

  6. Dreamax DMX-ST7A Speaker Replacement: étape 6, image 1 de 1
    • Remove the black and red wire from the Motherboard.

  7. Dreamax DMX-ST7A Speaker Replacement: étape 7, image 1 de 1
Conclusion

To reassemble your device, follow these instructions in reverse order.

Stacey Mattila

Membre depuis le 03/18/15

543 Réputation

5 tutoriels rédigés

Équipe

Michigan Tech, Team 1-4, Lauer Spring 2015 Membre de l'équipe Michigan Tech, Team 1-4, Lauer Spring 2015

MTU-LAUER-S15S1G4

2 membres

10 tutoriels rédigés

0 commentaires

Ajouter un commentaire

Nombre de vues :

Dernières 24 heures : 0

7 derniers jours : 0

30 derniers jours : 0

Total : 143