Aller au contenu principal

Dremel 4000 Back Case Replacement

Conditions préalables uniquement
Ce tutoriel est uniquement destiné à être utilisé comme prérequis d'autres tutoriels. Il ne se suffit pas à lui-même.

Ce dont vous avez besoin

  1. Dremel 4000 Back Case Replacement, Back Case: étape 1, image 1 de 2 Dremel 4000 Back Case Replacement, Back Case: étape 1, image 2 de 2
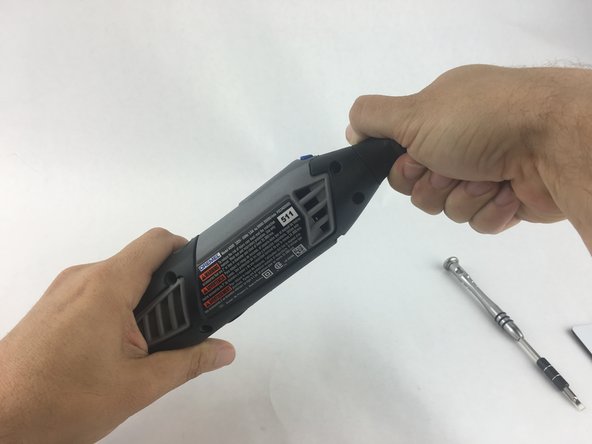
    • Start by removing the housing cap by unscrewing it.

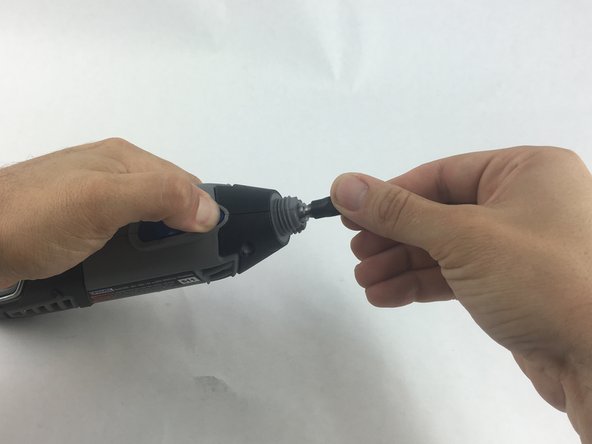
    • Next, unscrew the now exposed collet nut while holding down the shaft lock button.

    • To remove the collet nut, you may need to use the small open-end wrench provided with the Dremel.

  2. Dremel 4000 Back Case Replacement: étape 2, image 1 de 1
    • Using your hands, carefully remove hanger from casing.

  3. Dremel 4000 Back Case Replacement: étape 3, image 1 de 2 Dremel 4000 Back Case Replacement: étape 3, image 2 de 2
    • Remove the brush caps (one on each side) by using a flathead screwdriver bit.

    • The brush caps are spring loaded.

  4. Dremel 4000 Back Case Replacement: étape 4, image 1 de 1
    • Using the Torx 15 screwdriver tip, remove the 5 screws (12.5 mm) that hold the casing together.

  5. Dremel 4000 Back Case Replacement: étape 5, image 1 de 1
    • Use a plastic opening tool to gently wedge apart the hard plastic threads.

  6. Dremel 4000 Back Case Replacement: étape 6, image 1 de 1
    • Use your hands to carefully remove the back casing so that none of the components fall out.

Conclusion

To reassemble your device, follow these instructions in reverse order.

2 autres ont terminé cette réparation.

John Cobb

Membre depuis le 01/20/16

1 689 Réputation

4 tutoriels rédigés

Équipe

USF Tampa, Team 15-4, Remmell Spring 2016 Membre de l'équipe USF Tampa, Team 15-4, Remmell Spring 2016

USFT-REMMELL-S16S15G4

4 membres

13 tutoriels rédigés

0 commentaires

Ajouter un commentaire

Nombre de vues :

Dernières 24 heures : 0

7 derniers jours : 1

30 derniers jours : 8

Total : 1,657