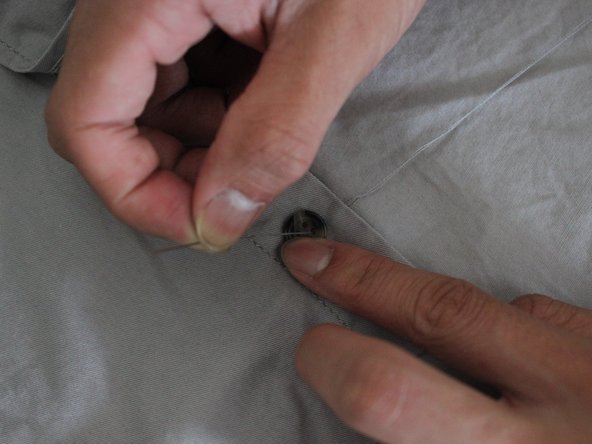
Aller au contenu principal

Dress Shirt Button Replacement

Ce dont vous avez besoin
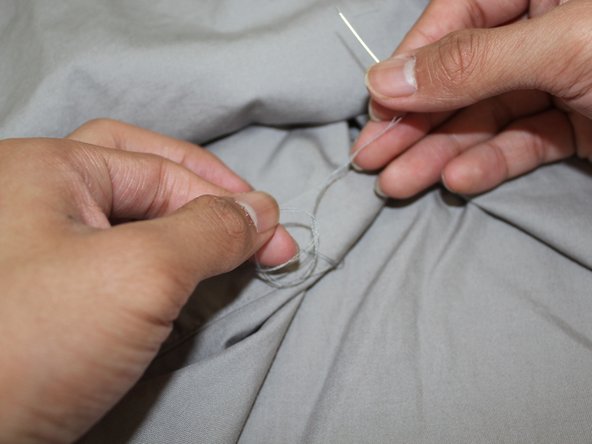
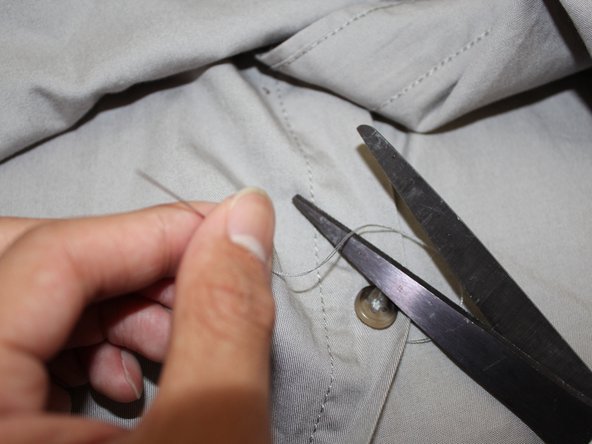
  1. Dress Shirt Button Replacement, Button: étape 1, image 1 de 2 Dress Shirt Button Replacement, Button: étape 1, image 2 de 2
    • Measure out two feet of thread and cut it.

  2. Dress Shirt Button Replacement: étape 2, image 1 de 3 Dress Shirt Button Replacement: étape 2, image 2 de 3 Dress Shirt Button Replacement: étape 2, image 3 de 3
    • The needle is sharp. Be careful when working.

    • Put the thread through the eye of the needle.

    • Pull the thread through so that both ends are even.

    • Tie both strings into a knot, closing the loop

  3. Dress Shirt Button Replacement: étape 3, image 1 de 2 Dress Shirt Button Replacement: étape 3, image 2 de 2
    • Begin sewing by putting the needle through the back of the fabric, out to the front, and through a hole in the button.

    • Make sure the button is facing the correct direction.

  4. Dress Shirt Button Replacement: étape 4, image 1 de 3 Dress Shirt Button Replacement: étape 4, image 2 de 3 Dress Shirt Button Replacement: étape 4, image 3 de 3
    • Put the needle through the hole diagonal and feed through to the back of the shirt

    • Repeat this process for the other diagonal.

    • Repeat the process of sewing through the diagonals multiple times.

  5. Dress Shirt Button Replacement: étape 5, image 1 de 1
    • When there is about 4 inches of thread yet, push the thread so that it is on the back side of the fabric.

    • Then push the needle back through making sure to not go through the button again.

  6. Dress Shirt Button Replacement: étape 6, image 1 de 3 Dress Shirt Button Replacement: étape 6, image 2 de 3 Dress Shirt Button Replacement: étape 6, image 3 de 3
    • Wrap the thread around the button 4-6 times.

  7. Dress Shirt Button Replacement: étape 7, image 1 de 3 Dress Shirt Button Replacement: étape 7, image 2 de 3 Dress Shirt Button Replacement: étape 7, image 3 de 3
    • Push the thread back through to the back side of the fabric.

    • Tie the knot off and cut.

Conclusion

Your shirt is now ready to be worn again.

Une autre personne a terminé cette réparation.

Jonathan Wong

Membre depuis le 04/09/15

198 Réputation

1 tutoriel rédigé

Équipe

Cal Poly, Team 28-4, Green Spring 2015 Membre de l'équipe Cal Poly, Team 28-4, Green Spring 2015

CPSU-GREEN-S15S28G4

6 membres

13 tutoriels rédigés

0 commentaires

Ajouter un commentaire

Nombre de vues :

Dernières 24 heures : 1

7 derniers jours : 12

30 derniers jours : 29

Total : 3,714