Aller au contenu principal

DualShock 2 D-Pad Replacement

Ce dont vous avez besoin

  1. DualShock 2 D-Pad Replacement, D-Pad: étape 1, image 1 de 3 DualShock 2 D-Pad Replacement, D-Pad: étape 1, image 2 de 3 DualShock 2 D-Pad Replacement, D-Pad: étape 1, image 3 de 3
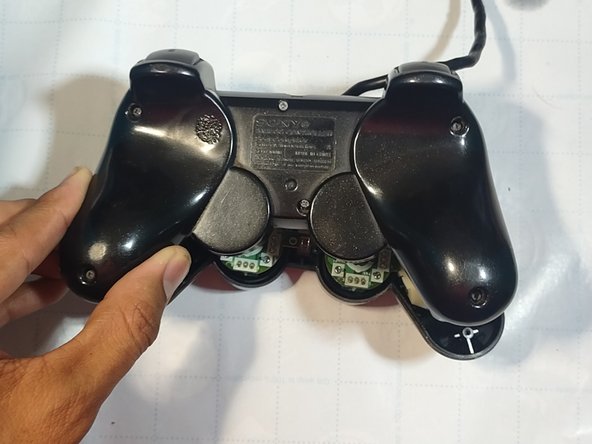
    • Turn the controller over.

    • Unscrew the six screws using your Phillips #00 screwdriver.

  2. DualShock 2 D-Pad Replacement: étape 2, image 1 de 3 DualShock 2 D-Pad Replacement: étape 2, image 2 de 3 DualShock 2 D-Pad Replacement: étape 2, image 3 de 3
    • Remove the back cover from the controller.

    • Slide the triggers off by pulling the trigger off the controller and repeat for another side.

  3. DualShock 2 D-Pad Replacement: étape 3, image 1 de 3 DualShock 2 D-Pad Replacement: étape 3, image 2 de 3 DualShock 2 D-Pad Replacement: étape 3, image 3 de 3
    • Remove the circuit board carefully.

    • Make sure not to touch any vital components and only grab them by the side.

  4. DualShock 2 D-Pad Replacement: étape 4, image 1 de 3 DualShock 2 D-Pad Replacement: étape 4, image 2 de 3 DualShock 2 D-Pad Replacement: étape 4, image 3 de 3
    • Remove the yellow rubber from the D-pad.

    • Remove the black plastic bracket with a pair of tweezers.

  5. DualShock 2 D-Pad Replacement: étape 5, image 1 de 3 DualShock 2 D-Pad Replacement: étape 5, image 2 de 3 DualShock 2 D-Pad Replacement: étape 5, image 3 de 3
    • Remove the broken D-pad from the controller carefully.

  6. DualShock 2 D-Pad Replacement: étape 6, image 1 de 3 DualShock 2 D-Pad Replacement: étape 6, image 2 de 3 DualShock 2 D-Pad Replacement: étape 6, image 3 de 3
    • Put the replacement D-pad in the controller.

    • Make sure to get replacement parts designed for your controller as sizes may vary.

    • Put the plastic bracket back on carefully.

  7. DualShock 2 D-Pad Replacement: étape 7, image 1 de 3 DualShock 2 D-Pad Replacement: étape 7, image 2 de 3 DualShock 2 D-Pad Replacement: étape 7, image 3 de 3
    • Replace the yellow rubber.

    • Carefully insert the circuit board and reclip the triggers.

    • Make sure to insert the analog sticks through the designed opening.

    • Insert the back cover back in place.

  8. DualShock 2 D-Pad Replacement: étape 8, image 1 de 3 DualShock 2 D-Pad Replacement: étape 8, image 2 de 3 DualShock 2 D-Pad Replacement: étape 8, image 3 de 3
    • Screw the back cover on again clockwise.

    • Test D-pad to make sure its in working order.

Conclusion

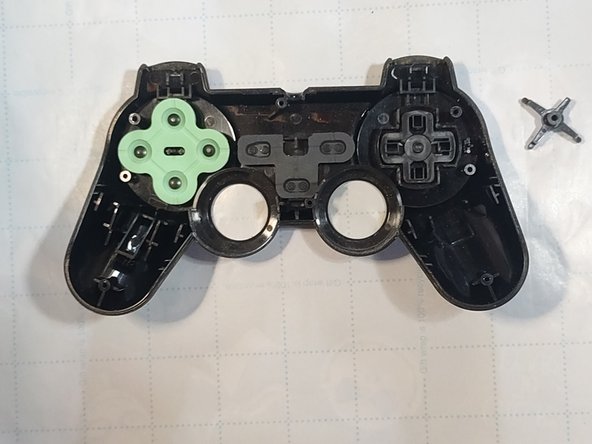
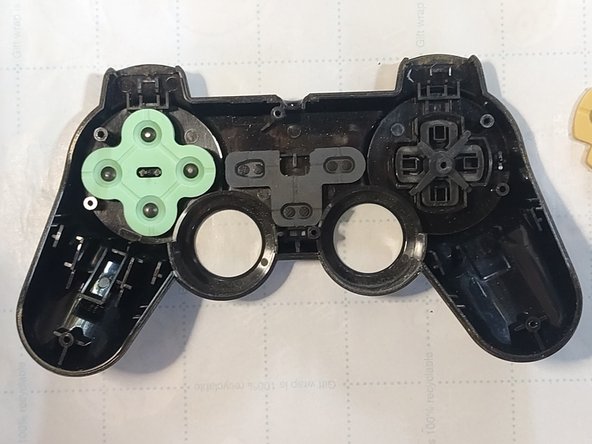
Enjoy your new D-pad.

5 autres ont terminé cette réparation.

Gilberto Rosales

Membre depuis le 08/23/22

274 Réputation

1 tutoriel rédigé

Équipe

CSU Los Angeles, Team 3-77, Briggs Fall 2022 Membre de l'équipe CSU Los Angeles, Team 3-77, Briggs Fall 2022

CSULA-BRIGGS-F22S3G77

1 membre

3 tutoriels rédigés

0 commentaires

Ajouter un commentaire

Nombre de vues :

Dernières 24 heures : 7

7 derniers jours : 54

30 derniers jours : 232

Total : 4,299