Aller au contenu principal

DualShock 4 CHU-ZCT2U Battery Case Replacement

Tutoriel Archivé
Ce tutoriel est conservé uniquement à des fins de suivis historiques. Utilisez la version actuelle du tutoriel pour effectuer votre réparation.

Ce dont vous avez besoin

  1. DualShock 4 CHU-ZCT2U Battery Case Replacement, Outer Shell: étape 1, image 1 de 3 DualShock 4 CHU-ZCT2U Battery Case Replacement, Outer Shell: étape 1, image 2 de 3 DualShock 4 CHU-ZCT2U Battery Case Replacement, Outer Shell: étape 1, image 3 de 3
    • Unscrew the four 6.5mm screws, using a Phillips-Head screwdriver.

    • Pry the two halves of the shell apart using a plastic opening tool.

    • Be careful, as there will be a ribbon connecting the inner workings of the controller. It will not separate into two parts just by pulling apart the shell.

  2. DualShock 4 CHU-ZCT2U Battery Case Replacement: étape 2, image 1 de 3 DualShock 4 CHU-ZCT2U Battery Case Replacement: étape 2, image 2 de 3 DualShock 4 CHU-ZCT2U Battery Case Replacement: étape 2, image 3 de 3
    • Pull the ribbon cable out of the motherboard port to fully separate the two halves, using a pair of tweezers.

  3. DualShock 4 CHU-ZCT2U Battery Case Replacement, Battery: étape 3, image 1 de 3 DualShock 4 CHU-ZCT2U Battery Case Replacement, Battery: étape 3, image 2 de 3 DualShock 4 CHU-ZCT2U Battery Case Replacement, Battery: étape 3, image 3 de 3
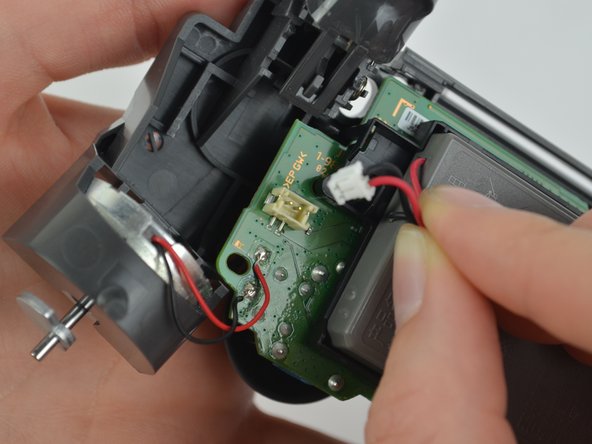
    • Unplug the black and red wires from the power port located on the motherboard.

    • Remove the old battery from the controller.

  4. DualShock 4 CHU-ZCT2U Battery Case Replacement: étape 4, image 1 de 2 DualShock 4 CHU-ZCT2U Battery Case Replacement: étape 4, image 2 de 2
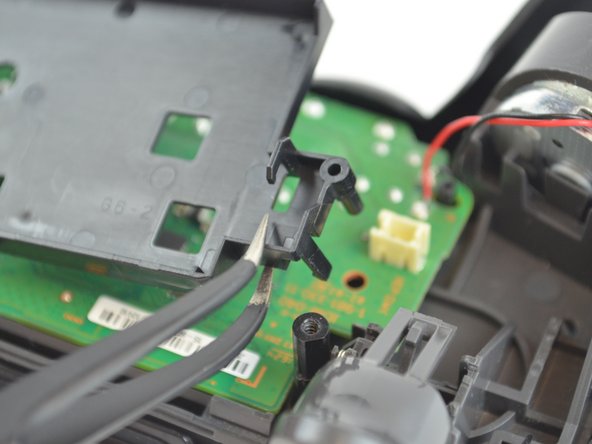
    • Remove the 6.43mm screw connecting the motherboard to the inner workings of the controller, using a Phillips-Head screwdriver.

  5. DualShock 4 CHU-ZCT2U Battery Case Replacement: étape 5, image 1 de 3 DualShock 4 CHU-ZCT2U Battery Case Replacement: étape 5, image 2 de 3 DualShock 4 CHU-ZCT2U Battery Case Replacement: étape 5, image 3 de 3
    • Unhook the battery case from the motherboard, and pull it off.

Conclusion

To reassemble your device, follow these instructions in reverse order.

19 autres ont terminé cette réparation.

Michelle Joseph

Membre depuis le 10/09/17

1 762 Réputation

3 tutoriels rédigés

Équipe

USF Tampa, Team S1-G5, Leahy Fall 2017 Membre de l'équipe USF Tampa, Team S1-G5, Leahy Fall 2017

USFT-LEAHY-F17S1G5

3 membres

22 tutoriels rédigés

0 commentaires

Ajouter un commentaire

Nombre de vues :

Dernières 24 heures : 0

7 derniers jours : 1

30 derniers jours : 3

Total : 12,310