Aller au contenu principal

Dynex DX-WBRDVD1 Optical Drive Replacement

Ce dont vous avez besoin

  1. Dynex DX-WBRDVD1 Optical Drive Replacement, Top Cover: étape 1, image 1 de 2 Dynex DX-WBRDVD1 Optical Drive Replacement, Top Cover: étape 1, image 2 de 2
    • Remove the four 5mm Phillips #1 screws that connect the black outer shell to the silver back of the device.

  2. Dynex DX-WBRDVD1 Optical Drive Replacement: étape 2, image 1 de 1
    • Remove the two 5mm screws on the left and right side panels.

    • There is one screw on each side that secures the cover to the body of the device.

  3. Dynex DX-WBRDVD1 Optical Drive Replacement: étape 3, image 1 de 1
    • Lift the black cover to a 45 degree angle from the rear of the device and pull the cover away entirely.

    • Check that the power cord is not preventing the device from opening or closing.

  4. Dynex DX-WBRDVD1 Optical Drive Replacement, Optical Drive: étape 4, image 1 de 2 Dynex DX-WBRDVD1 Optical Drive Replacement, Optical Drive: étape 4, image 2 de 2
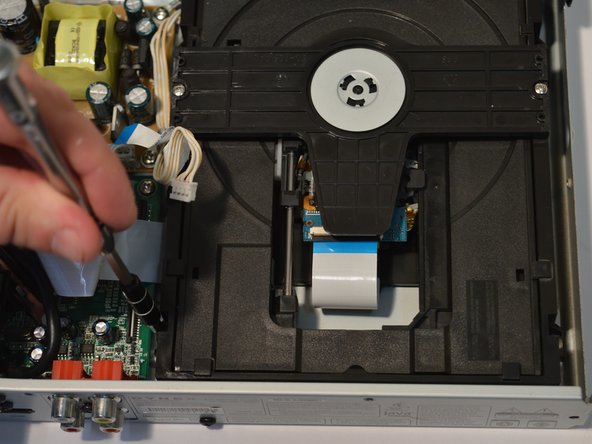
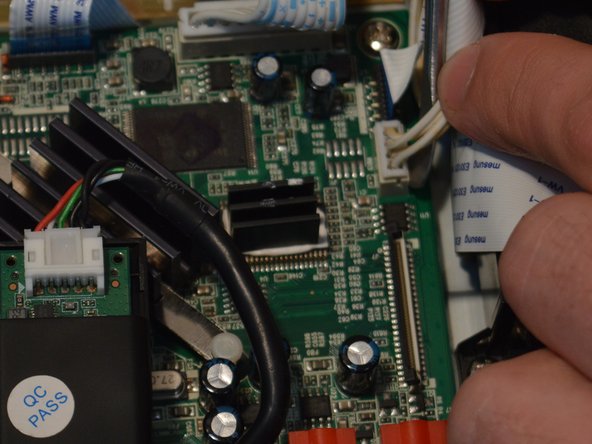
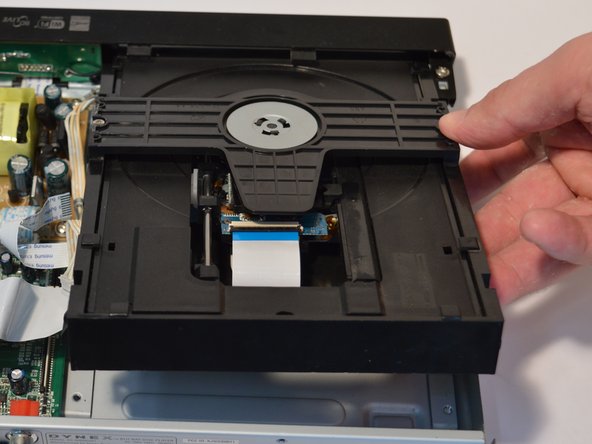
    • Use a Phillips #1 screwdriver to remove the two screws that secure the Optical Drive.

  5. Dynex DX-WBRDVD1 Optical Drive Replacement: étape 5, image 1 de 2 Dynex DX-WBRDVD1 Optical Drive Replacement: étape 5, image 2 de 2
    • Detach the tape wires from the motherboard and power board.

  6. Dynex DX-WBRDVD1 Optical Drive Replacement: étape 6, image 1 de 2 Dynex DX-WBRDVD1 Optical Drive Replacement: étape 6, image 2 de 2
    • Lift the disc drive up to a 45 degree angle and pull back out of the device shell

Conclusion

To reassemble your device, follow these instructions in reverse order.

2 autres ont terminé cette réparation.

0 commentaires

Ajouter un commentaire

Nombre de vues :

Dernières 24 heures : 1

7 derniers jours : 2

30 derniers jours : 13

Total : 397