Aller au contenu principal

Ematic EGQ307 Battery Replacement

Ce dont vous avez besoin

  1. Ematic EGQ307 Battery Replacement, Battery: étape 1, image 1 de 2 Ematic EGQ307 Battery Replacement, Battery: étape 1, image 2 de 2
    • There are two screws on the side with the micro USB power port. Remove the two 2mm x 0.5mm screws with a Phillips #0 Screwdriver head.

  2. Ematic EGQ307 Battery Replacement: étape 2, image 1 de 2 Ematic EGQ307 Battery Replacement: étape 2, image 2 de 2
    • Pry off the plastic backing with the spudger and the plastic opening tools. Anything that can provide enough leverage and not conduct electricity will also work for this purpose.

    • Carefully separate the front and back plates because the wire that connects the speaker is connected to both the front and back plates.

  3. Ematic EGQ307 Battery Replacement: étape 3, image 1 de 1
    • 3. Once you pry off the plastic backing, you will expose the battery.

    • Carefully separate the front and back plates because the wire that connects the speaker is connected to both the front and back plates

  4. Ematic EGQ307 Battery Replacement: étape 4, image 1 de 3 Ematic EGQ307 Battery Replacement: étape 4, image 2 de 3 Ematic EGQ307 Battery Replacement: étape 4, image 3 de 3
    Outil utilisé dans cette étape :
    Plastic Cards
    $2.99
    J'achète
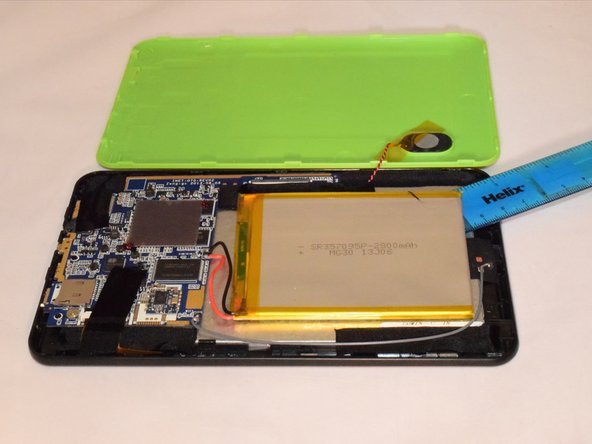
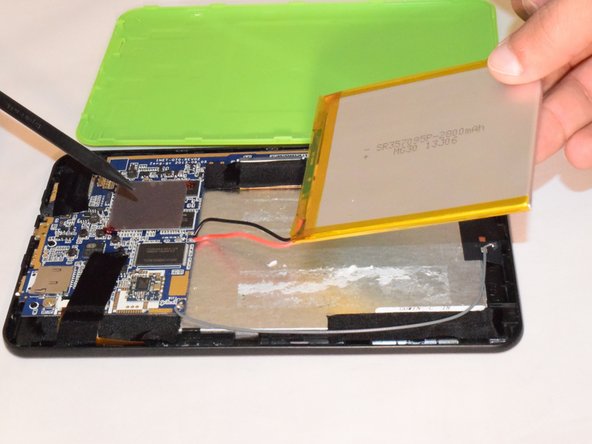
    • 4. Remove the tape holding the battery to the plastic frame. The battery is glued to the back of the LED. Pry the battery off the LED using a plastic card.

    • Do not bend or warp the battery. Even though the battery may not be working, it is still dangerous.

  5. Ematic EGQ307 Battery Replacement: étape 5, image 1 de 1
    • If replacing the battery, unplug the black and red wires gently from the hardware and take off the battery .

    • If not replacing it, do not disconnect the red and black wires.

    • If replacing the battery, you will need a soldering kit to reconnect the wires with the new battery after disconnecting the old battery.

    • How To Solder and Desolder Connections.

Conclusion

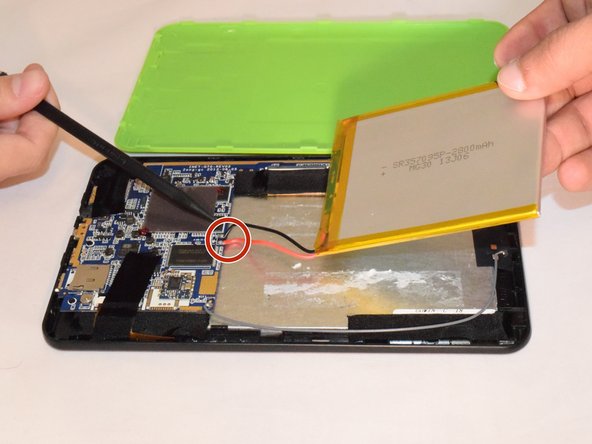
To reassemble your device, follow these instructions in reverse order. Note, you need to solder the battery wires onto the motherboard.

2 autres ont terminé cette réparation.

Othman

Membre depuis le 07/21/15

267 Réputation

1 tutoriel rédigé

Équipe

0 commentaires

Ajouter un commentaire

Nombre de vues :

Dernières 24 heures : 1

7 derniers jours : 2

30 derniers jours : 17

Total : 5,134