Aller au contenu principal

Eureka 1660SP Roller Replacement

Ce dont vous avez besoin

  1. Eureka 1660SP Roller Replacement, Roller: étape 1, image 1 de 2 Eureka 1660SP Roller Replacement, Roller: étape 1, image 2 de 2
    • Press the black separator switch and lightly pull the bottom half away from the top.

  2. Eureka 1660SP Roller Replacement: étape 2, image 1 de 2 Eureka 1660SP Roller Replacement: étape 2, image 2 de 2
    • Remove the vacuum head from the lower half of the body.

  3. Eureka 1660SP Roller Replacement: étape 3, image 1 de 3 Eureka 1660SP Roller Replacement: étape 3, image 2 de 3 Eureka 1660SP Roller Replacement: étape 3, image 3 de 3
    • Turn the vacuum head wheels up and remove all seven 13.9mm screws from the bottom using a #2 Phillips head screwdriver.

    • Separate the top and bottom of the vacuum head. Set the top aside.

  4. Eureka 1660SP Roller Replacement: étape 4, image 1 de 2 Eureka 1660SP Roller Replacement: étape 4, image 2 de 2
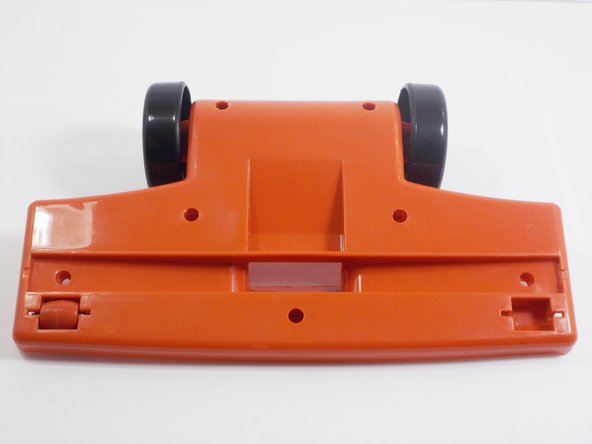
    • Turn the vacuum head's bottom over so that the inside of the head is facing up.

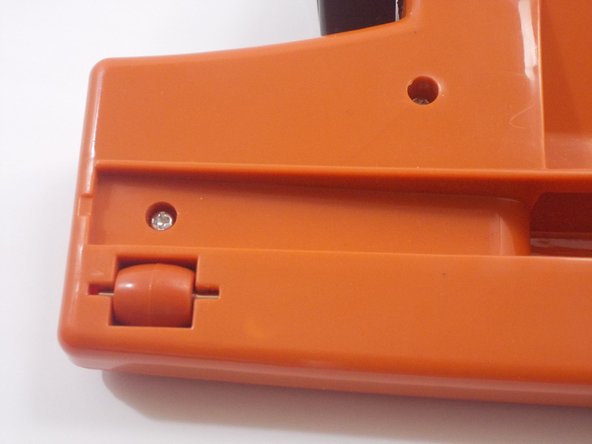
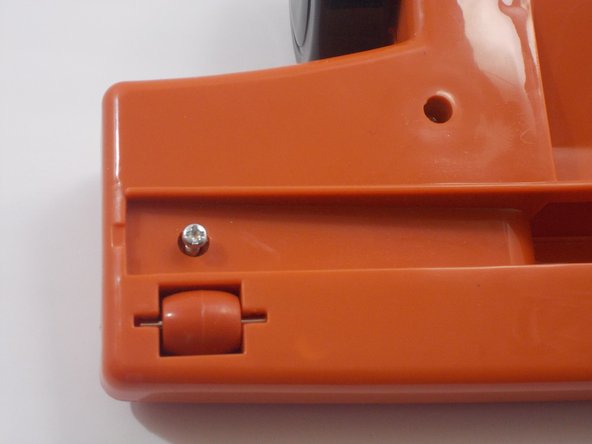
    • Using a Phillips #00 screwdriver, press down on metal bar of the roller on one side until it releases from the housing.

    • Turn the vacuum head's bottom over and pull at the roller and bar until they are completely out of the housing.

  5. Eureka 1660SP Roller Replacement: étape 5, image 1 de 1
    • Press the new bar and roller into place.

    • Replace the screws.

Ligne d'arrivée

Jennifer Sheils

Membre depuis le 09/07/13

4 Réputation

2 tutoriels rédigés

Équipe

UMass Dartmouth, Team 1-1, Gulbrandsen Fall 2013 Membre de l'équipe UMass Dartmouth, Team 1-1, Gulbrandsen Fall 2013

UMASSD-GULBRANDSEN-F13S1G1

3 membres

12 tutoriels rédigés

0 commentaires

Ajouter un commentaire

Nombre de vues :

Dernières 24 heures : 0

7 derniers jours : 2

30 derniers jours : 3

Total : 436