Cette version peut contenir des modifications incorrectes. Passez au dernier aperçu vérifié.
Ce dont vous avez besoin
-
Cette étape n’est pas traduite. Aidez à la traduire
-
Turn the PC on its back with the screen facing down and pull on the piece of plastic shown in the image. Use your fingernails to prod into the depression where the two plastic covers meet.
-
-
Cette étape n’est pas traduite. Aidez à la traduire
-
Using the 00 Phillips screwdriver remove the two screws in the corners.
-
Using your left hand pull at the exposed section of the PC while simultaneously pushing the right with the thumb of your other hand. This will release the plastic clips allowing back cover to slide off, as shown from the picture
-
-
-
Cette étape n’est pas traduite. Aidez à la traduire
-
Remove the tape covering the metal shield.
-
Remove the 12 screws using the Phillips #00 screwdriver.
-
Dislodge the shield by pulling the prongs away from underneath the battery. The shield should come completely off.
-
-
Cette étape n’est pas traduite. Aidez à la traduire
-
Remove the yellow tape securing the wires to the PCB board as well as the silver/grey tape.
-
Unscrew the six Phillips #00 screws.
-
-
Cette étape n’est pas traduite. Aidez à la traduire
-
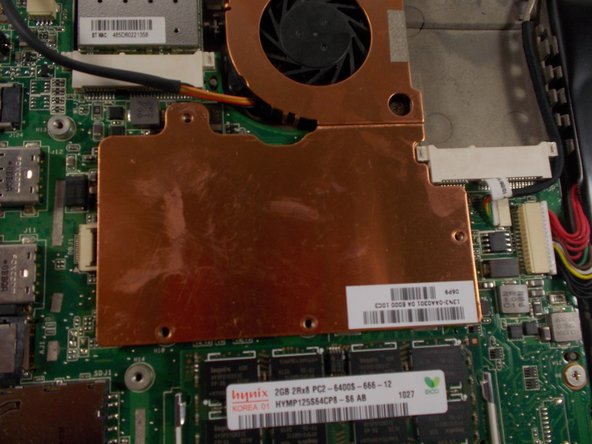
Using tweezers, disconnect the connector in the top left.
-
Pull the fan heat sink away from the PC.
-
Remove the fan from the copper heat sink with the tweezers by releasing the metal clips.
-


Équipe

UMass Dartmouth, Team S2-G1, Peak Fall 2018 Membre de l'équipe UMass Dartmouth, Team S2-G1, Peak Fall 2018
UMASSD-PEAK-F18S2G1
3 membres
5 tutoriels rédigés