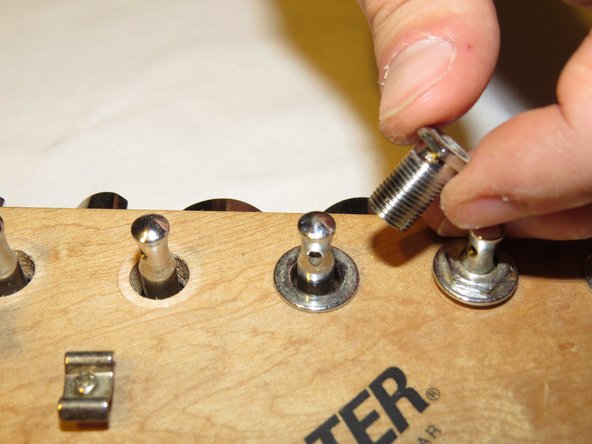
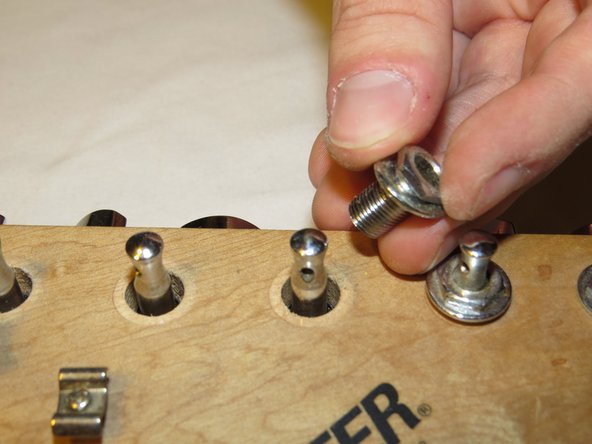
Aller au contenu principal

Fender Starcaster Tuning Heads Replacement

Ce dont vous avez besoin

  1. Fender Starcaster Tuning Heads Replacement, Loosen the Strings: étape 1, image 1 de 3 Fender Starcaster Tuning Heads Replacement, Loosen the Strings: étape 1, image 2 de 3 Fender Starcaster Tuning Heads Replacement, Loosen the Strings: étape 1, image 3 de 3
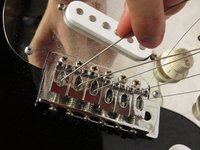
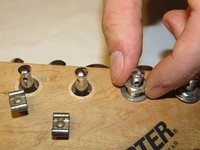
    • Start by loosening the strings. This is done by turning the tuning knob until the string has lost tension.

    • Repeat this for all six strings on the guitar.

  2. Fender Starcaster Tuning Heads Replacement, Remove the Strings from the Tuning Pegs: étape 2, image 1 de 2 Fender Starcaster Tuning Heads Replacement, Remove the Strings from the Tuning Pegs: étape 2, image 2 de 2
    • Be mindful of the string ends. They may be sharp and could puncture your skin.

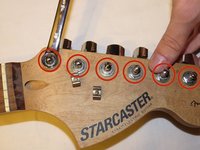
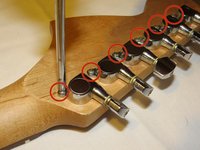
    • It may be necessary to use pliers to remove string ends from the tuning peg.

  3. Fender Starcaster Tuning Heads Replacement, Remove the Strings from the Bridge: étape 3, image 1 de 3 Fender Starcaster Tuning Heads Replacement, Remove the Strings from the Bridge: étape 3, image 2 de 3 Fender Starcaster Tuning Heads Replacement, Remove the Strings from the Bridge: étape 3, image 3 de 3
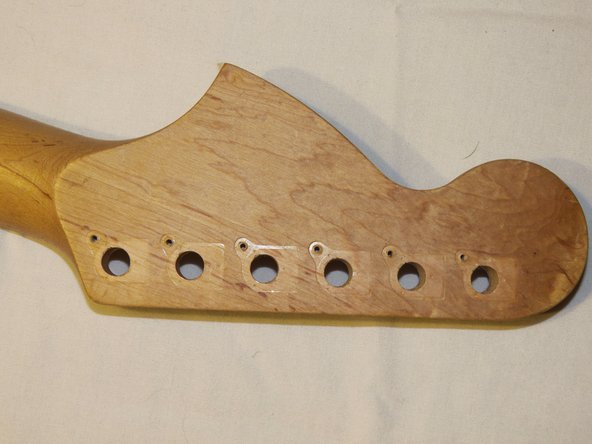
    • After removing the strings from the tuning pegs, slide the strings through the bridge and out of the back of the guitar.

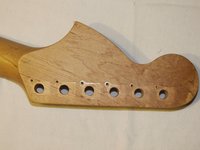
    • If the twists in the string ends are in the way, use wire cutters to snip them off. This will allow the heavier strings to pass through the bridge easier.

  4. Fender Starcaster Tuning Heads Replacement, Tuning Heads: étape 4, image 1 de 2 Fender Starcaster Tuning Heads Replacement, Tuning Heads: étape 4, image 2 de 2
    • Using a wrench, remove the nuts around each tuning head post.

  5. Fender Starcaster Tuning Heads Replacement: étape 5, image 1 de 3 Fender Starcaster Tuning Heads Replacement: étape 5, image 2 de 3 Fender Starcaster Tuning Heads Replacement: étape 5, image 3 de 3
    • Next, remove the threaded retainer sleeve from each post.

    • Don't forget the washer.

  6. Fender Starcaster Tuning Heads Replacement: étape 6, image 1 de 2 Fender Starcaster Tuning Heads Replacement: étape 6, image 2 de 2
    • Next, remove the screws from the backside of each tuner.

  7. Fender Starcaster Tuning Heads Replacement: étape 7, image 1 de 2 Fender Starcaster Tuning Heads Replacement: étape 7, image 2 de 2
    • Finally, remove the tuning machine assembly from the headstock.

Conclusion

To reassemble your device, follow these instructions in reverse order.

2 autres ont terminé cette réparation.

Christopher Hartigan

Membre depuis le 09/10/14

164 Réputation

5 tutoriels rédigés

Équipe

Pasco Hernando, Team 5-3, Prince Fall 2014 Membre de l'équipe Pasco Hernando, Team 5-3, Prince Fall 2014

PHSC-PRINCE-F14S5G3

9 membres

10 tutoriels rédigés

3 commentaires

Does the 2013 Starcaster take a 10mm tuning peg?

Brian Seese - Réponse

This is only the removal. Nothing After step 7. What about the actual replacement? What did you replace them with? Did it involve any machining?

Richard Caruso - Réponse

This is only the removal. What about the actual replacement? What did you replace them with? Did it involve any machining?

Richard Caruso - Réponse

Ajouter un commentaire

Nombre de vues :

Dernières 24 heures : 0

7 derniers jours : 16

30 derniers jours : 38

Total : 2,493