Ce dont vous avez besoin
-
Cette étape n’est pas traduite. Aidez à la traduire
-
This is the full video guide, it begins after i tried to open it from the back. The device should be open from the screen.
-
-
Cette étape n’est pas traduite. Aidez à la traduire
-
Pry the sides of the device carefully (or not if your screen is shattered) . There are 8 plastic tabs holding the screen to the frame, with a little glue in each tab. The top tab is a big tab, so you must begin from the bottom.
-
-
-
Cette étape n’est pas traduite. Aidez à la traduire
-
Disconnect the LCD ribbon connector in the middle of the frame and you can separate the LCD from the frame. At this point you can put a replacement LCD .
-
-
Cette étape n’est pas traduite. Aidez à la traduire
-
Top view of the device opened, the battery is soldered with a little of conformal coating on top of the pads.
-
-
Cette étape n’est pas traduite. Aidez à la traduire
-
Back view of the device, The part as identified:
-
ES9018Q2C DAC
-
ICN6211 MIPI LCD controller
-
Exynos 7270, this is a highly integrated chip for wearables, It includes the normal Samsung SOC characteristics, with stacked DRAM & eMMC integrated into the package. That is why the PCB don't have any DRAM or storage chips around.
-
-
Cette étape n’est pas traduite. Aidez à la traduire
-
I removed the backplate, but for LCD or battery replacement is not necessary. The battery was glued to the back and there is an antenna on the top .
-
-
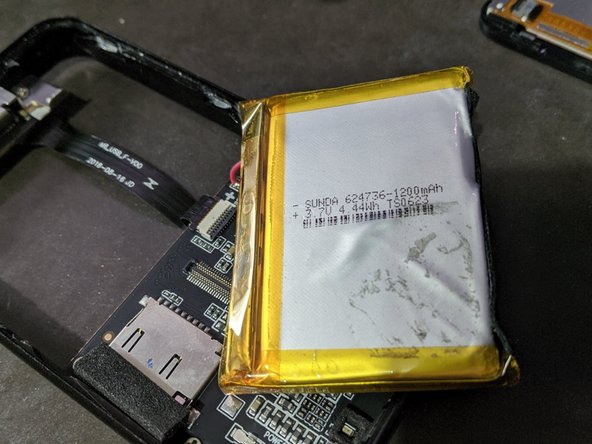
Cette étape n’est pas traduite. Aidez à la traduire
-
Battery Detail.
-
Manufactured by SUNDA.
-
3.7v to 4.2v
-
1200mAh
-
624736 pouch form factor
-