Aller au contenu principal

First-gen Honda Odyssey Oil and filter change

Ce dont vous avez besoin

  1. First-gen Honda Odyssey Oil and filter change, Oil and Oil filter: étape 1, image 1 de 1
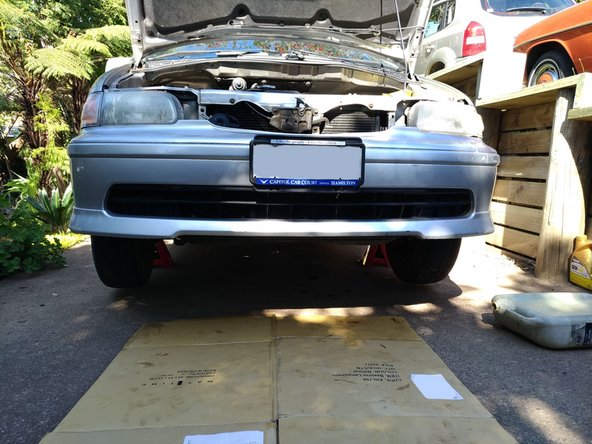
    • We'll be changing the oil and filter on my JDM-import 1999 Honda Odyssey with the 2.3L four-cylinder engine

  2. First-gen Honda Odyssey Oil and filter change, Jacking up the vehicle: étape 2, image 1 de 2 First-gen Honda Odyssey Oil and filter change, Jacking up the vehicle: étape 2, image 2 de 2
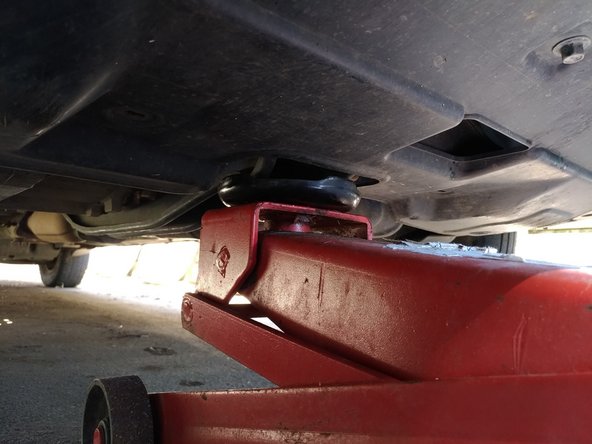
    • Thankfully this car has a centre lift point at the front of the subframe at the tow-hook

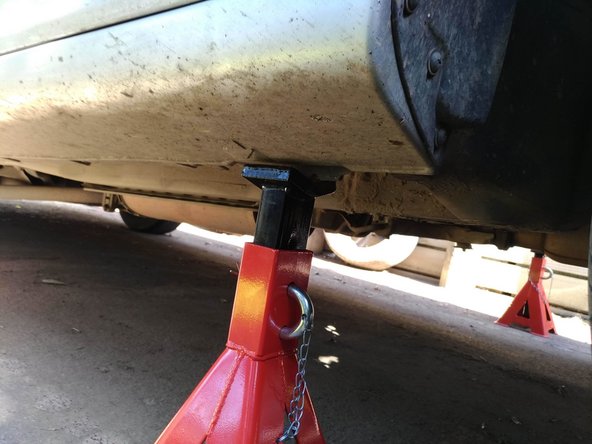
    • I just used the normal pinch welds to put the jack-stands under

  3. First-gen Honda Odyssey Oil and filter change: étape 3, image 1 de 2 First-gen Honda Odyssey Oil and filter change: étape 3, image 2 de 2
    • Open up the bonnet/hood for more light under the vehicle

    • I like to use cardboard to climb under the car

  4. First-gen Honda Odyssey Oil and filter change, Drain the oil pan: étape 4, image 1 de 3 First-gen Honda Odyssey Oil and filter change, Drain the oil pan: étape 4, image 2 de 3 First-gen Honda Odyssey Oil and filter change, Drain the oil pan: étape 4, image 3 de 3
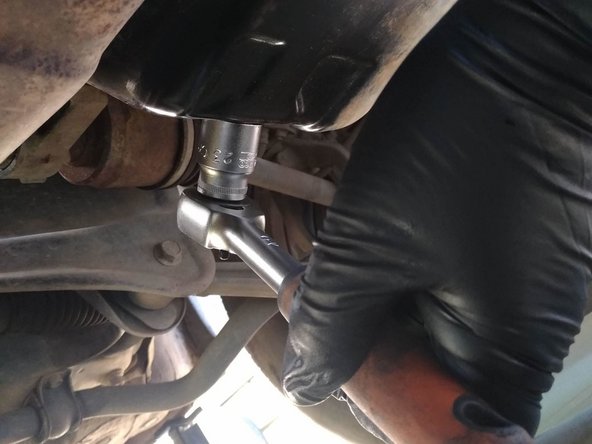
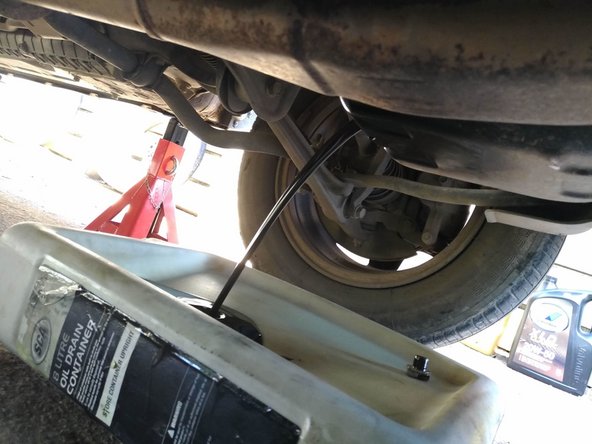
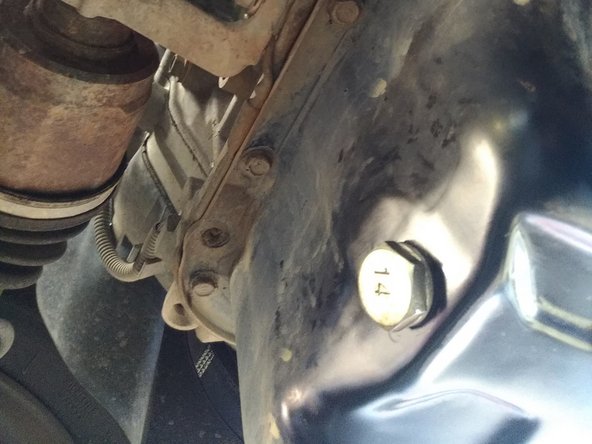
    • Position your drain pan, the drain bolt faces towards the rear of the oilpan

    • On this 1999 Odyssey it was a 23mm drain bolt

  5. First-gen Honda Odyssey Oil and filter change, Remove old oil filter: étape 5, image 1 de 3 First-gen Honda Odyssey Oil and filter change, Remove old oil filter: étape 5, image 2 de 3 First-gen Honda Odyssey Oil and filter change, Remove old oil filter: étape 5, image 3 de 3
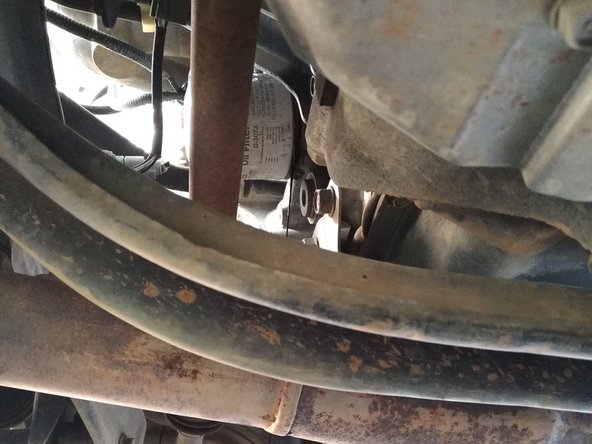
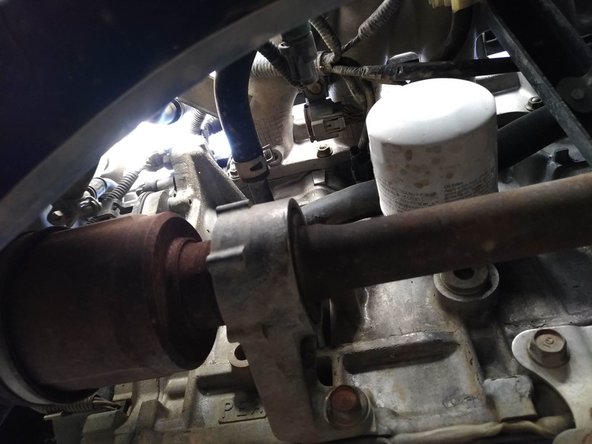
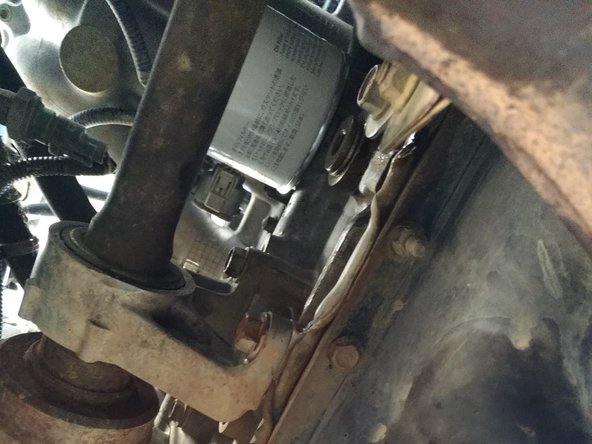
    • One of the hardest parts of this procedure

    • Honda put the oil filter mounting on the back of the engine block under the intake manifold

    • You have to reach past the subframe, exhaust, and axle

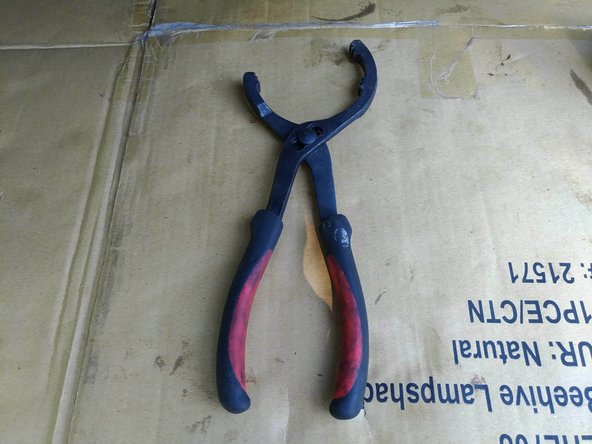
    • I like to use oil-filter pliers, but there are a few different tools that can be used

    • Check to make sure the gasket came off with the old filter and did not get left behind on the block

  6. First-gen Honda Odyssey Oil and filter change, Install a new oil filter: étape 6, image 1 de 3 First-gen Honda Odyssey Oil and filter change, Install a new oil filter: étape 6, image 2 de 3 First-gen Honda Odyssey Oil and filter change, Install a new oil filter: étape 6, image 3 de 3
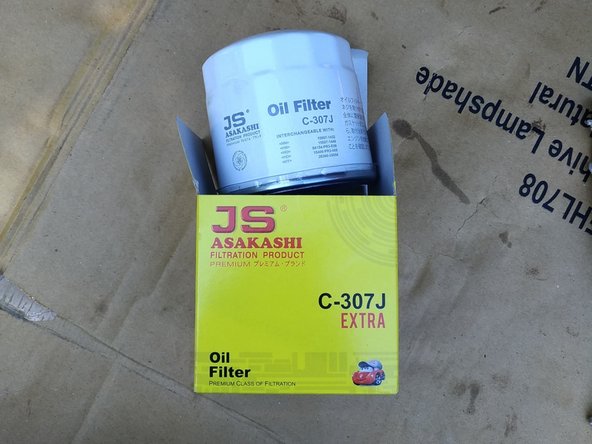
    • I used a JS Asakashi C-307J, (made in Japan)

    • I can order them shipped from Singapore cheaper then I can buy locally from Repco or Supercheap here in New Zealand

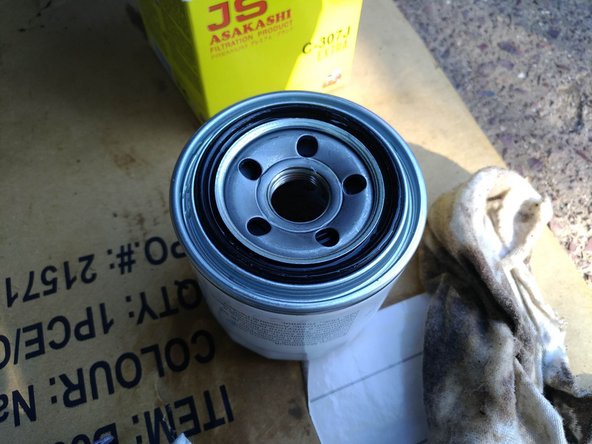
    • Oil up the gasket on the new filter

    • Clean the mounting plate on the block with your rags

  7. First-gen Honda Odyssey Oil and filter change, Check your work: étape 7, image 1 de 1
    • If you've not already, put the drain bolt back in

    • Tighten the new oil filter 3/4 of a turn after it touches the block

    • Tighten the drain bolt without breaking it off :)

    • Clean around the filter and bolt with a rag so you can see any leaks

  8. First-gen Honda Odyssey Oil and filter change, Lower the car: étape 8, image 1 de 2 First-gen Honda Odyssey Oil and filter change, Lower the car: étape 8, image 2 de 2
    • Remove your cardboard and tools

    • Lift the car again from the centre lift point with your hydraulic jack

    • Pull the jack-stands out from each side

    • Carefully lower the car to the ground, leveling it for filling

  9. First-gen Honda Odyssey Oil and filter change, Fill the car: étape 9, image 1 de 1
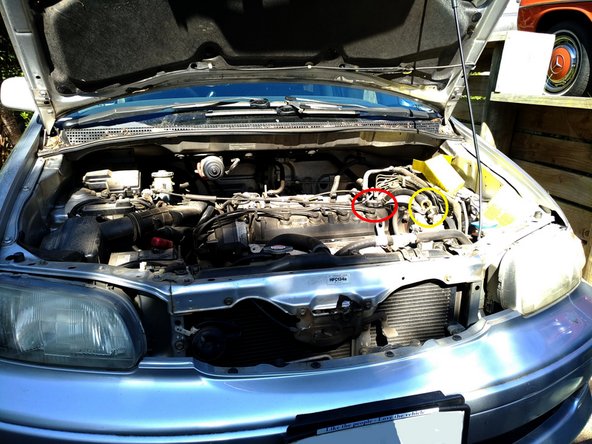
    • In the photo, the red circle is the oil fill point, and the yellow circle is the dipstick

    • I used Nulon 10W-40 full synthetic

    • I needed about 4.5L or so to fill

    • I like to use a stubby wide-mouth funnel

    • Pour large oil bottles sideways to reduce the blub-blub effect

  10. First-gen Honda Odyssey Oil and filter change, Check for leaks and re-check level: étape 10, image 1 de 2 First-gen Honda Odyssey Oil and filter change, Check for leaks and re-check level: étape 10, image 2 de 2
    • Run the engine for about 10 seconds to fill up the filter and oil galleys

    • Turn the engine off and check for leaks

    • Check the level using the dipstick and a rag again, it should have gone down a bit due to the oil filter filling up

    • Top up the level to the upper range of the dipstick

Conclusion

Servicing done!

Une autre personne a terminé cette réparation.

Gaspard Leon

Membre depuis le 04/24/10

2 831 Réputation

8 tutoriels rédigés

0 commentaires

Ajouter un commentaire

Nombre de vues :

Dernières 24 heures : 1

7 derniers jours : 5

30 derniers jours : 30

Total : 3,569