Aller au contenu principal

Focusrite Scarlett 2i4 (1st Gen) USB Port Replacement

Ce dont vous avez besoin

  1. Focusrite Scarlett 2i4 (1st Gen) USB Port Replacement, Locate The Screws: étape 1, image 1 de 3 Focusrite Scarlett 2i4 (1st Gen) USB Port Replacement, Locate The Screws: étape 1, image 2 de 3 Focusrite Scarlett 2i4 (1st Gen) USB Port Replacement, Locate The Screws: étape 1, image 3 de 3
    • The screws we all looking for are on the back of the box.

    • Use the screwdriver to remove the 8 screws from the back cover.

    • Remember where the screws go, this is very important when trying to reassemble the device.

  2. Focusrite Scarlett 2i4 (1st Gen) USB Port Replacement, Unscrew The TRS Outputs: étape 2, image 1 de 2 Focusrite Scarlett 2i4 (1st Gen) USB Port Replacement, Unscrew The TRS Outputs: étape 2, image 2 de 2
    • Next, unscrew the TRS outputs. Then put them to the side.

  3. Focusrite Scarlett 2i4 (1st Gen) USB Port Replacement, Take Off The Backplate: étape 3, image 1 de 1
    • Take the backplate off, and get your flashlight ready.

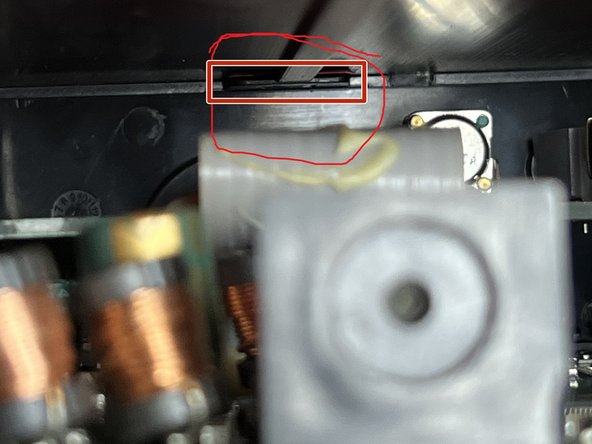
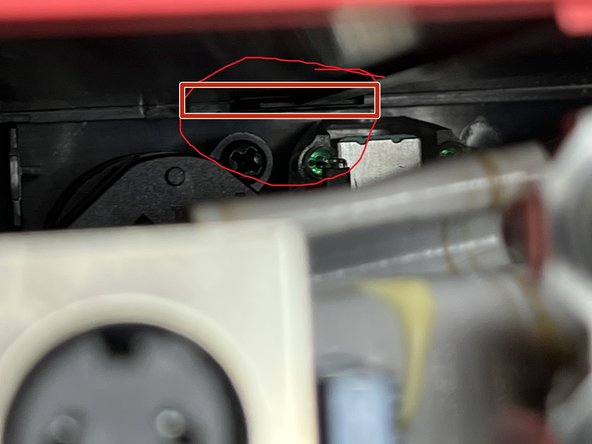
  4. Focusrite Scarlett 2i4 (1st Gen) USB Port Replacement, Undo The Tabs: étape 4, image 1 de 3 Focusrite Scarlett 2i4 (1st Gen) USB Port Replacement, Undo The Tabs: étape 4, image 2 de 3 Focusrite Scarlett 2i4 (1st Gen) USB Port Replacement, Undo The Tabs: étape 4, image 3 de 3
    • Use your flashlight to look for the tabs that secure the circuit boards. The tabs should be located on the top inner front part on both the right and left sides.

    • Be Careful undoing the tabs* You don't need a lot of force!

    • Use a flat-head screwdriver to undo the tabs. Just slide the screwdriver in from the side, and rotate the screwdriver a bit to undo it.

    • Once both tabs are undone, you should be able to slide the board out from the front.

  5. Focusrite Scarlett 2i4 (1st Gen) USB Port Replacement, Slide Front Panel To Board: étape 5, image 1 de 2 Focusrite Scarlett 2i4 (1st Gen) USB Port Replacement, Slide Front Panel To Board: étape 5, image 2 de 2
    • Like I said in the last step, slide the board out the front.

    • Notice the tabs.

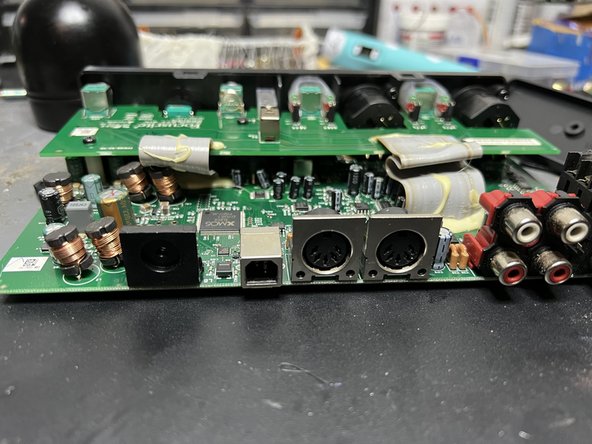
    • Ok, now that the board is free, you can see more of the inner-workings.

  6. Focusrite Scarlett 2i4 (1st Gen) USB Port Replacement, Replace USB-B: étape 6, image 1 de 1
    • Next, look for the soldering points for the USB Type B.

    • Should be under the Type B USB.....

    • Next, use a heat gun or soldering iron and remove the port.

  7. Focusrite Scarlett 2i4 (1st Gen) USB Port Replacement, Finishing up.: étape 7, image 1 de 1
    • After desoldering or just resoldering the new Type-B, just follow the step to open the box backward. If done right everything should be good to go!

Conclusion

To reassemble your device, follow these instructions in reverse order.

WinterFreezeRecords-Aaron

Membre depuis le 10/19/21

145 Réputation

1 tutoriel rédigé

2 commentaires

60 watt or above soldering iron is required. Couldn’t get it to melt with a 30 watt. I worked on a scarlett 2i2 second generation.

Big Krusty - Réponse

This is the 1st gen not the second!!

Caleb Carter - Réponse

Ajouter un commentaire

Nombre de vues :

Dernières 24 heures : 2

7 derniers jours : 18

30 derniers jours : 81

Total : 3,324