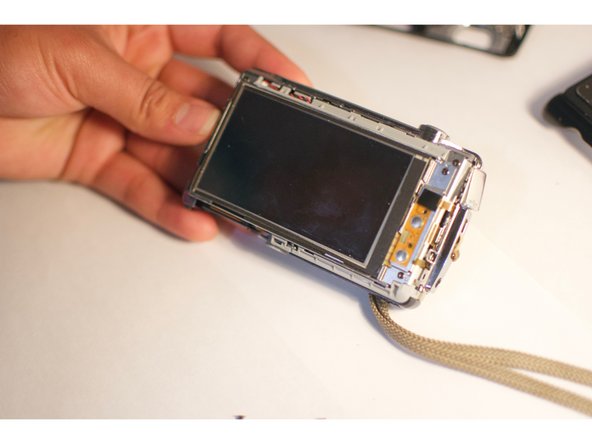
Aller au contenu principal

Fujifilm FinePix Z90 LCD Screen Replacement

Ce dont vous avez besoin

  1. Fujifilm FinePix Z90 LCD Screen Replacement, LCD Screen: étape 1, image 1 de 2 Fujifilm FinePix Z90 LCD Screen Replacement, LCD Screen: étape 1, image 2 de 2
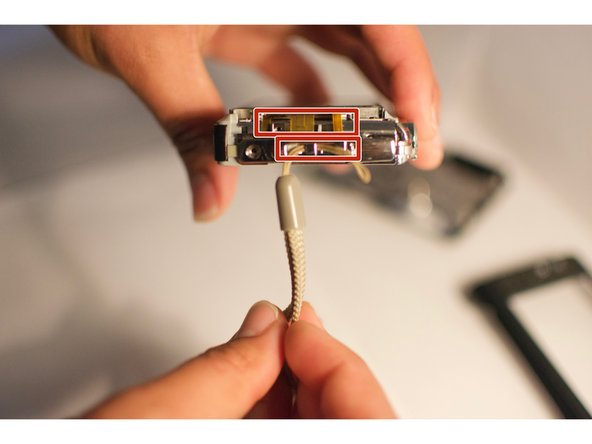
    • Locate the right side of the camera, where the USB connector is. Remove uncovered Phillips #000 screw.

    • Once the uncovered screw is removed, open the USB connector cover to remove the next Phillips #000 screw.

  2. Fujifilm FinePix Z90 LCD Screen Replacement: étape 2, image 1 de 2 Fujifilm FinePix Z90 LCD Screen Replacement: étape 2, image 2 de 2
    • Remove the two uncovered Phillips #000 screws from the left side.

    • Repeat for the screws on the bottom.

  3. Fujifilm FinePix Z90 LCD Screen Replacement: étape 3, image 1 de 3 Fujifilm FinePix Z90 LCD Screen Replacement: étape 3, image 2 de 3 Fujifilm FinePix Z90 LCD Screen Replacement: étape 3, image 3 de 3
    • Remove the casing from the back of camera where LCD screen is located.

    • On the right side of the camera locate the wrist strap. Carefully remove the lace that attached wrist strap to camera.

    • Located just above (or next to) lace that attaches wrist strap is a ribbon cable. Be extremely cautious not to tear when removing lace. This ribbon connects the front panel to the motherboard.

    • Gently remove silver piece that lace was connected to, set aside.

  4. Fujifilm FinePix Z90 LCD Screen Replacement: étape 4, image 1 de 2 Fujifilm FinePix Z90 LCD Screen Replacement: étape 4, image 2 de 2
    • After removing silver piece that attached to lace, locate and remove screw.

    • Turning camera back to the LCD screen, remove the three screws just to the right of screen. These are located next to the ribbon cables attaching the LCD to the motherboard.

  5. Fujifilm FinePix Z90 LCD Screen Replacement: étape 5, image 1 de 1
    • Gently remove front of camera face (casing).

    • Once removed motherboard should be displayed. Be very careful with this section.

  6. Fujifilm FinePix Z90 LCD Screen Replacement: étape 6, image 1 de 1
    • Using a plastic opening tool, pull the LCD screen to the left slightly, lift it and flip it open to the right.

    • There is another ribbon cable attaching the LCD screen to the motherboard; be careful not to tear it. Be sure to tear black electrical tape before removing ribbon.

  7. Fujifilm FinePix Z90 LCD Screen Replacement: étape 7, image 1 de 3 Fujifilm FinePix Z90 LCD Screen Replacement: étape 7, image 2 de 3 Fujifilm FinePix Z90 LCD Screen Replacement: étape 7, image 3 de 3
    • Using a plastic opening tool, flip open the black lever to release the ribbon.

    • Gently slide the cable out of the lock; the LCD screen is now ready to be removed.

Conclusion

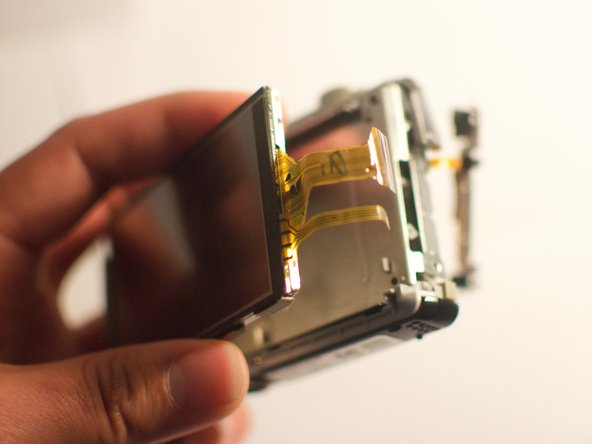
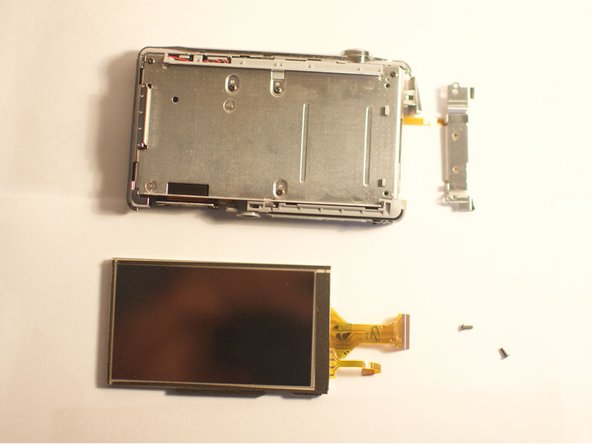
Once you have removed the damaged screen, following the instructions in reverse order will instruct you to reassemble your device.

Sam Clark

Membre depuis le 11/03/15

301 Réputation

3 tutoriels rédigés

Équipe

UMass Dartmouth, Team 1-6, Bhusal Fall 2015 Membre de l'équipe UMass Dartmouth, Team 1-6, Bhusal Fall 2015

UMASSD-BHUSAL-F15S1G6

2 membres

6 tutoriels rédigés

0 commentaires

Ajouter un commentaire

Nombre de vues :

Dernières 24 heures : 1

7 derniers jours : 1

30 derniers jours : 8

Total : 893