Aller au contenu principal

Fujifilm Instax Mini 8 Infrared Blaster Replacement

Ce dont vous avez besoin

  1. Fujifilm Instax Mini 8 Infrared Blaster Replacement, Infrared Blaster: étape 1, image 1 de 3 Fujifilm Instax Mini 8 Infrared Blaster Replacement, Infrared Blaster: étape 1, image 2 de 3 Fujifilm Instax Mini 8 Infrared Blaster Replacement, Infrared Blaster: étape 1, image 3 de 3
    • First, push in the lens and remove the two AA batteries.

  2. Fujifilm Instax Mini 8 Infrared Blaster Replacement: étape 2, image 1 de 2 Fujifilm Instax Mini 8 Infrared Blaster Replacement: étape 2, image 2 de 2
    • Open the rear compartment and remove the film cartridge.

  3. Fujifilm Instax Mini 8 Infrared Blaster Replacement: étape 3, image 1 de 3 Fujifilm Instax Mini 8 Infrared Blaster Replacement: étape 3, image 2 de 3 Fujifilm Instax Mini 8 Infrared Blaster Replacement: étape 3, image 3 de 3
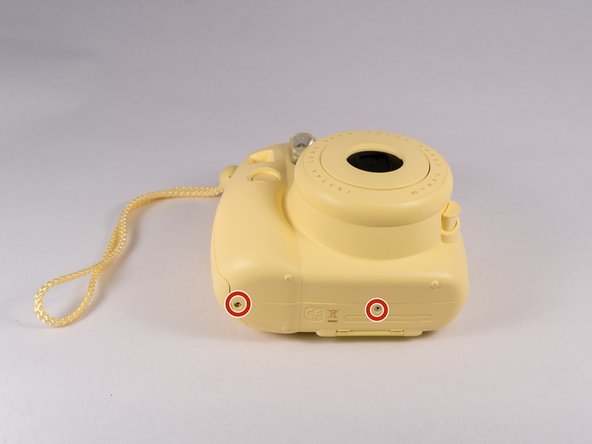
    • Remove screws from bottom of camera with a small #00 Phillips Screwdriver. Then remove screws around the camera. Additionally, there are two screws in the battery compartment which also need to be removed.

  4. Fujifilm Instax Mini 8 Infrared Blaster Replacement: étape 4, image 1 de 3 Fujifilm Instax Mini 8 Infrared Blaster Replacement: étape 4, image 2 de 3 Fujifilm Instax Mini 8 Infrared Blaster Replacement: étape 4, image 3 de 3
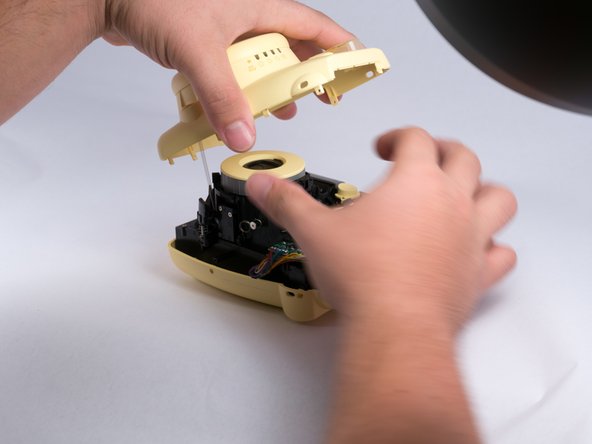
    • Once all screws are removed, gently pry open the front casing with your hands or plastic opening tools carefully. Do note that there will be a spring that attaches the front casing and the main circuit board, so refrain from allowing excess tension on the spring.

  5. Fujifilm Instax Mini 8 Infrared Blaster Replacement: étape 5, image 1 de 3 Fujifilm Instax Mini 8 Infrared Blaster Replacement: étape 5, image 2 de 3 Fujifilm Instax Mini 8 Infrared Blaster Replacement: étape 5, image 3 de 3
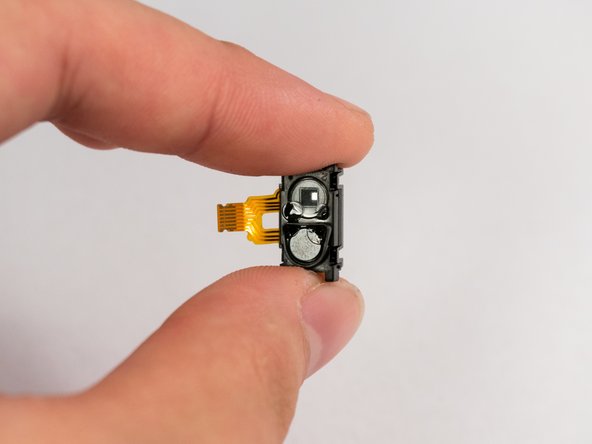
    • Locate the IR blaster, remove the connecting wire ribbon by prying the connector latch open on the motherboard, then sliding it out. Once the wire ribbon is disconnected, the IR blaster can be lifted away from the motherboard.

Conclusion

To reassemble your device, follow these instructions in reverse order.

Une autre personne a terminé cette réparation.

Boyang Wu

Membre depuis le 10/02/12

955 Réputation

5 tutoriels rédigés

Équipe

USF Tampa, Team 4-1, Meier Fall 2015 Membre de l'équipe USF Tampa, Team 4-1, Meier Fall 2015

USFT-MEIER-F15S4G1

4 membres

24 tutoriels rédigés

2 commentaires

Where can I find the replacements (ir blaster)? What is the function of this part. I dropped my camera and the flash won’t turn on and films develop completely black even in broad daylight.

Jenna - Réponse

Can that part be pushed back when cleaning it with a qtip? I think I pushed a bit hard but I don’t know. If it’s pushed back a bit will it effect its use?? Please help!

Orange - Réponse

Ajouter un commentaire

Nombre de vues :

Dernières 24 heures : 2

7 derniers jours : 9

30 derniers jours : 60

Total : 11,175