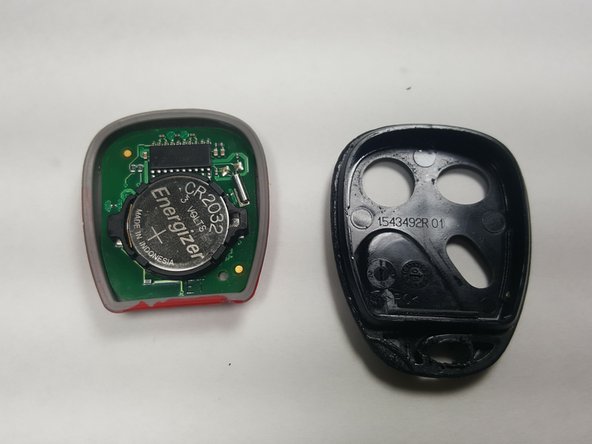
Aller au contenu principal

GM Key Fob Plastic Housing Replacement

Ce dont vous avez besoin

  1. GM Key Fob  Plastic Housing Replacement, Key Fob Plastic Housing: étape 1, image 1 de 1
    • Pry apart the key ring to remove it from the old housing.

  2. GM Key Fob  Plastic Housing Replacement: étape 2, image 1 de 3 GM Key Fob  Plastic Housing Replacement: étape 2, image 2 de 3 GM Key Fob  Plastic Housing Replacement: étape 2, image 3 de 3
    • Once you have removed the key ring, use it to open the housing by wedging it into the groove, as pictured.

  3. GM Key Fob  Plastic Housing Replacement: étape 3, image 1 de 2 GM Key Fob  Plastic Housing Replacement: étape 3, image 2 de 2
    • Remove the electrical board and rubber key pad from the old housing.

  4. GM Key Fob  Plastic Housing Replacement: étape 4, image 1 de 2 GM Key Fob  Plastic Housing Replacement: étape 4, image 2 de 2
    • Remove the electrical board from the rubber key pad.

  5. GM Key Fob  Plastic Housing Replacement: étape 5, image 1 de 2 GM Key Fob  Plastic Housing Replacement: étape 5, image 2 de 2
    • If necessary, remove the battery from the electrical board and replace it.

  6. GM Key Fob  Plastic Housing Replacement: étape 6, image 1 de 1
    • After Opening the new Key Fob package, select the correct housing as more than one model is included.

Conclusion

To reassemble your device, simply follow these disassembly instructions in reverse order.

Une autre personne a terminé cette réparation.

Megan Hayden

Membre depuis le 10/06/16

136 Réputation

1 tutoriel rédigé

Équipe

University of Memphis, Team 4-3, Baddour Fall 2016 Membre de l'équipe University of Memphis, Team 4-3, Baddour Fall 2016

UM-BADDOUR-F16S4G3

3 membres

1 tutoriel rédigé

0 commentaires

Ajouter un commentaire

Nombre de vues :

Dernières 24 heures : 0

7 derniers jours : 11

30 derniers jours : 31

Total : 2,465