Aller au contenu principal

Garmin Drive 60LM Screen Replacement

Ce dont vous avez besoin

  1. Garmin Drive 60LM Screen Replacement, Screen: étape 1, image 1 de 2 Garmin Drive 60LM Screen Replacement, Screen: étape 1, image 2 de 2
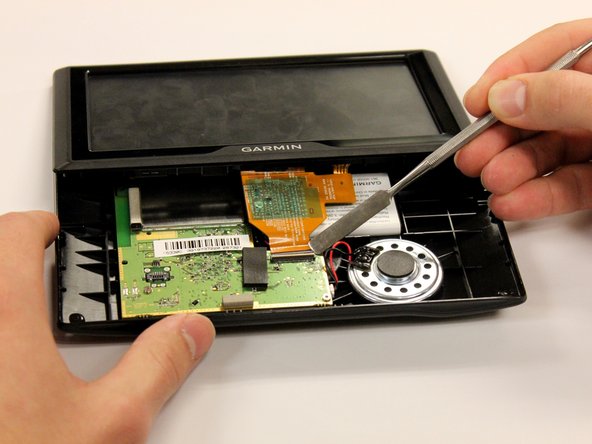
    • Using the T4 Torx screwdriver, unscrew all four of the screws (1/4 inch, 6.35 mm) from the back panel of your device.

  2. Garmin Drive 60LM Screen Replacement: étape 2, image 1 de 3 Garmin Drive 60LM Screen Replacement: étape 2, image 2 de 3 Garmin Drive 60LM Screen Replacement: étape 2, image 3 de 3
    • Remove the back panel using the metal spudger tool.

    • The metal spudger tool can cause damage to internal components.

    • Flip the device over with the screen facing upward and open the device.

  3. Garmin Drive 60LM Screen Replacement: étape 3, image 1 de 3 Garmin Drive 60LM Screen Replacement: étape 3, image 2 de 3 Garmin Drive 60LM Screen Replacement: étape 3, image 3 de 3
    • Use a plastic spudger to flip up the white clamp holding the orange ribbon in place to the motherboard.

    • Lift the screen and orange ribbon away from the motherboard.

    • The metal spudger pictured is not ESD safe. Use a plastic spudger instead.

  4. Garmin Drive 60LM Screen Replacement: étape 4, image 1 de 2 Garmin Drive 60LM Screen Replacement: étape 4, image 2 de 2
    • Carefully unsnap the plastic border surrounding the screen.

Conclusion

To reassemble your device, follow these instructions in reverse order.

yuanhao zu

Membre depuis le 01/30/17

112 Réputation

1 tutoriel rédigé

Équipe

Baylor, Team 3-3, Whitney Spring 2017 Membre de l'équipe Baylor, Team 3-3, Whitney Spring 2017

BU-WHITNEY-S17S3G3

4 membres

3 tutoriels rédigés

0 commentaires

Ajouter un commentaire

Nombre de vues :

Dernières 24 heures : 1

7 derniers jours : 2

30 derniers jours : 11

Total : 804