Introduction
The mother board assembly is simple to replace and only takes 10-15 minutes to open the device and access the logic board. This guide requires a prying tool, the Torx 4 screwdriver, and the soldering kit.
Ce dont vous avez besoin
-
-
Remove the four 2.5mm screws from the back assembly with a Torx #04 Screwdriver.
-
Holding the GPS with a free hand while unscrewing the small screws will help stabilize the device.
-
-
-
-
Remove the two 1.0mm 04# Torx screws from the mother board assembly
-
One screw can be found directly to the right of the battery and one screw can be found behind the orange band.
-
Hold the GPS with a free hand to ensure stability.
-
-
-
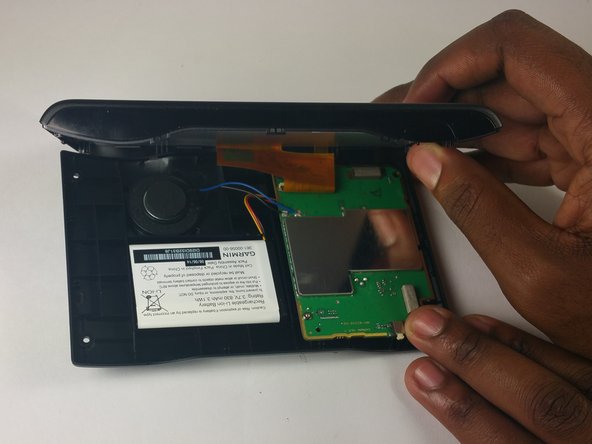
Place the screen portion of the GPS face down.
-
Remove the mother board from the plastic back panel.
-
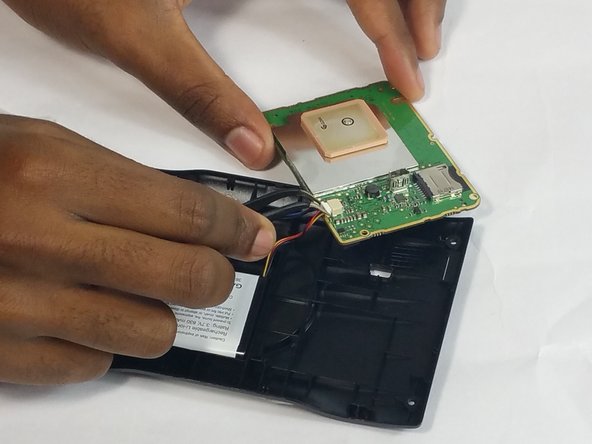
Disconnect the battery with tweezers by gripping the white socket displayed in the photo. Wiggle the white socket out of the mother board.
-
-
-
Use a soldering tool to de-solder the connection to the motherboard. Refer to the iFixit Soldering guide to see how
-


To reassemble your device, follow these instructions in reverse order.
To reassemble your device, follow these instructions in reverse order.
Équipe

USF Tampa, Team 2-3, Blackwell Fall 2016 Membre de l'équipe USF Tampa, Team 2-3, Blackwell Fall 2016
USFT-BLACKWELL-F16S2G3
4 membres
5 tutoriels rédigés