Aller au contenu principal

Gateway MS2370 Screen Replacement

Ce dont vous avez besoin

  1. Gateway MS2370 Screen Replacement, Battery: étape 1, image 1 de 1
    • Make sure the laptop is turned off and flipped over so that the bottom is facing up. Then, locate the battery clip as shown.

  2. Gateway MS2370 Screen Replacement: étape 2, image 1 de 1
    • Either using your fingers or a plastic spudger push the battery clip to the left to release battery.

  3. Gateway MS2370 Screen Replacement: étape 3, image 1 de 1
    • Pull the battery from the laptop to remove it.

  4. Gateway MS2370 Screen Replacement, Screen: étape 4, image 1 de 1
    Outil utilisé dans cette étape :
    Tweezers
    $4.99
    J'achète
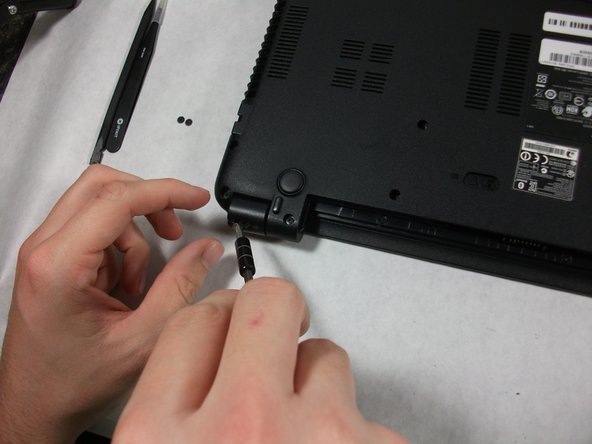
    • Using the pointed tweezers, remove plastic circles that are stuck onto the back of the laptop’s hinges.

    • These plastic circles are stuck inside the hole with adhesive and might require a significant amount of force.

  5. Gateway MS2370 Screen Replacement: étape 5, image 1 de 2 Gateway MS2370 Screen Replacement: étape 5, image 2 de 2
    • Unscrew both of the 3mm Phillips 01 screws on both hinges using the matching screwdriver.

  6. Gateway MS2370 Screen Replacement: étape 6, image 1 de 1
    • Take the plastic spudger and pull up the tabs on all four sides of the screen molding.

  7. Gateway MS2370 Screen Replacement: étape 7, image 1 de 1
    • Carefully remove the screen molding. Be aware that the screen molding will not come out all the way.

  8. Gateway MS2370 Screen Replacement: étape 8, image 1 de 1
    • Unscrew the four 3mm inch Phillips 01 screws on the screen bracket.

  9. Gateway MS2370 Screen Replacement: étape 9, image 1 de 3 Gateway MS2370 Screen Replacement: étape 9, image 2 de 3 Gateway MS2370 Screen Replacement: étape 9, image 3 de 3
    • Peel up the tape over the connector and unplug the screen from the laptop.

  10. Gateway MS2370 Screen Replacement: étape 10, image 1 de 2 Gateway MS2370 Screen Replacement: étape 10, image 2 de 2
    • Slowly remove the screen from the laptop.

Conclusion

To reassemble your device, follow these instructions in reverse order.

Mathieu Bolduc-Clayton

Membre depuis le 10/17/17

518 Réputation

4 tutoriels rédigés

Équipe

UMass Dartmouth, Team S1-G5, Simcock Fall 2017 Membre de l'équipe UMass Dartmouth, Team S1-G5, Simcock Fall 2017

UMASSD-SIMCOCK-F17S1G5

3 membres

10 tutoriels rédigés

0 commentaires

Ajouter un commentaire

Nombre de vues :

Dernières 24 heures : 0

7 derniers jours : 1

30 derniers jours : 9

Total : 675