Aller au contenu principal

Gateway NE52203u Touchpad Assembly Replacement

Ce dont vous avez besoin

  1. Gateway NE52203u Touchpad Assembly Replacement, Touchpad Assembly: étape 1, image 1 de 2 Gateway NE52203u Touchpad Assembly Replacement, Touchpad Assembly: étape 1, image 2 de 2
    • Remove 18 6.0 mm Phillips #00 screws from the bottom of the laptop.

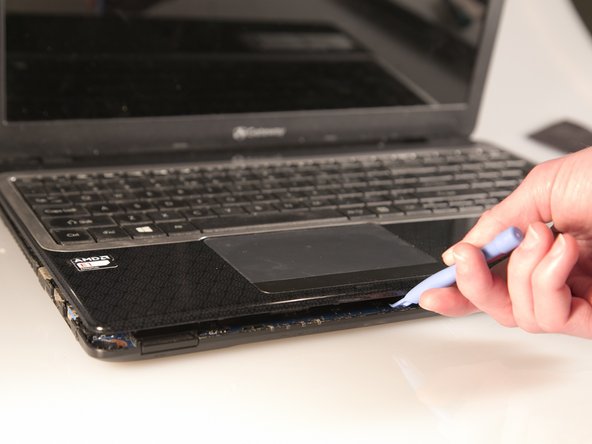
    • Remove 5 6.0 mm Phillip #00 screws from under cover.

  2. Gateway NE52203u Touchpad Assembly Replacement: étape 2, image 1 de 1
    • Remove three 2.9 mm Phillips #00 screws from the battery compartment.

  3. Gateway NE52203u Touchpad Assembly Replacement: étape 3, image 1 de 2 Gateway NE52203u Touchpad Assembly Replacement: étape 3, image 2 de 2
    • Separate the bottom panel from the touchpad assembly by inserting a plastic opening tool between them on all four sides.

  4. Gateway NE52203u Touchpad Assembly Replacement: étape 4, image 1 de 1
    Outil utilisé dans cette étape :
    Tweezers
    $4.99
    J'achète
    • Pull black ribbon wire from port using tweezers in order to completely separate touchpad assembly from bottom assembly.

  5. Gateway NE52203u Touchpad Assembly Replacement: étape 5, image 1 de 3 Gateway NE52203u Touchpad Assembly Replacement: étape 5, image 2 de 3 Gateway NE52203u Touchpad Assembly Replacement: étape 5, image 3 de 3
    • Disconnect the two ZIF ports that attach the touchpad assembly to the motherboard.

    • First flip open the flap covering the ribbon using a spudger or fingernail.

    • Second gently pull the ribbon away from the port.

Conclusion

To reassemble your device, follow these instructions in reverse order.

Stephen Spees

Membre depuis le 03/20/15

542 Réputation

4 tutoriels rédigés

Équipe

Baylor, Team 2-1, Grigsby Spring 2015 Membre de l'équipe Baylor, Team 2-1, Grigsby Spring 2015

BU-GRIGSBY-S15S2G1

4 membres

10 tutoriels rédigés

0 commentaires

Ajouter un commentaire

Nombre de vues :

Dernières 24 heures : 1

7 derniers jours : 3

30 derniers jours : 14

Total : 765