Aller au contenu principal

General Electric Create Jason Wu Interior Disassembly

Ce dont vous avez besoin

  1. General Electric Create Jason Wu Interior Disassembly, General Electric Create Jason Wu Casing Disassembly: étape 1, image 1 de 3 General Electric Create Jason Wu Interior Disassembly, General Electric Create Jason Wu Casing Disassembly: étape 1, image 2 de 3 General Electric Create Jason Wu Interior Disassembly, General Electric Create Jason Wu Casing Disassembly: étape 1, image 3 de 3
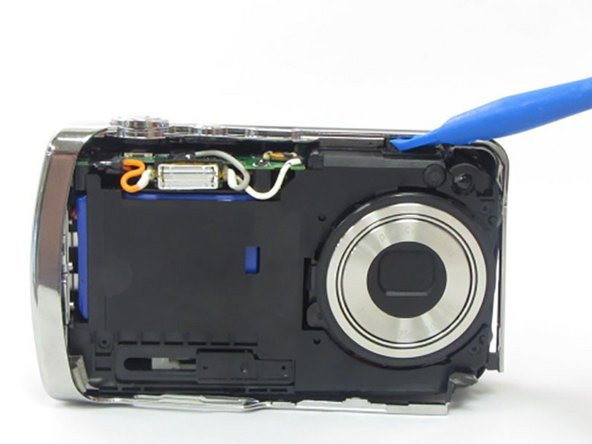
    • Begin by removing the 5 screws (located: 2 screws on either side and 1 screw on the bottom) using the PH000 head in the Precision Phillips Screwdriver.

    • These screws were missing in our example. These screws should have been small Phillips PH000 screws 1.5mm in length.

    • These screws are very small. To keep from losing any pieces, place all small metals on a magnetic project mat.

  2. General Electric Create Jason Wu Interior Disassembly: étape 2, image 1 de 2 General Electric Create Jason Wu Interior Disassembly: étape 2, image 2 de 2
    • After the screws are removed, pull the front casing up and away from the camera.

    • If the casing is difficult to remove, use a plastic opening tool to gently pry up on the front as shown.

  3. General Electric Create Jason Wu Interior Disassembly: étape 3, image 1 de 3 General Electric Create Jason Wu Interior Disassembly: étape 3, image 2 de 3 General Electric Create Jason Wu Interior Disassembly: étape 3, image 3 de 3
    • Using your hands or an opening tool, pry off the silver frame, taking special care at the top of the camera where the buttons are as it is a little harder to pry off.

    • If the back casing is loose from the camera body, it may be easier to perform step 4 first, then accomplish this step. Proceed as your unit allows.

  4. General Electric Create Jason Wu Interior Disassembly: étape 4, image 1 de 3 General Electric Create Jason Wu Interior Disassembly: étape 4, image 2 de 3 General Electric Create Jason Wu Interior Disassembly: étape 4, image 3 de 3
    • The last part of the casing to disconnect is the back that houses the LCD screen.

    • The screen is attached by a connection ribbon. Gently pull the casing and screen away from the camera body to disconnect the casing.

    • The LCD screen is held onto the back casing by a small amount of adhesive. This may come loose during this process. Do not worry if they become separated.

    • This plug and the connection ribbon are fragile, try not to tear the connection ribbon when disconnecting.

  5. General Electric Create Jason Wu Interior Disassembly, General Electric Create Jason Wu Interior Disassembly: étape 5, image 1 de 3 General Electric Create Jason Wu Interior Disassembly, General Electric Create Jason Wu Interior Disassembly: étape 5, image 2 de 3 General Electric Create Jason Wu Interior Disassembly, General Electric Create Jason Wu Interior Disassembly: étape 5, image 3 de 3
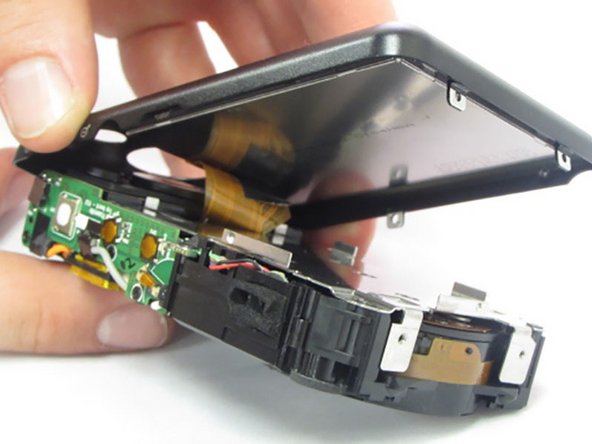
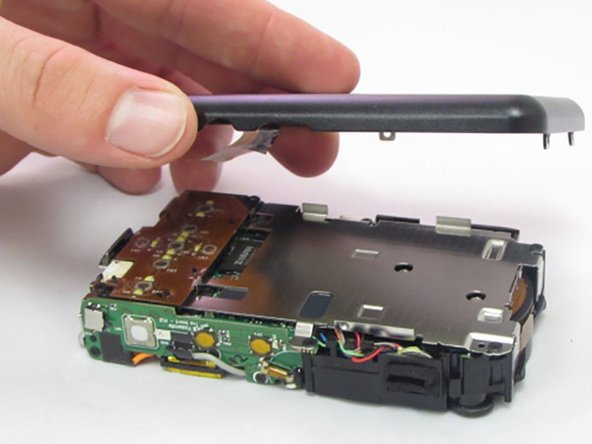
    • After the casing is removed, use your fingers to carefully lift up on the rubber pad, if it didn't already fall out during step 4.

    • The pad isn't secured to the camera so it will lift up and pull away easily.

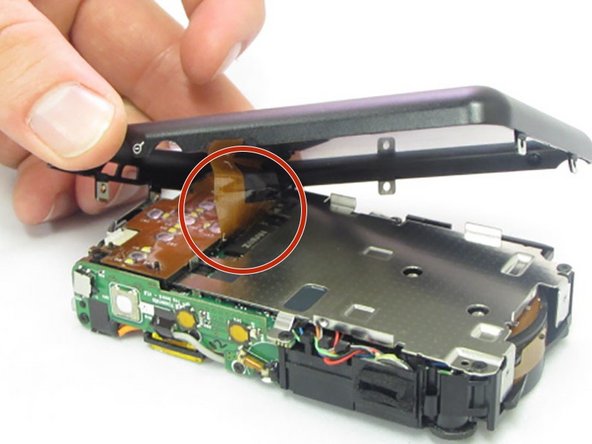
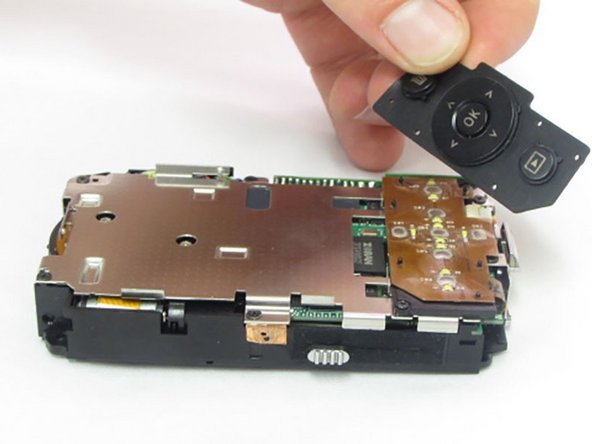
    • After the pad is removed, the 2 Phillips head screws holding the control board will be exposed.

  6. General Electric Create Jason Wu Interior Disassembly: étape 6, image 1 de 3 General Electric Create Jason Wu Interior Disassembly: étape 6, image 2 de 3 General Electric Create Jason Wu Interior Disassembly: étape 6, image 3 de 3
    • Using the Phillips precision screwdriver with the PH000 Phillips bit, remove the two 1.5mm screws.

    • Although the 2 screws are removed, the button board is still attached with a connection ribbon.

    • With a firm grip towards the bottom of the control board, gently pull away from the camera, removing the ribbon from the connector.

  7. General Electric Create Jason Wu Interior Disassembly: étape 7, image 1 de 3 General Electric Create Jason Wu Interior Disassembly: étape 7, image 2 de 3 General Electric Create Jason Wu Interior Disassembly: étape 7, image 3 de 3
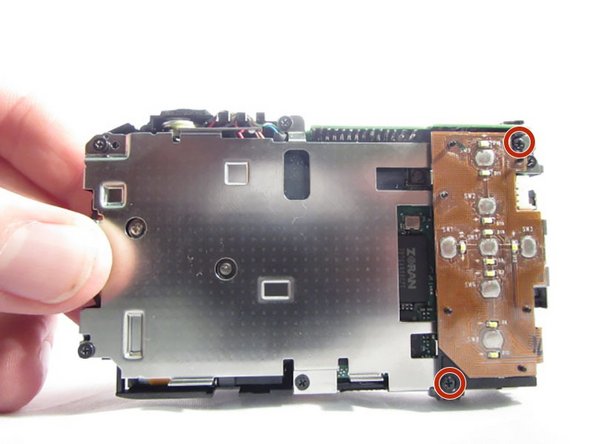
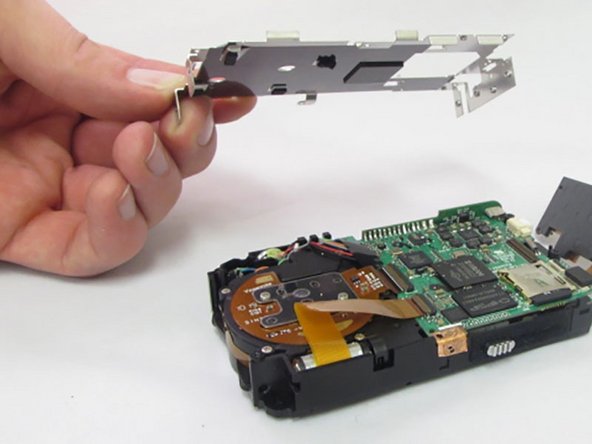
    • Locate the six 1.5mm Phillips screws that are holding on the interior camera frame.

    • Using the Phillips precision screwdriver and the PH000 Phillips bit, remove the 6 screws.

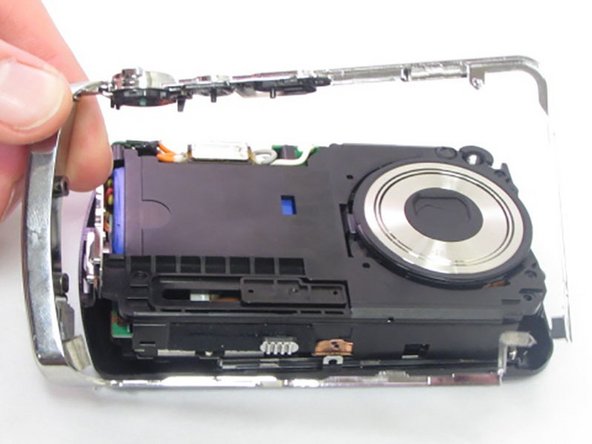
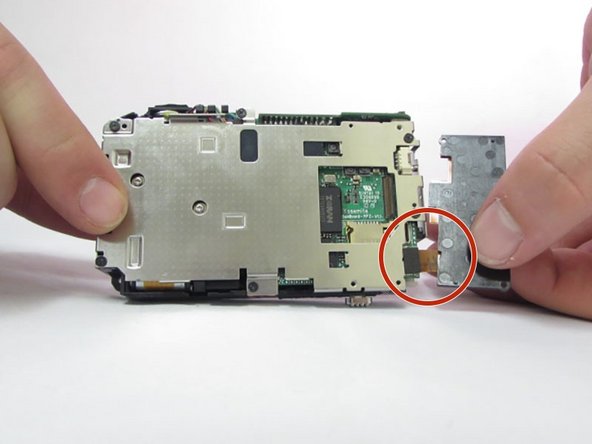
    • With the screws removed, the interior frame will no longer be fastened to the camera body and can be lifted up and away.

Conclusion

To reassemble your device, follow these instructions in reverse order.

2 autres ont terminé cette réparation.

Kylan Hennessy

Membre depuis le 01/23/17

573 Réputation

5 tutoriels rédigés

Un commentaire

Awesome, thank you!

Danny Lang - Réponse

Ajouter un commentaire

Nombre de vues :

Dernières 24 heures : 0

7 derniers jours : 1

30 derniers jours : 3

Total : 150